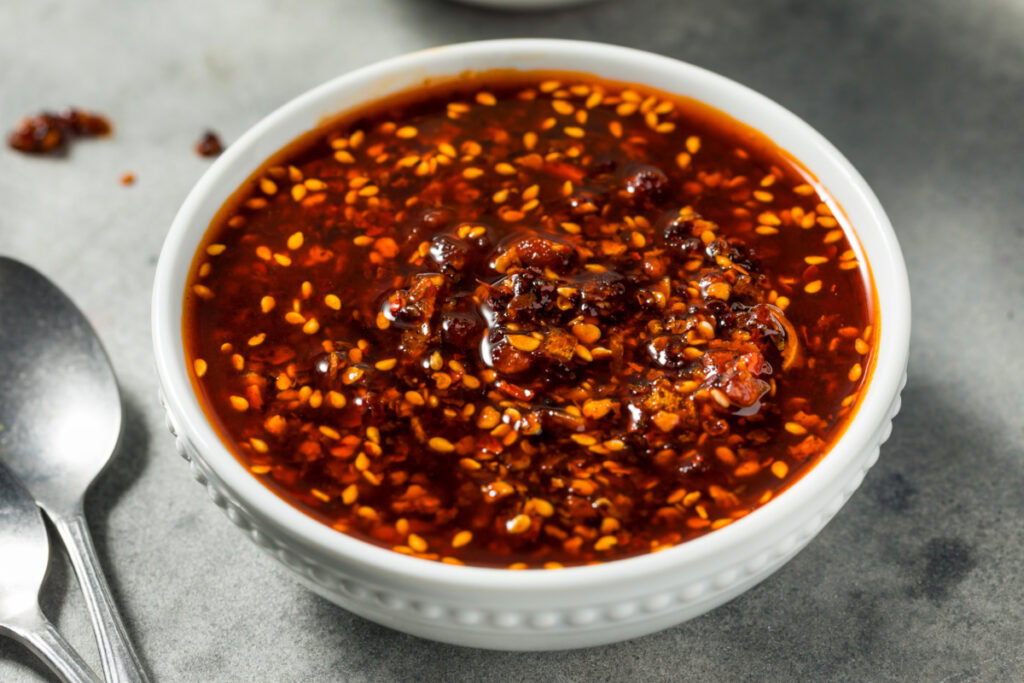
Homemade Chili Crisp Recipe
Chili crisp has basically taken over my kitchen. I put it on eggs, noodles, dumplings—heck, even pizza gets a spoonful sometimes.
Making your own chili crisp at home means you get to pick the heat, swap in your favorite add-ins, and save a few bucks instead of grabbing those pricey jars at the store. I only started making it myself because, honestly, it’s way easier than I thought.
You’re looking at maybe 30 minutes, start to finish, and you’ll end up with a jar of crunchy, fragrant chili oil that’ll last for weeks. The best part? You can mess with the spice level and ingredients until it’s exactly how you want it.
Let’s get into what you’ll need, the ingredients that make this chili crisp stand out, and the steps to put it all together. I’ll toss in a few tips I’ve learned (sometimes the hard way) for nailing that crispy texture and deep flavor.
Equipment
You don’t need anything fancy to make chili crisp at home. Most of this stuff is probably already in your kitchen.
Here’s my usual setup:
- Medium saucepan – for heating up the oil and spices
- Heatproof bowl – super important for pouring in hot oil safely
- Fine mesh strainer – if you want a smoother chili crisp, this helps
- Spice grinder or mortar and pestle – for smashing up whole spices
- Mason jar or any airtight container – for storing your chili crisp
- Thermometer – not required, but it helps keep an eye on the oil temp
- Wooden spoon or heat-resistant spatula – for stirring
The heatproof bowl is key. Hot oil can crack regular glass, so I go with metal or tempered glass every time.
A thermometer is handy for keeping the oil just hot enough—around 225-250°F. Too hot and things burn, too cool and you miss out on flavor.
If you don’t have a spice grinder, no big deal. Pre-ground spices work, but the flavor’s not quite as bright.
For storage, I like a mason jar since it seals tight and keeps moisture out. Any clean jar with a snug lid does the trick. Just make sure it’s dry before you add the chili crisp.
Ingredients
Here’s my go-to list for a homemade chili crisp that’s actually tasty. Some things like Sichuan peppercorns and star anise are what set this apart.
For the oil base:
- 1 ½ cups neutral oil (I usually grab peanut oil or vegetable oil)
- ¼ cup sesame oil
For the spices and aromatics:
- ½ cup dried chiles (chopped up)
- ¼ cup red pepper flakes (or crushed red pepper flakes)
- 2 tablespoons gochugaru (Korean chili flakes)
- 2 tablespoons Sichuan chili flakes
- 1 tablespoon Sichuan peppercorns (crushed)
- 3 pieces star anise
- 2 tablespoons sesame seeds (or toasted sesame seeds)
- 1 teaspoon black pepper
For the crunchy bits:
- ⅓ cup fried shallots
- ¼ cup fried garlic
- ½ cup roasted peanuts (or just regular peanuts, chopped)
For extra flavor:
- 2 tablespoons soy sauce
- 1 tablespoon mushroom powder (optional, but it adds a nice earthy depth)
- ½ teaspoon MSG (optional)
You can find most of these at an Asian grocery or online. I like mixing different chili flakes for more layers of heat and flavor. If you can’t find pre-made fried shallots or fried garlic, making them isn’t hard, just a little messy.
Instructions
Making your own chili crisp is actually pretty chill. Here’s how I do it, step by step.
- Toss the chili flakes, sesame seeds, Sichuan peppercorns, sugar, and salt into your heatproof bowl. Give it a good mix.
- Heat the oil in your saucepan over medium. Once it hits about 350°F, add the garlic, shallots, and star anise.
- Let those aromatics cook for 2-3 minutes until they’re golden and smell amazing. Don’t walk away, or they’ll burn before you know it.
- Take the pan off the heat and carefully pour the hot oil over the spice mix in your bowl. It’ll sizzle and bubble—just what you want.
- Stir it all together with your wooden spoon. Let it sit and cool down at room temp.
- When it’s totally cool, move your chili crisp to a clean glass jar. Pop it in the fridge and it’ll keep for up to three months.
The flavor really comes together after a day, so if you can, let it sit before diving in.
Notes
For storage, just keep your chili crisp in a clean jar with a tight lid. I leave mine out for up to two weeks, or stash it in the fridge for about a month.
If it gets solid in the fridge, just set it out for 15 minutes and it softens right up.
Be careful with the hot oil. Make sure your bowl is heat-safe and bone dry—any water and you’ll get some scary splatters.
- Stand back a bit when pouring the oil
- Don’t leave hot oil on the stove alone
- Keep kids and pets out of the kitchen
- Use oven mitts if you need to move hot stuff around
Adjust the spice level however you like. Use less chili for a milder crisp, or toss in more if you want it fiery. You can even take out some of the seeds if you want it less intense.
Different oils give different results. I usually go for neutral oils like vegetable or canola since they let the spices shine. Peanut oil is a little nutty and pretty good if you’re into that.
The chili crisp just gets better after a day or two, so I like to make it ahead when I know I’ll need it.
Watch the oil temp. Too hot and your spices will taste burnt. Not hot enough and the flavors won’t really come out. If you’re not sure, it’s better to go a little lower than risk burning the whole batch.
Equipment
- Medium saucepan
- Heatproof bowl (metal or tempered glass)
- Wooden spoon or heat-resistant spatula
- Thermometer (optional)
- Fine mesh strainer (optional)
- Mason jar or airtight container
Ingredients
- 1 1/2 cups neutral oil (peanut or vegetable)
- 1/4 cup sesame oil
- 1/2 cup dried chiles chopped
- 1/4 cup red pepper flakes
- 2 tbsp gochugaru (Korean chili flakes)
- 2 tbsp Sichuan chili flakes
- 1 tbsp Sichuan peppercorns lightly crushed
- 3 star anise whole
- 2 tbsp sesame seeds toasted if you have them
- 1 tsp black pepper freshly ground
- 1 tbsp granulated sugar
- 1 tsp salt
- 1/3 cup fried shallots
- 1/4 cup fried garlic
- 1/2 cup roasted peanuts roughly chopped
- 2 tbsp soy sauce
- 1 tbsp mushroom powder optional
- 1/2 tsp MSG optional
Instructions
- In a heatproof bowl, combine the dried chiles, red pepper flakes, gochugaru, Sichuan chili flakes, crushed Sichuan peppercorns, sesame seeds, black pepper, sugar, and salt. Stir to evenly mix.
- In a medium saucepan, combine the neutral oil, sesame oil, and star anise. Warm over medium heat until the oil reaches about 225–250°F (105–120°C). (If you don’t have a thermometer, heat until the oil shimmers and a tiny pinch of flakes sizzles gently.)
- Carefully pour the hot oil (including the star anise) over the spice mixture. It should bubble and sizzle. Stir thoroughly for 30–60 seconds to bloom the spices.
- Let the mixture cool for about 10 minutes, then stir in the fried shallots, fried garlic, chopped peanuts, soy sauce, and (if using) mushroom powder and MSG.
- Once fully cool, transfer to a clean, completely dry jar and seal. For best flavor, let it sit overnight before using. Store refrigerated for up to 1 month.
Notes
Nutrition
Tasting Notes
When I take that first bite of homemade chili crisp, the flavors just sort of tumble in. There’s this nutty, rich thing from the oil, and then, bam—a slow-building heat that warms you up but doesn’t totally take over.
What really gets me is the umami. There’s this deep, savory note, almost meaty, that makes me want to spoon it onto everything in sight. It reminds me a bit of Lao Gan Ma, honestly, but this version is fresher, punchier.
Texture’s a big deal here, too. Those crunchy bits of fried garlic and shallots? I could eat them by the spoonful. Every bite’s got a little something to chew, and the chili flakes give it a nice, gritty edge—without being, you know, sandy.
I like that you can play with the heat level. When I go for medium-spicy, it adds just enough warmth to make food more interesting, not just hot for the sake of it.
The garlic and shallot flavors really come through, but they’re mellowed out—thanks to frying—so they taste sweet and toasty, never harsh. There’s a hint of sugar in there, too, which rounds things out and keeps the heat in check.
The oil itself? It’s packed with flavor. I end up using the oil just as much as the crispy bits since it soaks up all those aromatics. It’s a little smoky, super savory, and that red-orange color looks so good drizzled over anything.
Honestly, my homemade chili crisp just tastes brighter and more alive than the jarred kind. The spices stand out more, and everything feels like it’s got a little extra kick.