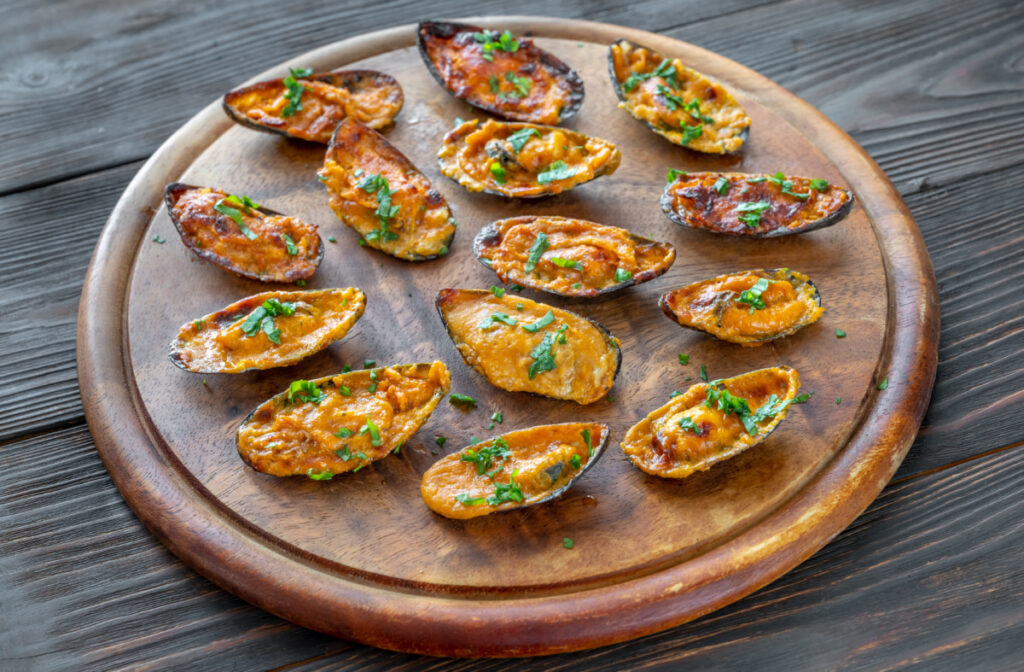
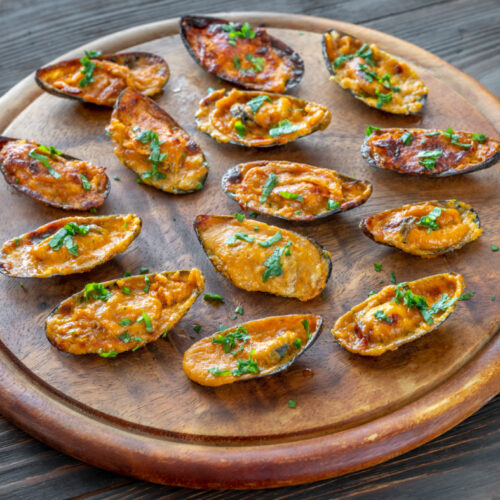
Baked Mussels Recipe
Baked mussels stuffed with cheese are honestly one of my favorite seafood starters when I want something tasty but not fussy. There’s just something about that cheesy topping melting into the mussels that feels a little fancy, even though it’s super doable at home.
The cheese mixture brings a rich, well-seasoned layer that works so well with the sweet, tender mussel meat. It’s the kind of dish that makes you pause and wonder why you ever thought you had to order it at a restaurant.
I love making stuffed baked mussels—some folks call them baked tahong—because they look impressive but don’t actually take much time or effort. The trick is using good mussels and really leaning into the flavors with your cheese and seasonings.
Once you try these, you’ll probably want to make them again for your next get-together. Or maybe just for yourself. No judgment.
You’ll find everything you need here, from the gear and ingredients to the steps, plus a few tips and personal notes. I’ll even toss in some flavor ideas and what to expect, so you’re not left guessing when you pull these golden beauties out of the oven.
Equipment
You don’t need anything fancy for baked mussels. I just use basic stuff that’s already in my kitchen.
Here’s what I grab:
- Large pot – for steaming the mussels open
- Baking sheet – holds the mussels while they bake
- Small mixing bowl – to stir up the cheese stuffing
- Knife – for garlic and herbs
- Spoon – for mixing and stuffing
- Tongs – makes handling hot mussels way easier
- Oven mitts – so you don’t burn yourself
If you’ve got a small brush, it’s handy for scrubbing off any sand or gunk from the shells. I always check that my baking sheet has a rim, just in case any juices decide to escape.
Want to serve them up nice? A big platter does the job. If you have those special mussel plates with little dips, cool, but honestly, any plate works.
Ingredients
One reason I keep coming back to this recipe is how simple the ingredients are. It’s all about the mussels—fresh or frozen—and I’ll go for green-lipped mussels if I can find them. They’re big and a little sweeter, which I love.
For the mussels, you’ll want:
- 24 green-lipped mussels (or regular mussels), cleaned and on the half shell
- 1 cup quick-melt cheese, shredded (or mozzarella)
- ½ cup grated Parmesan cheese
- 4 cloves garlic, minced
- ¼ cup unsalted butter, softened
- 2 tablespoons fresh parsley, chopped
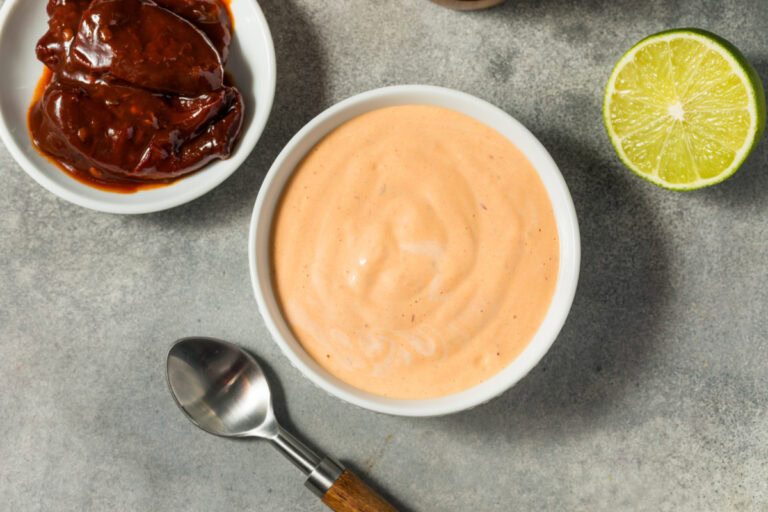
- 1 tablespoon lemon juice
- ½ teaspoon black pepper
- ¼ teaspoon salt
- ¼ cup breadcrumbs (totally optional, but adds crunch)
I usually reach for quick-melt cheese—it melts just right and gets that gooey, golden look. If you’ve only got mozzarella, that’s fine too.
I throw the garlic, butter, parsley, and lemon juice together for a punchy base. Parmesan brings a salty bite that just works with the mussels. Breadcrumbs? Up to you, but I like the extra texture.
Don’t forget to clean your mussels well. Frozen ones need to be thawed and patted dry before you start.
Instructions
First things first, the mussels need a good clean. I rinse them under cold water, give them a scrub with a brush, and yank off those weird stringy beards by pulling toward the hinge. If any are open, I tap them—if they stay open, out they go.
Here’s how I do it:
- Preheat the oven to 375°F (190°C).
- Put the cleaned mussels in a big pot with about a cup of water.
- Cover and steam for 3-5 minutes, just until they pop open.
- Take them off the heat and let them cool for a bit.
- Toss any mussels that didn’t open.
Once they’re cool enough to handle, I pop off the top shell and line up the bottom halves (with the meat) on my baking sheet.
Now for the garlic-bechamel:
- Melt 2 tablespoons butter in a saucepan.
- Add in 2 cloves minced garlic, cook for 30 seconds.
- Stir in 2 tablespoons flour, cook for a minute.
- Slowly whisk in 1 cup milk until it’s smooth.
- Season with salt and pepper.
I spoon a bit of the garlic-bechamel over each mussel, then sprinkle on the shredded mozzarella and parmesan.
- Bake for 12-15 minutes, or until the cheese is bubbly and golden.
- If you like, hit the broiler for the last couple of minutes to brown the tops.
- Let them cool for a minute or two before serving so you don’t burn your mouth.
Notes
Always go for the freshest mussels you can find. I look for shells that are tightly closed or close up when tapped. Anything broken or super fishy-smelling gets tossed.
Live mussels keep in the fridge for a day or two if you cover them with a damp cloth. Never seal them in a tight container or leave them sitting in water.
You can totally switch up the cheese. Sometimes I just use Parmesan, or I’ll toss in mozzarella for extra stretch. Herbs are fair game—parsley is classic, but basil or oregano change things up nicely.
Breadcrumbs can be swapped for panko if you want more crunch. I’ve even used crushed crackers when I was out of breadcrumbs, and it worked just fine.
Watch the mussels as they bake—if you leave them in too long, they get tough. I usually check at 10 minutes, since everyone’s oven runs a bit different.
Leftovers keep for about a day in the fridge. I reheat them at 350°F for a few minutes, just until they’re warmed through.
If you’re into garlic, add another clove or two to the butter. Some folks like a sprinkle of red pepper flakes for a bit of heat.
This is a great make-ahead party dish. Prep the mussels on the baking sheet and just slide them into the oven when you’re ready to wow your guests.
Equipment
- Large pot with lid
- Baking sheet
- Wire rack or foil (optional)
- Small saucepan
- Whisk
- small mixing bowl
- Knife
- spoon
- Tongs
- Oven mitts
- Small brush (optional, for scrubbing shells)
Ingredients
- 24 mussels green-lipped or regular; scrubbed and debearded
- 1 cup quick-melt cheese shredded, or mozzarella
- 0.5 cup Parmesan cheese grated
- 4 cloves garlic minced, divided
- 0.25 cup unsalted butter divided
- 2 tbsp all-purpose flour for béchamel
- 1 cup milk whole milk preferred
- 2 tbsp fresh parsley chopped
- 1 tbsp lemon juice
- 0.5 tsp black pepper
- 0.25 tsp salt
- 0.25 cup breadcrumbs optional, for crunch
Instructions
- Preheat the oven to 375°F (190°C). Rinse mussels under cold water, scrub shells, and pull off the beards (pull toward the hinge). Discard any with cracked shells. If a mussel is open, tap it—if it doesn’t close, discard it.
- Steam the mussels: Place mussels in a large pot with about 1 cup water. Cover and steam 3–5 minutes, just until the shells open. Discard any that do not open.
- Cool 5 minutes until safe to handle. Remove and discard the top shells, keeping the mussel meat on the bottom half shell. Arrange the mussels on a baking sheet.
- Make the garlicky béchamel: In a small saucepan over medium heat, melt 2 tablespoons of the butter. Add 2 cloves minced garlic and cook 30 seconds. Whisk in flour and cook 1 minute.
- Slowly whisk in milk until smooth. Season with salt and black pepper. Simmer 2–3 minutes, whisking, until slightly thickened. Remove from heat and stir in parsley, lemon juice, and the remaining 2 cloves minced garlic (for extra punch).
- Spoon a small amount of béchamel over each mussel. Top with shredded quick-melt/mozzarella and a sprinkle of Parmesan. If using, add a pinch of breadcrumbs for crunch.
- Bake 12–15 minutes, until the cheese is bubbling and lightly golden. Optional: Broil 1–2 minutes at the end for deeper browning (watch closely).
- Rest 1–2 minutes so the topping sets slightly, then serve hot with extra lemon wedges if desired.
Notes
Nutrition
Tasting Notes
The first bite of these baked mussels hits you with so much savory flavor. Right away, that briny, ocean taste stands out—honestly, it takes me back to the beach every time.
The cheese topping melts in and adds this creamy, salty layer that just works with the mussels. I love how the cheese sort of hugs the seafood, making everything blend together in a way that’s hard to describe but so good.
Texture-wise, that’s where things get interesting. The mussels stay tender and a little chewy, which is exactly how I like them. The cheese on top goes all golden and gets those crispy bits around the edges—can’t beat that mix of soft and crunchy.
There’s definitely a little garlic and butter running through the whole thing. Those flavors show up just enough to bring out the mussels’ taste, not hide it. And if you tossed in breadcrumbs, there’s this toasty note that I always look forward to.
The whole dish feels rich, but not too much. I never feel weighed down after eating these. The salty kick from the cheese and mussels just balances everything out.
Sometimes, there’s a mild sweetness in the mussels that sneaks in between all the savory stuff. It really pops if the mussels are super fresh. That combo of sweet seafood and salty cheese? Honestly, it just works.