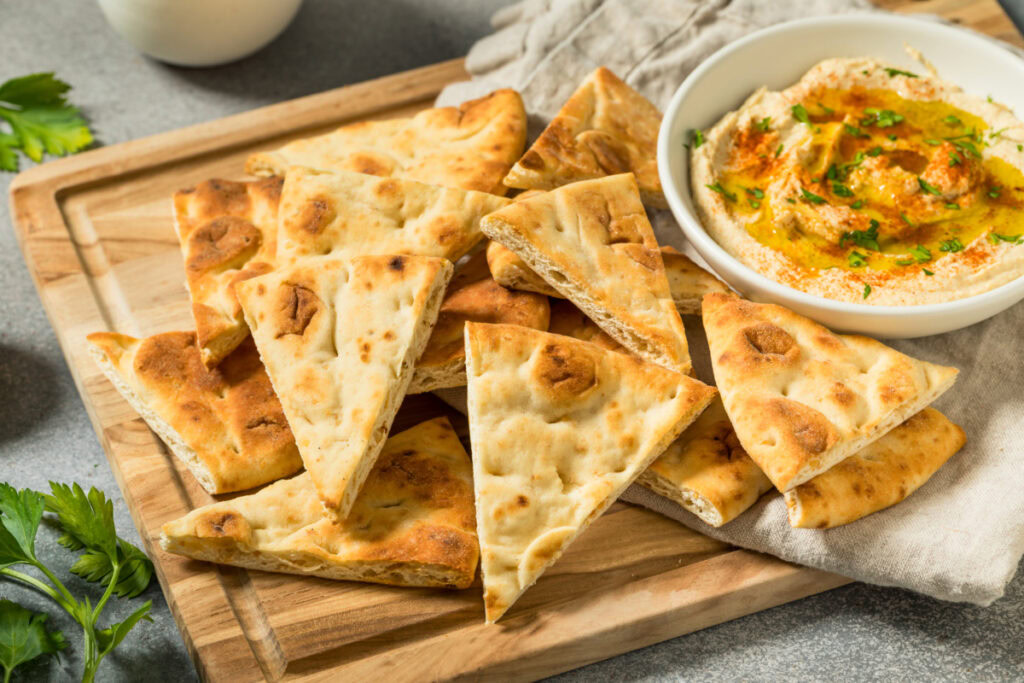
Mediterranean Pita Bread Chips Recipe
Pita chips are honestly one of my go-tos for snacking at home—crunchy, full of flavor, and honestly, way better than the stuff you get in a bag.
This Mediterranean pita bread chips recipe takes plain pita bread and turns it into golden, crispy chips with olive oil, garlic, and herbs in just about 15 minutes.
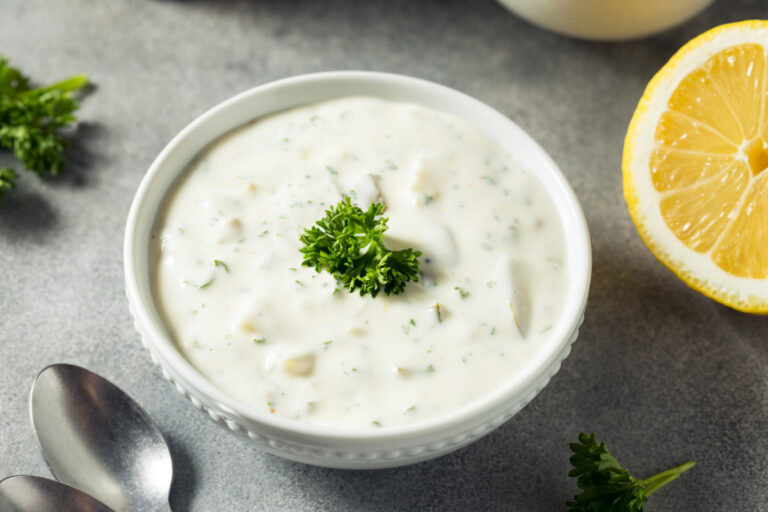
I like to dip them in hummus or tzatziki, but sometimes I just eat them right off the tray. No shame.
Making your own pita chips is pretty simple, and you get to decide exactly what goes into them. Chances are, you’ve already got most of what you need in your kitchen.
The best part? You can play around with the seasonings and make them your own.
I’ll break down the basic equipment, the ingredients, and the steps for getting those chips crispy every time. There are a few little tips I’ve picked up along the way.
Equipment
You really don’t need any fancy gadgets for pita chips. I just use regular stuff from my kitchen drawer.
Here’s what I usually grab:
- Baking sheet – Just a regular rimmed one works for spreading out the pita pieces.
- Sharp knife or kitchen scissors – For slicing the pita bread into wedges.
- Pastry brush – Handy for brushing on oil, but not a dealbreaker.
- Large mixing bowl – Makes tossing everything together easier.
- Measuring spoons – For the oil and spices.
- Parchment paper or foil – Keeps the chips from sticking and cleanup’s a breeze.
Honestly, the pastry brush is nice, but sometimes I just use my hands to toss everything with oil.
A cooling rack is a bonus if you’ve got one. It helps keep the chips crispy after baking, but it’s not a must.
The only thing I’d say is, make sure your baking sheet isn’t warped or weirdly shaped. Even heat is key, otherwise some chips will burn while others stay a little too soft.
Ingredients
These Mediterranean pita chips don’t ask for much—just a handful of pantry basics.
For the chips:
- 4 pita pockets (store-bought or homemade, whatever you like)
- ¼ cup extra virgin olive oil
- 1 teaspoon garlic powder
- 1 teaspoon dried oregano
- 1 teaspoon dried basil
- ½ teaspoon sea salt
- ¼ teaspoon black pepper
- ½ teaspoon onion powder
Optional toppings:
- ¼ teaspoon red pepper flakes
- 1 tablespoon sesame seeds
- ½ teaspoon dried rosemary
I always reach for extra-virgin olive oil because it gives the best taste, and it helps the spices stick.
You can use store-bought pita or your own homemade batch. Homemade is awesome if you’ve got the time, but either way, the chips come out tasty.
The garlic powder really brings that Mediterranean vibe. I wouldn’t skip it. And fresh spices, if you’ve got them, make a difference.
Instructions
First, I crank my oven up to 375°F (190°C) and line a couple of baking sheets with parchment. No sticking, no mess.
Getting the pita bread ready:
- I slice each pita in half to split the layers.
- Then, I stack up the halves and cut them into 8 triangles each.
- Spread all the wedges out in a single layer on the baking sheets.
Seasoning the chips:
- Drizzle 2-3 tablespoons of olive oil over the pita pieces.
- Use your hands to toss everything so each piece gets a little oil.
- Sprinkle on 1 teaspoon of salt, 1 teaspoon dried oregano, ½ teaspoon garlic powder, and ½ teaspoon paprika.
- Toss again to coat the chips with the seasonings.
Make sure none of the pita pieces are overlapping. That’s pretty important—otherwise, you’ll get soggy spots.
For baking:
- Pop the baking sheets in the oven.
- Bake for 10-12 minutes until the edges look golden.
- Around the 6-minute mark, flip the chips over so they brown evenly.
When you first take them out, the chips might feel a little soft, but give them a few minutes. They crisp up as they cool.
I usually let them hang out on the baking sheets for about 5 minutes before digging in.
Notes
Store pita chips in an airtight container—they’ll stay crunchy for up to 5 days if you keep them sealed.
I like using a glass jar or a plastic container with a tight lid. Just make sure the chips are totally cool before you seal them up. Any leftover warmth can make them go soft.
If you’re planning to eat them soon, just leave them on the counter. For longer storage, you can freeze them for up to 3 months.
Sometimes I toss a little food-safe silica packet in the container—it absorbs extra moisture. Those packets from vitamin bottles work fine.
If your chips lose their crunch (it happens), just pop them back in the oven at 350°F for a few minutes. Let them cool and they’ll be crisp again.
I wouldn’t put them in the fridge—it just makes them weirdly chewy.
You can totally change up the spices depending on what you’re serving. Mediterranean herbs are classic, but don’t be afraid to experiment.
Just keep the chips away from direct sunlight and hot spots like the stove.
Equipment
- Baking sheet
- Parchment paper or foil
- Sharp knife or kitchen scissors
- Large mixing bowl
- Measuring spoons
- Pastry brush (optional)
- Cooling rack (optional)
Ingredients
- 4 pita pockets store-bought or homemade
- 1/4 cup extra-virgin olive oil
- 1 tsp garlic powder
- 1 tsp dried oregano
- 1 tsp dried basil
- 1/2 tsp onion powder
- 1/2 tsp sea salt plus more to taste
- 1/4 tsp black pepper
- 1/2 tsp smoked paprika optional but recommended
- 1/4 tsp red pepper flakes optional
- 1 tbsp sesame seeds optional
- 1/2 tsp dried rosemary optional
Instructions
- Preheat the oven to 375°F (190°C). Line 1–2 baking sheets with parchment paper or foil.
- Split each pita pocket in half to separate the layers, then cut into wedges (about 8 triangles per pita half). Spread the pieces in a single layer on the baking sheets.
- In a large bowl, toss the pita wedges with olive oil until lightly coated. Sprinkle in garlic powder, oregano, basil, onion powder, salt, pepper, and (if using) smoked paprika. Toss again so the seasonings stick evenly. Add any optional toppings (red pepper flakes, sesame seeds, rosemary) and toss briefly.
- Arrange the wedges again in a single, non-overlapping layer (this helps them crisp instead of steaming).
- Bake for 10–12 minutes, flipping the chips around the 6-minute mark, until golden and crisp at the edges.
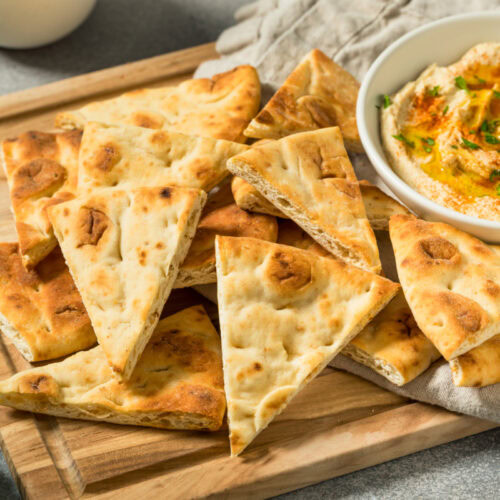
- Cool on the tray for about 5 minutes (they crisp up as they cool). Serve with hummus, tzatziki, or your favorite dip.
- Store completely cooled chips in an airtight container at room temperature for up to 5 days. To re-crisp, warm in a 350°F (175°C) oven for a few minutes, then cool.
Notes
Nutrition
Tasting Notes
When I first dig into these Mediterranean pita bread chips, the crunch is honestly the thing that gets me. They’re crispy and light—never greasy, which is a relief. Plus, they’ve got that golden-brown look that just makes you want to grab another.
The taste? It’s savory and has this lovely aromatic vibe. The olive oil stands out right away, then you get a little garlic and those classic herbs. It’s got that warm, Mediterranean feel—kind of makes me think of sitting outside at a little café somewhere.
These chips? They’re great as a snack all by themselves. But, honestly, I can’t resist pairing them with a few dips:
- Hummus – It’s classic, and somehow the chickpea flavor just pops more with these.
- Roasted red pepper hummus – This one adds a sweet, smoky thing I really like.
- Labneh – That tangy, creamy yogurt cheese is such a good match.
- Avocado hummus – Super smooth, a little rich, and tastes really fresh.
They’re sturdy, which I appreciate—nobody wants chips that fall apart in the dip. Even with thicker spreads, these hold up. And those herb-seasoned edges? They sneak in a little extra flavor every time.
I’ve noticed they taste even better after they’ve cooled off completely. If you let them sit for ten minutes or so, the flavors kind of settle in. As long as you stash them in an airtight container, they keep their crunch for days.