Zombie Hand Cake Pops Recipe
Making zombie hand cake pops is honestly a blast if you want to add something a little spooky to a Halloween party or just a scary movie night.
They look like creepy zombie hands, but they’re actually sweet and delicious—plus, you only need cake mix, frosting, candy melts, and food coloring.
I love making these because both kids and adults get a kick out of how gross (and tasty) they look. If you’re after a treat that’s easy but guaranteed to grab attention, zombie hand cake pops are a solid pick.

Why I Love Them
Zombie Hand Cake Pops just make any party more lively. Every time I bring them out, people start smiling and snapping photos—can’t blame them, they look wild.
They’re also a great excuse to get creative. I shape the “hands” however I want, usually with green candy melts for that classic zombie vibe, and then add details with chocolate or icing.
I like that they’re just the right size for snacking—grab one, eat it in a couple bites, and move on. That’s perfect for parties or school events.
They’re not hard to make, either. The steps are simple, so even if I’m short on time, I can pull these off (and kids love helping with the decorating part).
Equipment
To make Zombie Hand Cake Pops, I use a few key tools. Having the right stuff on hand makes everything smoother and helps the cake pops actually look like hands.
Here’s what I reach for:
- Mixing bowls (at least 2, medium size)
- Measuring cups and spoons
- Electric hand mixer or whisk
- Baking sheet
- Parchment paper
- Lollipop sticks (about 20 sticks, 6 inches each)
- Microwave-safe bowl (for melting candy melts)
- Spoon or spatula
- Decorating piping bag or a plastic sandwich bag (for details)
- Toothpicks
- Food-safe gloves (optional, but nice for shaping)
I usually put a silicone mat on the baking sheet—makes cleanup easier. My hand mixer speeds things up, but if I’m feeling patient, a whisk works too.
For shaping the hands, I just use my fingers and sometimes a toothpick for those tiny details, like knuckles or scars.
Having all this ready means I can just focus on making the cake pops as spooky as possible.
Ingredients
For my Zombie Hand Cake Pops, I keep it simple. Here’s exactly what I use most of the time:
Ingredients List
| Ingredient | Amount |
|---|---|
| Chocolate cake | 2 cups, crumbled |
| Vanilla frosting | 1/2 cup |
| White candy melts | 1 cup |
| Green food coloring | 1/2 teaspoon |
| Mini chocolate chips | 2 tablespoons |
| Lollipop sticks | 12 |
| Black icing gel | For details |
| Edible red gel | For blood effect |
I’ll use store-bought cake or just make one from a mix. Leftover cake from another project? That works too.
Candy melts make up the coating, and I just tint them green for that zombie skin. Black icing gel is a lifesaver for drawing nails or stitches.
Edible red gel is my favorite for adding a little fake blood. Mini chocolate chips? They’re great for texture or extra details.
This batch makes about 12 cake pops. If I need more, I just double up.
Everything here is easy to find at the grocery store or a craft shop.
Instructions
First thing, I wash my hands and get all my ingredients ready.
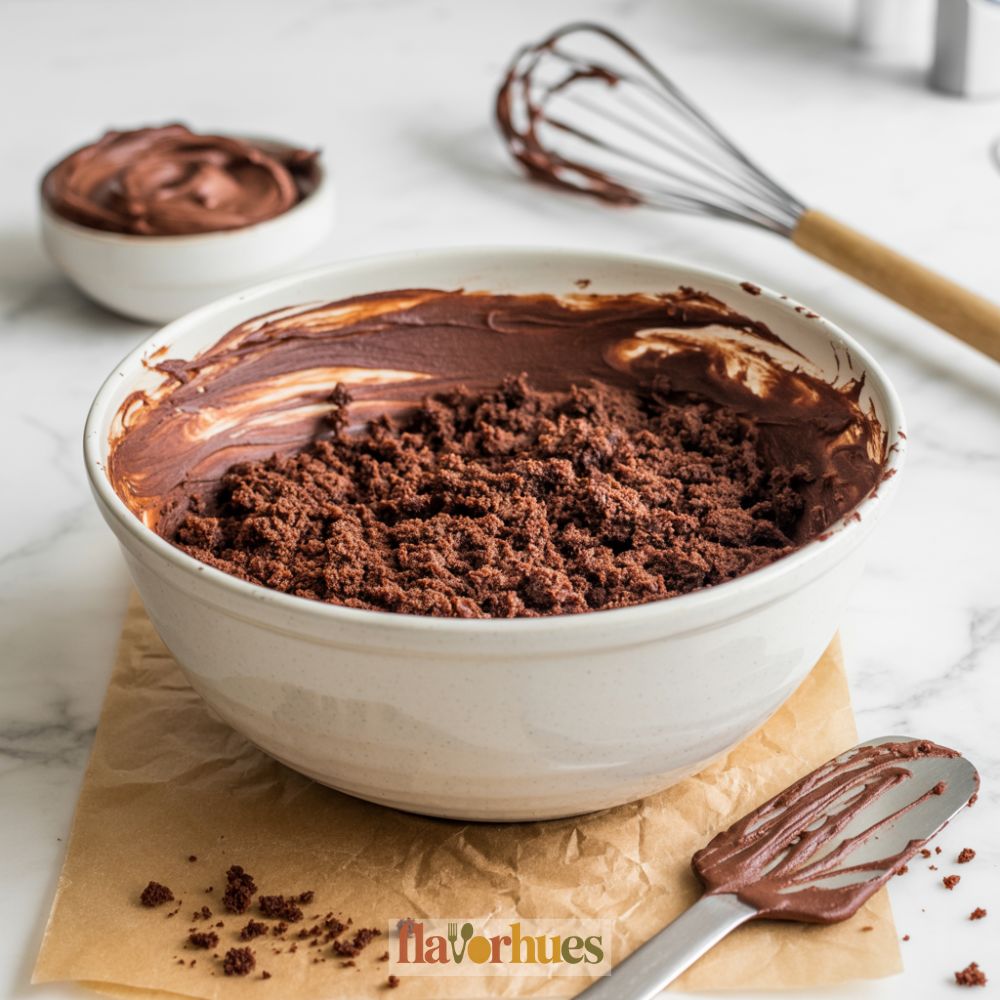
I crumble the cake into a big bowl. Then, I add frosting a bit at a time, mixing until it sticks together when I squeeze it.
Next, I grab a little of the cake mix and shape it into a rough hand. For fingers, I roll out small pieces and press them onto the palm. A lollipop stick goes in the base of each hand. You can also use a silicon mould for this step.

Now I melt the white chocolate chips in the microwave. I stir in green food coloring until I get a zombie shade I like.
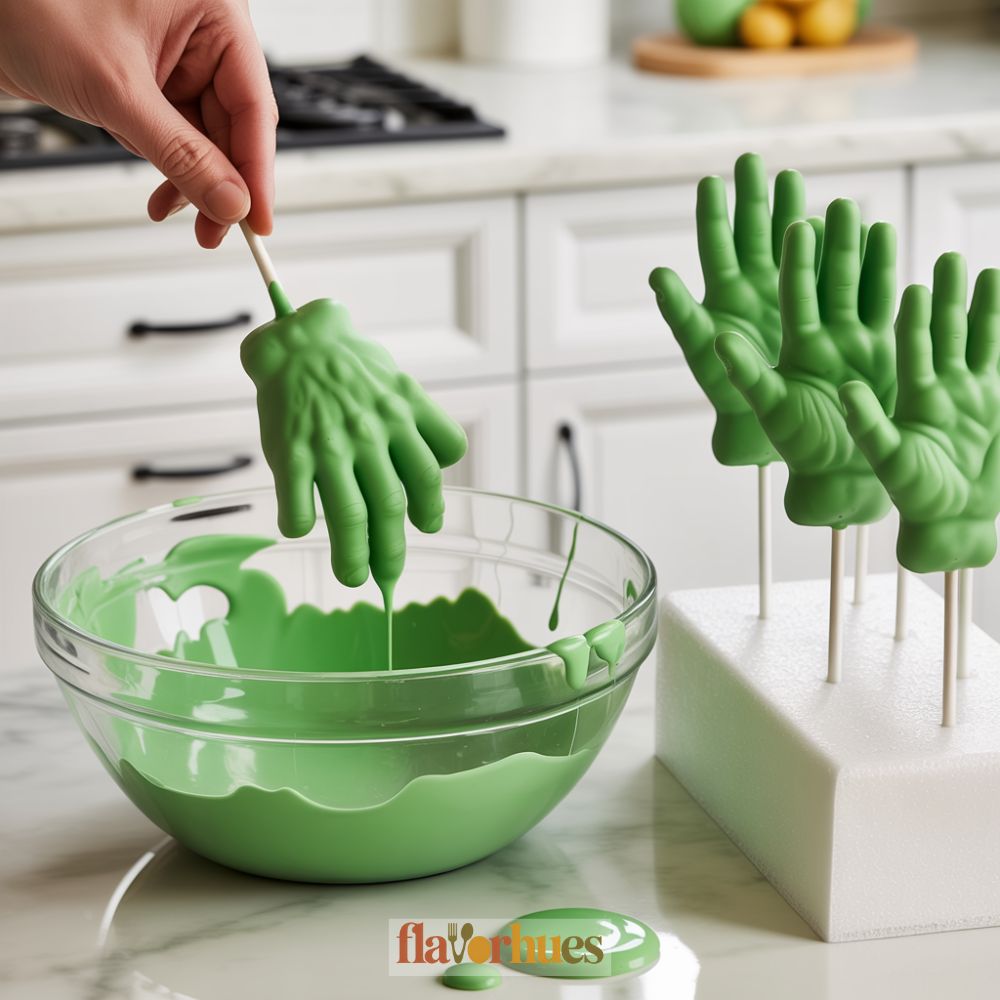
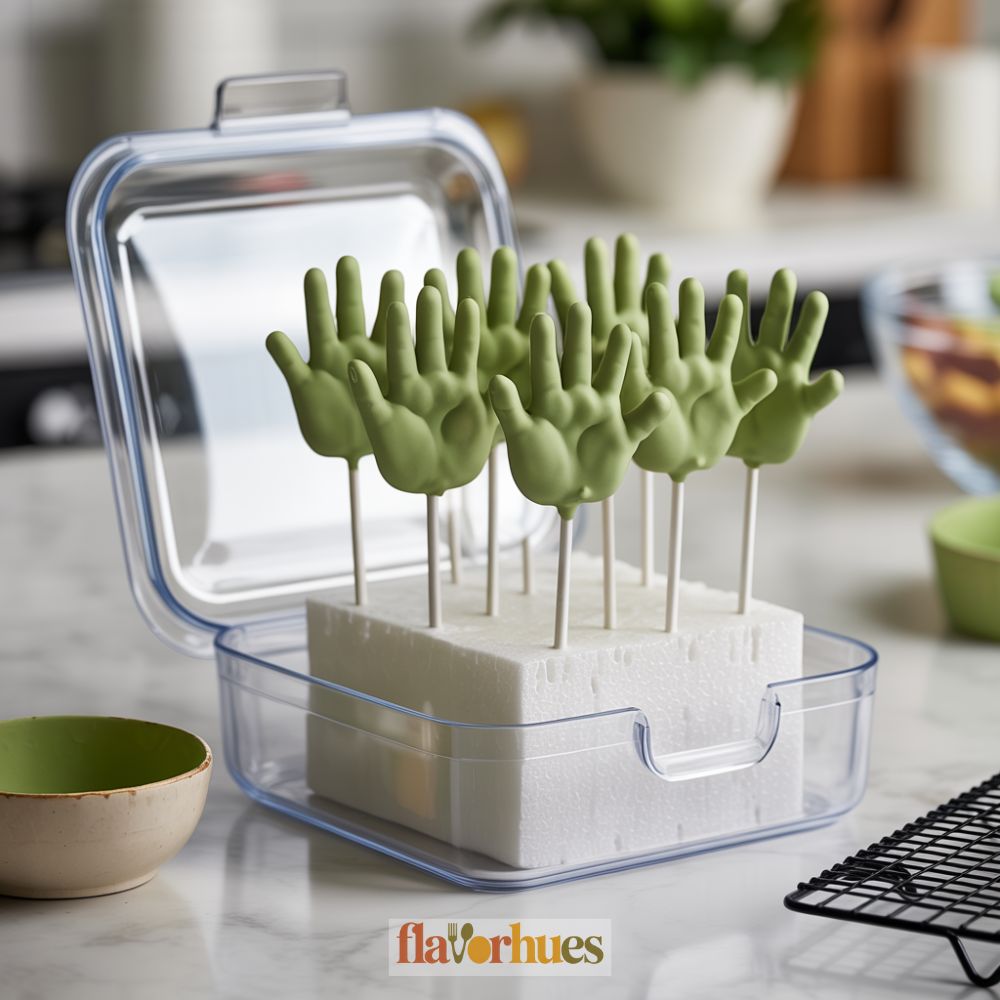
I dip each hand into the melted chocolate, tapping off the extra. Then I stand them up in a piece of styrofoam or a cup to dry. Once they’re set, I draw on nails, knuckles, and bloody bits with a black marker and red gel icing.
Once everything’s dry, they’re ready to serve.

Equipment
- 2 medium mixing bowls
- Spoon or spatula
- Decorating piping bag or sandwich bag
- Food-safe gloves (optional)
- Silicone baking mat (optional, for easy cleanup)
- Foam block or stand (to hold pops while drying)
Ingredients
- 2 cups chocolate cake crumbled (from baked and cooled cake)
- 1/2 cup vanilla frosting
- 1 cup white candy melts
- 1/2 teaspoon green food coloring
- 2 tablespoons mini chocolate chips
- 12 lollipop sticks
- 1 tube black icing gel for details
- 1 tube red gel icing for blood effect
Instructions
- Crumble the baked and cooled chocolate cake into a large mixing bowl.
- Add the frosting gradually and mix until the mixture holds together when pressed.
- Take a small amount of cake mixture and shape it into a rough hand, rolling smaller pieces for fingers and attaching them to form a creepy hand shape.
- Insert a lollipop stick into the base of each hand.
- Place shaped cake hands onto a parchment-lined baking sheet and freeze for 15–30 minutes until firm.
- In a microwave-safe bowl, melt white candy melts in 30-second intervals, stirring between each.
- Add green food coloring to achieve a zombie-like shade. Stir well.
- Dip each frozen cake hand into the melted green coating, tapping off the excess.
- Stand the pops upright in a foam block or cup until set.
- Once dry, use black icing gel to draw fingernails and stitches.
- Add red gel icing to mimic blood at the fingertips or wrist area.
- Optional: Use mini chocolate chips or toothpicks to add texture like scars or wounds.
- Let all decorations dry completely before serving.
Decoration Tips
Decorating these pops is where it gets fun. I start by melting a cup of white candy melts and mixing in a few drops of green food coloring for that undead look.
Black gel icing is perfect for fingernails, and red gel adds the blood. Sometimes, I dust a little cocoa powder for a dirty, fresh-from-the-grave effect.
Here’s my go-to list for decorating:
| Ingredient | Amount |
|---|---|
| White candy melts | 1 cup |
| Green food coloring | 3-4 drops |
| Black gel icing | 1 tube |
| Red gel icing | 1 tube |
| Cocoa powder | 1 teaspoon |
| Edible candy eyes (optional) | 10 pieces |
I stick the finished pops in a foam block to dry, so they keep their shape and the icing sets properly.
For more texture, I’ll use a toothpick to shape the fingers or add wrinkles. A light dusting of cocoa powder around the base makes them look even creepier.
Honestly, it’s fun to experiment with colors and designs. Sometimes I’ll go wild with sprinkles or candy decorations just to see what happens.
Creative Zombie Hand Cake Pops Variations
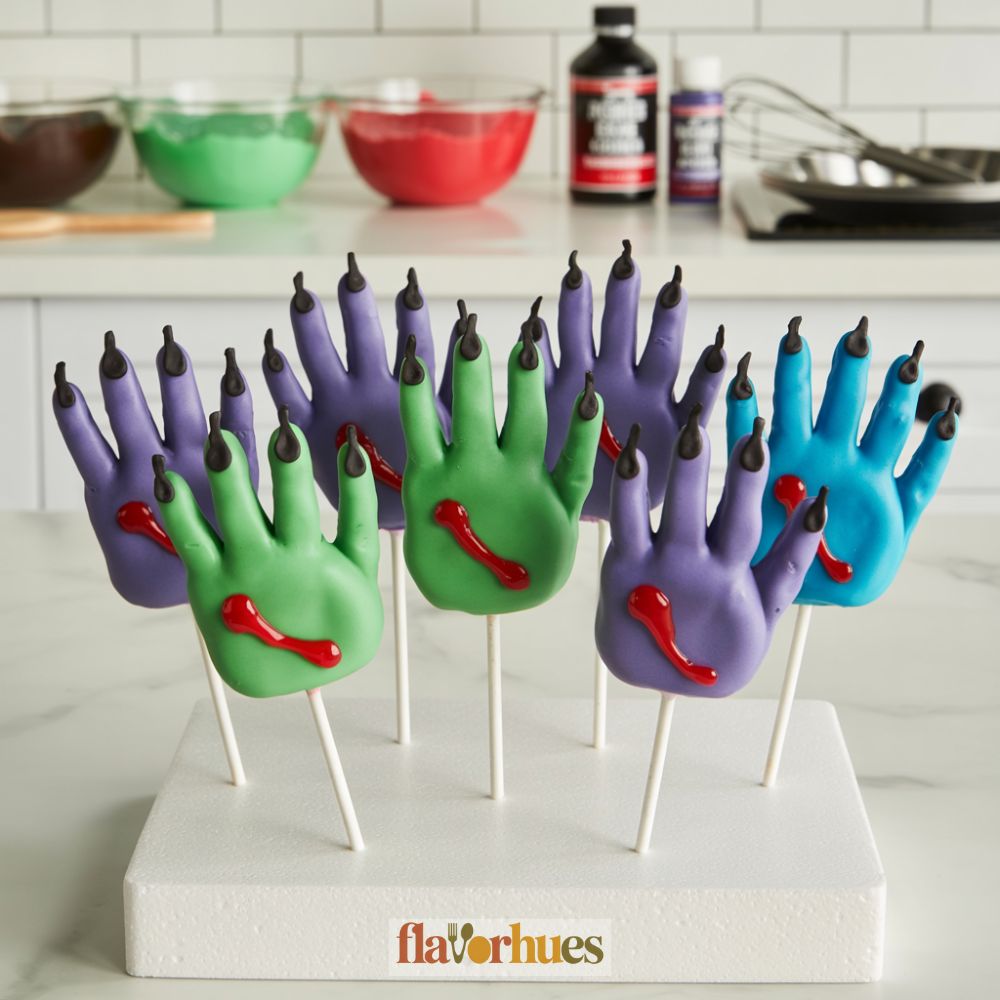
I don’t stick to just green—sometimes I’ll go for blue or purple zombie hands. Mixing food coloring into white chocolate makes for some pretty cool effects.
Here’s a peek at some other ingredients I play with:
| Ingredient | Amount |
|---|---|
| Chocolate cake | 2 cups crumbled |
| Frosting | 1/3 cup |
| White chocolate | 1 cup (for coating) |
| Food coloring | 3-4 drops per color |
| Pretzel sticks | 15 (for arms) |
| Candy eyes | 20 pieces |
| Red gel icing | as needed (for wounds) |
For an extra-creepy touch, I’ll press candy bones into the cake pop fingers. It’s a small detail, but it definitely ups the spooky factor.
Sprinkles are great for texture—black and silver are my favorites for that dirty, undead look.
Sometimes I outline the fingers with black gel to make them stand out, especially if I’m putting them on a party tray.
Mixing up the finger shapes and colors means I never get bored making these. That’s honestly the best part.
Substitute
Sometimes I don’t have all the ingredients for Zombie Hand Cake Pops.
I use simple swaps that work well and still taste good.
Cake Substitute
If I’m out of vanilla cake mix, I use this instead:
| Substitute | Quantity |
|---|---|
| Chocolate cake mix | 1 box (15.25 oz) |
| Funfetti cake mix | 1 box (15.25 oz) |
| Brownie mix | 1 box (18 oz) |
Frosting Alternative
Instead of regular frosting, I sometimes use:
- Cream cheese frosting: 1 cup
- Chocolate frosting: 1 cup
These make the pops a little richer, honestly.
Candy Coating Switches
If I don’t have green candy melts, I use:
- White chocolate chips: 2 cups (melted and dyed with green food coloring)
- Almond bark: 2 cups (with green coloring added)
If I can’t find black food gel for the details, I just grab melted dark chocolate (¼ cup) and use a piping bag or even a toothpick. Works in a pinch.
Stick Options
When lollipop sticks are missing, I grab:
- Paper straws: 15 pieces
- Wooden skewers: 15 pieces (cut shorter)
What Can Go Wrong?
Sometimes, my Zombie Hand Cake Pops do not hold their shape.
This can happen if I use too much frosting when mixing the cake and crumbs. It’s best to keep it to about 1/3 cup frosting for every 2 cups of cake crumbs.
The chocolate coating can be tricky. If my chocolate is too thick, it won’t coat the hands smoothly.
I always melt about 1 cup of candy melts with 1 teaspoon of vegetable oil to help it flow better.
If I rush the chilling step, the cake pops might fall off the sticks.
I make sure to freeze them for at least 15 minutes before dipping. I know, waiting is hard.
- Cake pops cracking: Chocolate was too hot or the pops were too cold.
- Sticky hands: I used too little powdered sugar when shaping.
- Details get messy: I added decorations before the coating dried.
| Problem | What I Do to Fix It |
|---|---|
| Cake pop falls apart | Use less frosting and chill longer |
| Coating too thick/thin | Adjust oil and re-melt as needed |
| Lumpy chocolate | Stir well and melt slowly |
Storage And Shelf Life Tips
I like to keep my zombie hand cake pops fresh, so I tuck them in an airtight container. I never stack them—nobody wants smushed icing or wrecked decorations.
If I’m leaving them at room temperature, I’ll make sure they’re out of direct sunlight. Usually, they’re fine hanging out on the counter for up to two days, as long as it’s cool and dry in the kitchen.
If I need them to last a bit longer, the fridge is my go-to.
Refrigerator Storage Tips:
- Keep in a single layer
- Stash them away from foods with strong smells
- Try to eat within 5–7 days
Want to really stretch out their shelf life? I freeze them. First, I wrap each pop in plastic wrap, then into a freezer bag they go.
Freezer Storage Steps:
- Wrap each cake pop tightly in plastic wrap
- Pop them in a zip-top freezer bag
- Aim to use within one month for best flavor
Here’s a quick chart I made for storage times:
| Storage Place | Shelf Life |
|---|---|
| Room Temp (cool) | 2 days |
| Refrigerator | 5–7 days |
| Freezer | 1 month |
If I’m grabbing a frozen cake pop, I just let it sit out for about 30 minutes. That’s usually enough time for it to soften up and taste great again.
One thing I always avoid: humid spots. Moisture just makes the coating all sticky and weird.