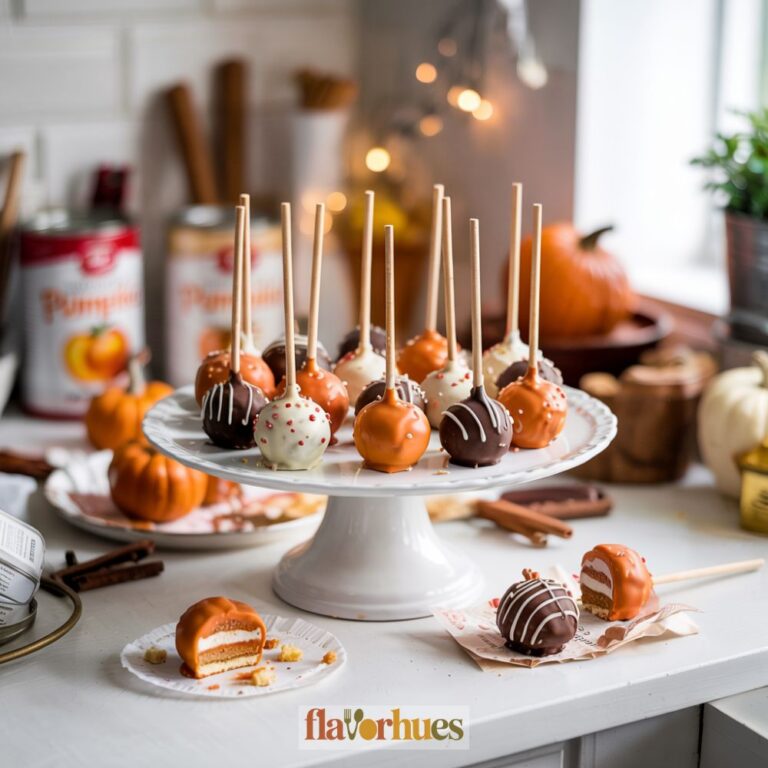
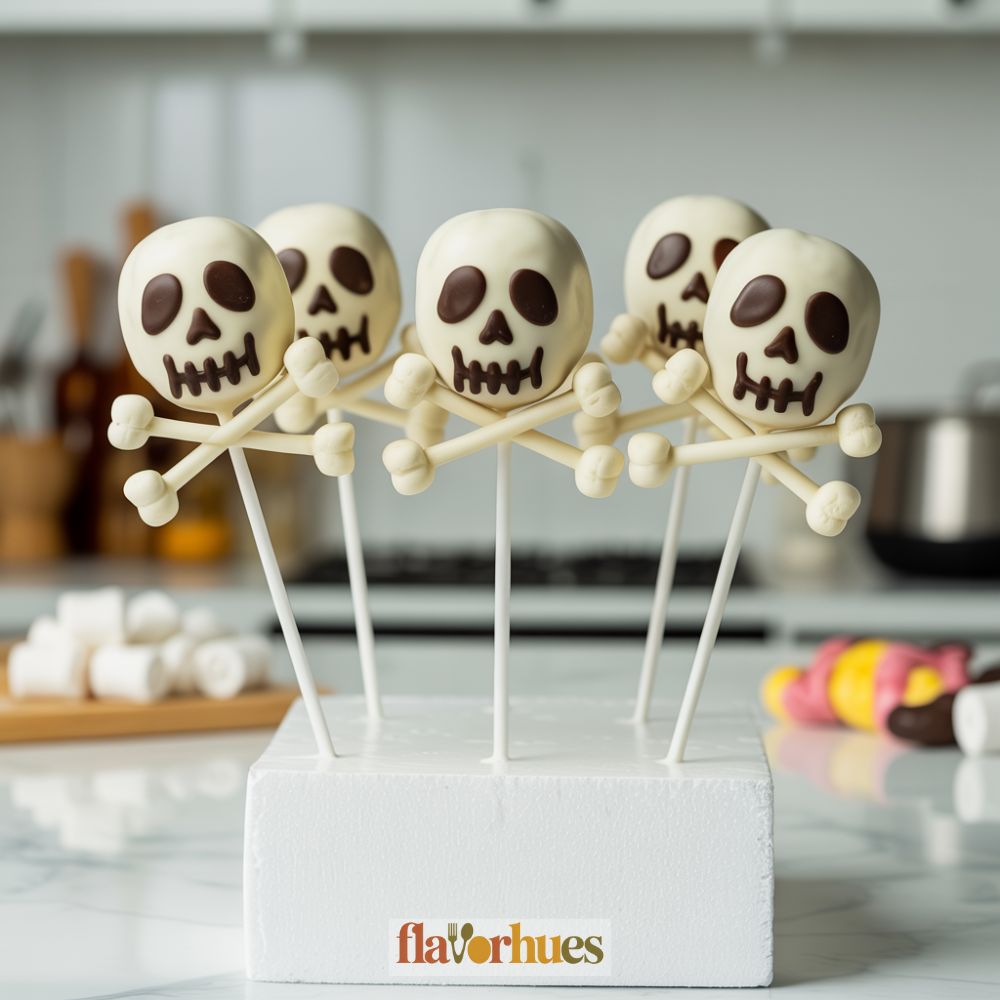
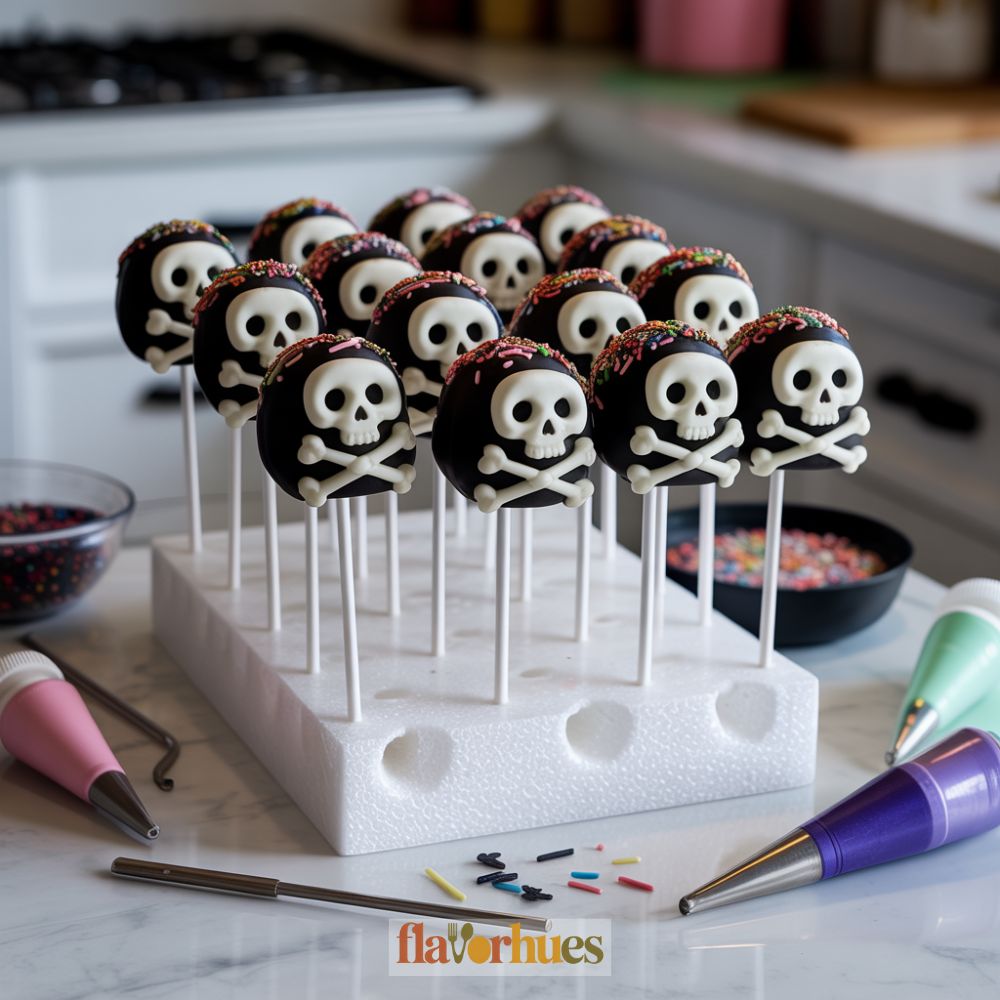
Skull and Crossbones Cake Pops Recipe
Every year, I’m on the hunt for new ways to make my parties pop, and these Skull and Crossbones Cake Pops? They’re always a hit.
They’re fun to make—honestly, more fun to eat—and perfect for Halloween, pirate birthdays, or any event that just needs a spooky little treat.
If you want your desserts to get people talking, these cake pops are a simple way to do it.
Why I Love Them
I love Skull and Crossbones Cake Pops because making and decorating them is just plain fun. The whole process lets me take a break from regular baking and get a little creative for once.
Playing with candy melts, edible markers, and sprinkles gives me the freedom to bring these little skulls to life.
These cake pops always make my snack table stand out. They catch people’s eyes at parties, especially during Halloween or a pirate-themed event.
My friends and family are always curious and want to try one—sometimes more than one, honestly.
I like that they only need a few basic ingredients. Sometimes I’ll change up the cake flavor or use different candies just to fit whatever theme I’ve got going on.
Making these pops is actually pretty relaxing. I get to focus on the little details, and it’s a nice way to spend time with family as we design the tiny skull faces together.
Eating them is just as fun as decorating. They’re sweet, soft, and honestly just the right size for a treat.
Equipment
To make Skull and Crossbones Cake Pops, I just grab a few tools from my kitchen drawer. Each one makes things smoother—and a little more fun.
Here’s what I use:
- 1 large mixing bowl
- 1 electric mixer or a sturdy spoon
- 1 baking sheet
- Parchment paper
- 24 cake pop sticks
- 2 microwave-safe bowls
- 1 fork or dipping tool
- 1 small piping bag (or just a zip bag with the corner snipped)
I make sure my mixing bowl is big enough for the crumbled cake and frosting. The electric mixer saves my arm, but honestly, a spoon works fine if that’s what I’ve got.
A baking sheet lined with parchment paper is perfect for setting the cake balls. The microwave-safe bowls are for melting the candy melts and chocolate.
I use 24 cake pop sticks so I have one for each pop. The piping bag (or zip bag) is handy for neat decorations.
Extra tip: I wipe my hands and tools often to keep everything clean and simple.
Ingredients
To make Skull and Crossbones Cake Pops, I stick with a few simple ingredients. Here’s what I need:
| Ingredient | Amount |
|---|---|
| Chocolate cake | 1 box (about 15 oz) baked |
| Cream cheese frosting | 1/2 cup |
| White candy melts | 2 cups |
| Black candy melts | 1/4 cup |
| Mini marshmallows | 24 pieces |
| Lollipop sticks | 12 sticks |
| Edible black marker | 1 pen |
| Sprinkles (optional) | As needed |
First, I bake the chocolate cake according to the package and let it cool. Then I crumble the cake into a big bowl.
I mix in 1/2 cup of cream cheese frosting until it all holds together easily. White candy melts are for coating the cake balls, and I use black candy melts for the details.
For the crossbones, two mini marshmallows per pop do the trick. I grab an edible black marker to draw the faces.
Sometimes I toss in sprinkles for extra fun, but that’s totally up to me. Each ingredient really helps set the mood for a spooky treat.
Instructions
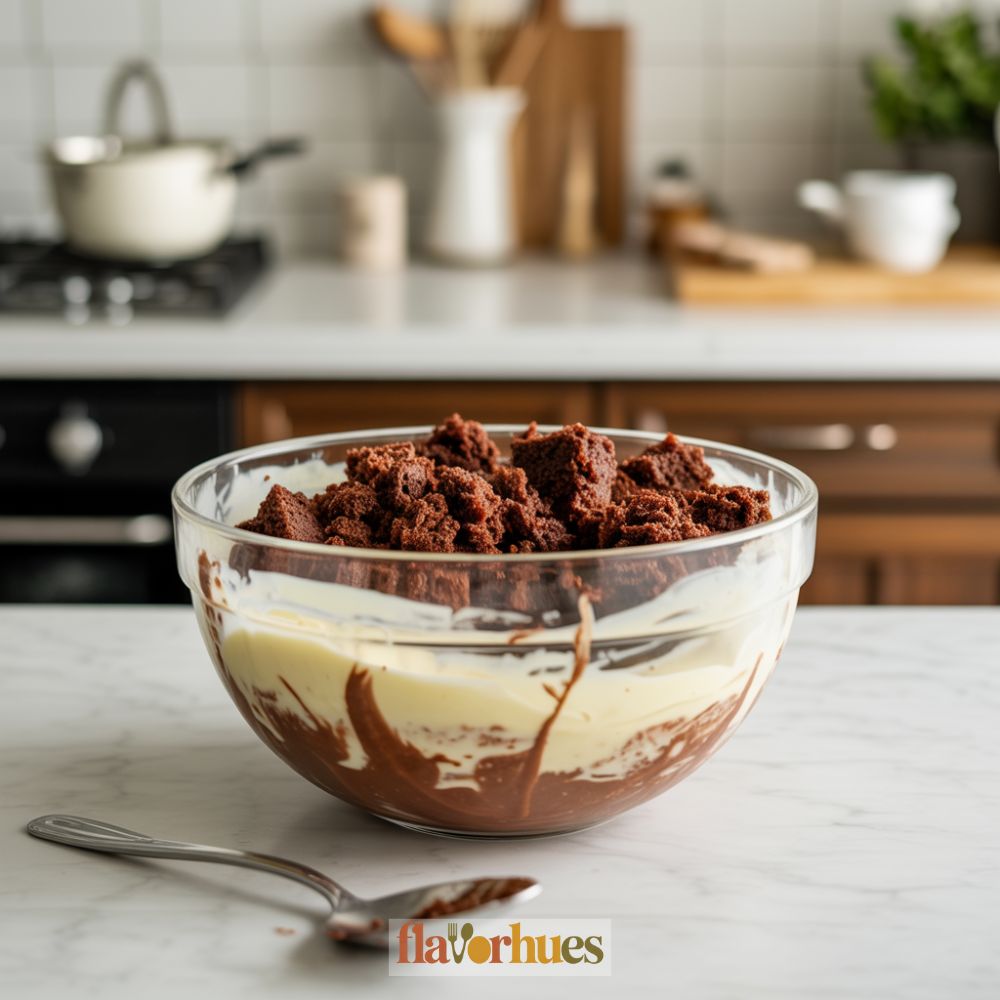
First, I crumble one baked cake (about 9×13 inches) into a large bowl. Then, I mix in 3/4 cup of frosting until the mixture holds together like dough.
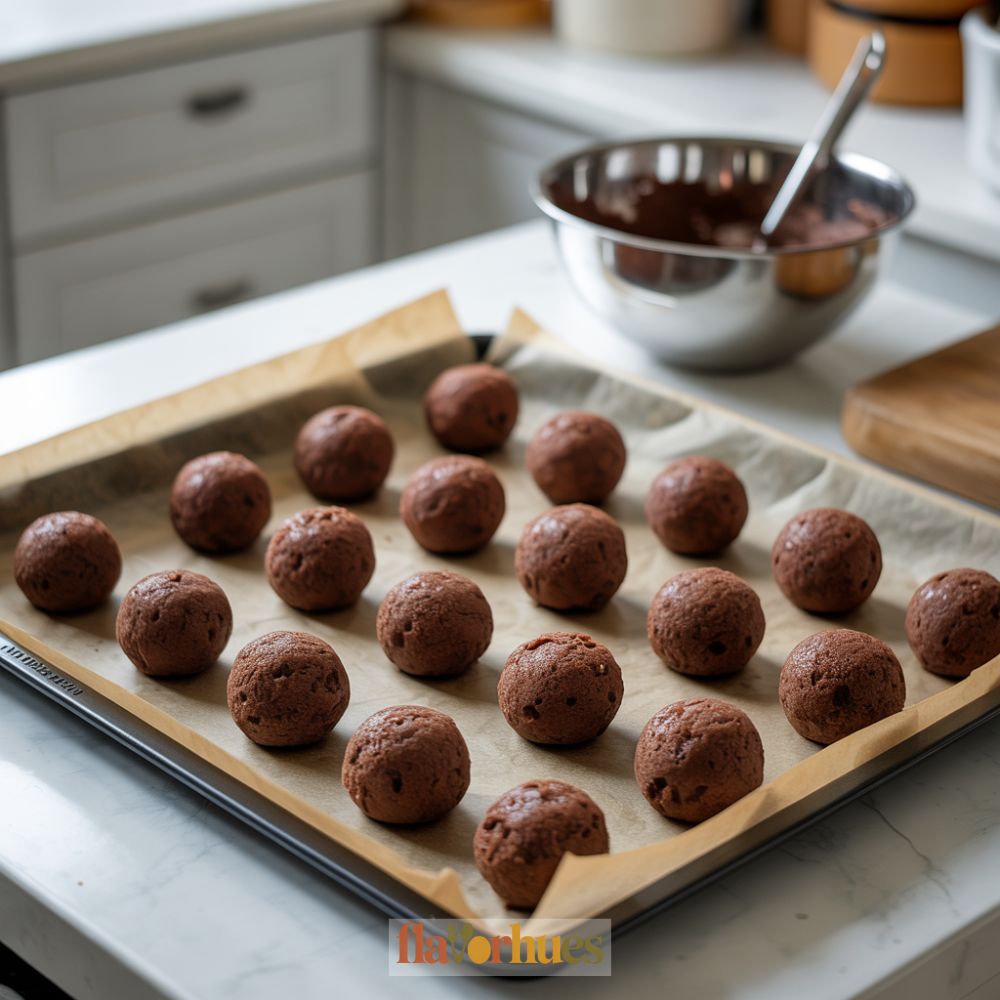
I roll the dough into balls about 1.5 inches wide. After that, I place them on a tray lined with parchment paper and freeze them for 20 minutes.
While the cake balls chill, I melt 2 cups of white candy melts in the microwave, stirring every 30 seconds. Once it’s smooth, I dip a lollipop stick about half an inch into the melted candy and insert it into each cake ball.
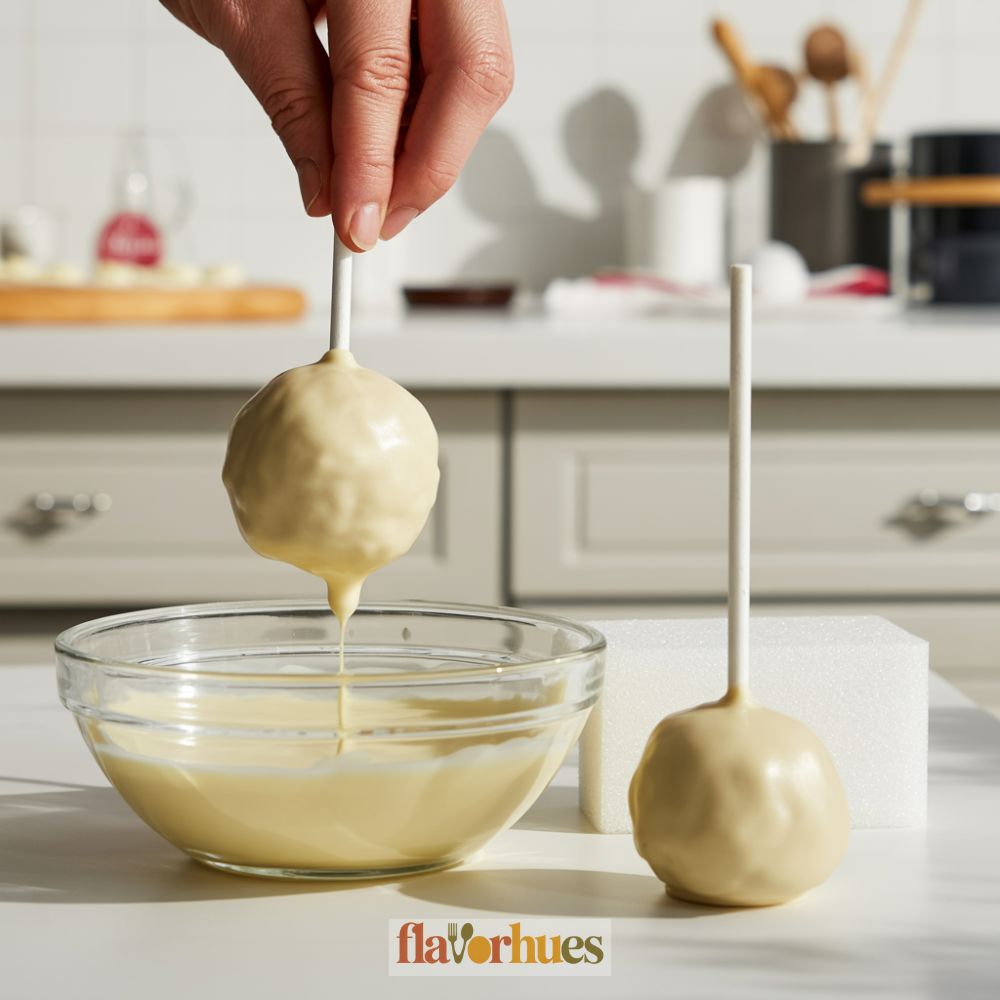
Next, I dip each cake pop into the melted candy, rotating to coat it all over. I gently tap off any extra coating.
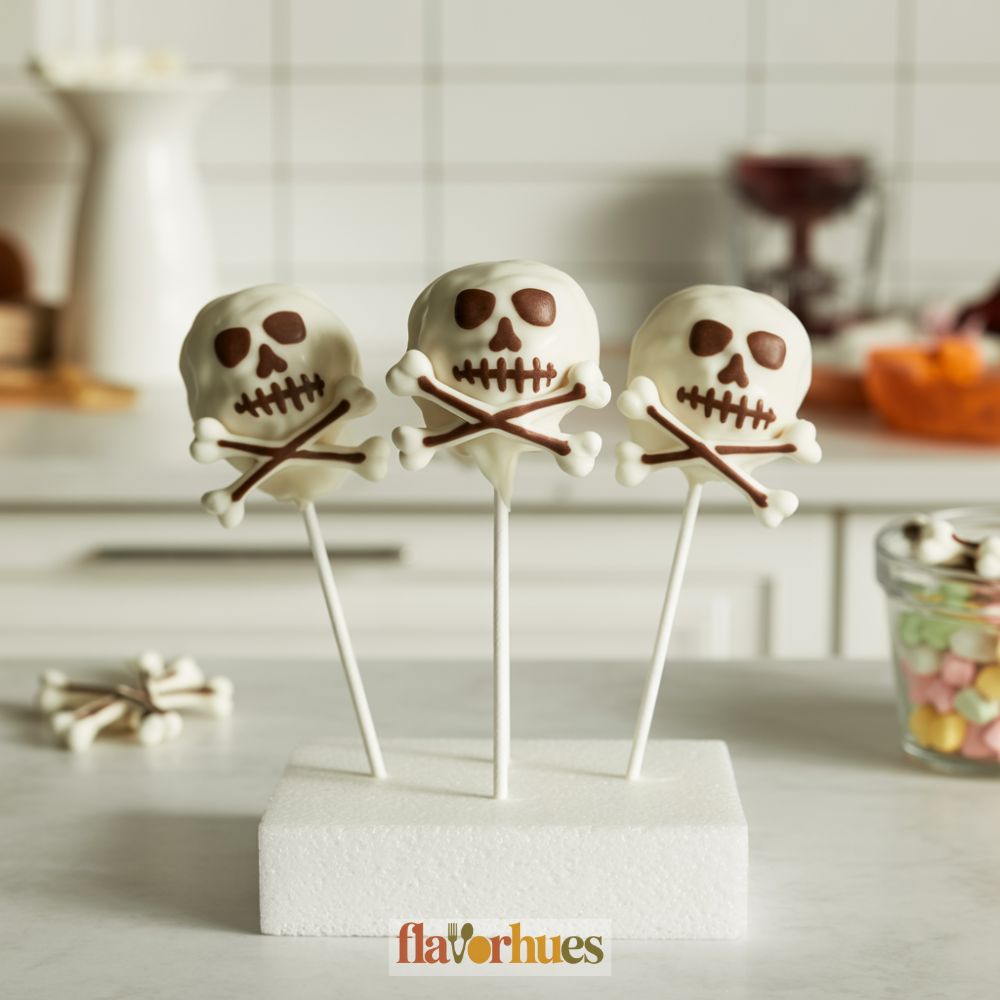
Once dipped, I set the pops upright in a foam block. Before the coating dries, I press two small candy bones on each side for crossbones.
After the pops set, I use a black edible marker or gel to draw two eyes and a mouth for the skull face.
Decoration Tips
When I start decorating my Skull and Crossbones Cake Pops, I gather all my supplies first. Here’s what I use:
| Ingredient | Quantity |
|---|---|
| White candy melts | 1 cup |
| Black gel food coloring | Small tube (10g) |
| Mini marshmallows | 12 pieces |
| Cake pop sticks | 12 |
| Chocolate sprinkles | 1 tablespoon |
I melt the white candy melts in the microwave for 30 seconds, stir, and repeat until smooth. For each cake pop, I dip it into the melts and let it set on parchment paper.
I try to keep the surface smooth by spinning the stick slowly. To make the crossbones, I cut mini marshmallows in half and stick two halves to each side of my cake pop using a dab of melted candy.
I use a toothpick to draw eyes and a mouth with the black gel food coloring. It’s totally fine if the faces look a little different—each one gets its own personality.
Chocolate sprinkles make great little cracks or scars. Sometimes I press a few into the icing before it dries for a cool effect.
I always make sure everything’s dry before wrapping or serving the pops. That keeps the decorations from getting messy.

Equipment
- 1 fork or dipping tool
- 1 small piping bag
Ingredients
- 15 oz chocolate cake baked and cooled
- 1/2 cup cream cheese frosting
- 2 cups white candy melts
- 1/4 cup black candy melts
- 24 mini marshmallows 2 per pop
- 12 lollipop sticks
- 1 edible black marker
- Sprinkles optional – as needed
Instructions
- Prepare chocolate cake as directed on the box. Allow to cool completely.
- Crumble baked cake into a large mixing bowl. Add 1/2 cup of cream cheese frosting. Mix until the texture is like dough.
- Roll mixture into 1.5-inch balls. Place them on a parchment-lined baking sheet and freeze for 20 minutes.
- Melt a small amount of white candy melts. Dip each lollipop stick about 1/2 inch into the melted candy and insert into the cake balls.
- Melt 2 cups of white candy melts in 30-second intervals, stirring in between. Dip each cake pop into the melted coating, rotating to coat. Tap off excess.
- While coating is still wet, attach 2 mini marshmallows to each side to form crossbones.
- Place pops upright in a foam block or stand and let the coating harden.
- Use black edible marker or gel to draw eyes and a mouth on each skull.
- Use sprinkles for cracks or scars. Press them in before the coating sets completely.
- Allow all decorations to dry fully before serving or storing.
Creative Skull and Crossbones Cake Pops Variations
I like to mix things up with different flavors and designs for my skull and crossbones cake pops. Here are some fun ways I get creative.
Flavors
- Vanilla Fun: I use one box (16 oz) vanilla cake mix and half a cup of vanilla frosting.
- Chocolate Surprise: I go with one box (16 oz) chocolate cake mix and half a cup of chocolate frosting.
- Red Velvet: I like using one box (16 oz) red velvet cake mix and half a cup of cream cheese frosting.
Decorations
I decorate the pops with white, black, and red candy melts. For the crossbones, I’ll use mini pretzel sticks or white chocolate rods if I have them.
| Decoration | Amount |
|---|---|
| White candy melts | 2 cups |
| Black candy melts | 1/2 cup |
| Red candy melts | 1/2 cup |
| Mini pretzel sticks | 40 pieces |
| White chocolate rods | 40 pieces |
Instead of just white skulls, sometimes I’ll coat them in dark chocolate and use white icing for the face. Another idea—add colored sugar or edible glitter for extra sparkle.
Sometimes I even use candy eyes for a spooky or silly touch. With these easy tweaks, it’s pretty simple to make each batch look unique for any party or theme.
Substitute
Sometimes I need to swap things if I’m out of something or just want to use what I’ve got in the pantry. Here are my favorite substitutes for Skull and Crossbones Cake Pops.
Cake Substitute List:
- Chocolate: I’ll use chocolate cake mix instead of vanilla for a darker “skull.”
- Brownies: When I’m out of cake mix, I bake up a box of brownies (about 400g) as directed.
Frosting Substitute List:
- Cream Cheese Frosting: Sometimes I swap in a cup (225g) of cream cheese frosting for a tangy twist.
- Nutella: If I’m craving chocolate-hazelnut, half a cup (120g) works great instead of frosting.
Candy Melts Substitute Table:
| Original | Substitute | Amount |
|---|---|---|
| White candy melts (300g) | White chocolate chips | 300g (about 1¾ cups) |
| Black candy melts (100g) | Dark chocolate chips | 100g (about ½ cup) |
If I don’t have candy eyes or decorations, I’ll use mini chocolate chips or just tiny dots of melted chocolate.
When I run out of cake pop sticks, I use clean popsicle sticks or even sturdy toothpicks. Each substitute is easy to find and honestly keeps things fun and simple.
What Can Go Wrong?
Sometimes my cake pops just don’t stay on the stick. If the cake mixture is too wet or too dry, they can fall apart or slip down.
I’ve had candy melts that refuse to melt smoothly. When that happens, the coating turns lumpy or cracks once it dries.
To fix it, I’ll add a small spoon of vegetable oil and stir until things finally look smooth enough. It usually helps, though it can take a bit of patience.
Once, I used too little frosting, and my cake balls just broke apart when I tried to shape them. Using about 1/3 cup frosting for every 2 cups cake crumbs seems to work for me—give or take.
Getting the skull shape right? That’s a whole other challenge. I try to use a gentle hand and avoid squeezing too hard when pressing in the features, or the cake pop crumbles and it’s back to square one.
Sometimes decorations just won’t stick, no matter what. I dip the cake pop back into the melted candy coating to help the sprinkles or candy eyes actually attach.
Here’s a quick list of common problems:
- Cake balls falling apart
- Candy coating cracking
- Decorations not sticking
- Sticks sliding out
If you’re following the ingredients list, use:
| Ingredient | Quantity |
|---|---|
| Baked Cake | 2 cups crumbs |
| Frosting | 1/3 cup |
| Candy Melts | 1 cup |
| Lollipop Sticks | 12 |
| Sprinkles/Decorations | As needed |
Storage And Shelf Life Tips
I always let my Skull and Crossbones Cake Pops cool and set completely before storing them.
Moisture can make the candy coating sticky, so I make sure they’re dry to the touch.
For short-term storage (up to 3 days), I keep my cake pops in an airtight container at room temperature.
I usually put a piece of wax paper between the layers so they don’t stick together.
When I need to store them longer, I place them in the fridge.
I’ll wrap each cake pop in plastic wrap or sometimes just pop them in treat bags first. This keeps them from picking up any weird fridge smells.
For freezing, I arrange the pops upright in a sturdy container.
I also slip parchment paper between the rows. Here’s a quick reference:
| Storage Method | How Long They Last |
|---|---|
| Room Temperature | 2-3 days |
| Refrigerator | Up to 1 week |
| Freezer | Up to 1 month |
Once I’m ready to eat them, I let the cake pops come to room temperature before serving.
If you freeze them, it’s honestly best to thaw them overnight in the fridge so the coating doesn’t crack. Trust me, it’s worth the wait.