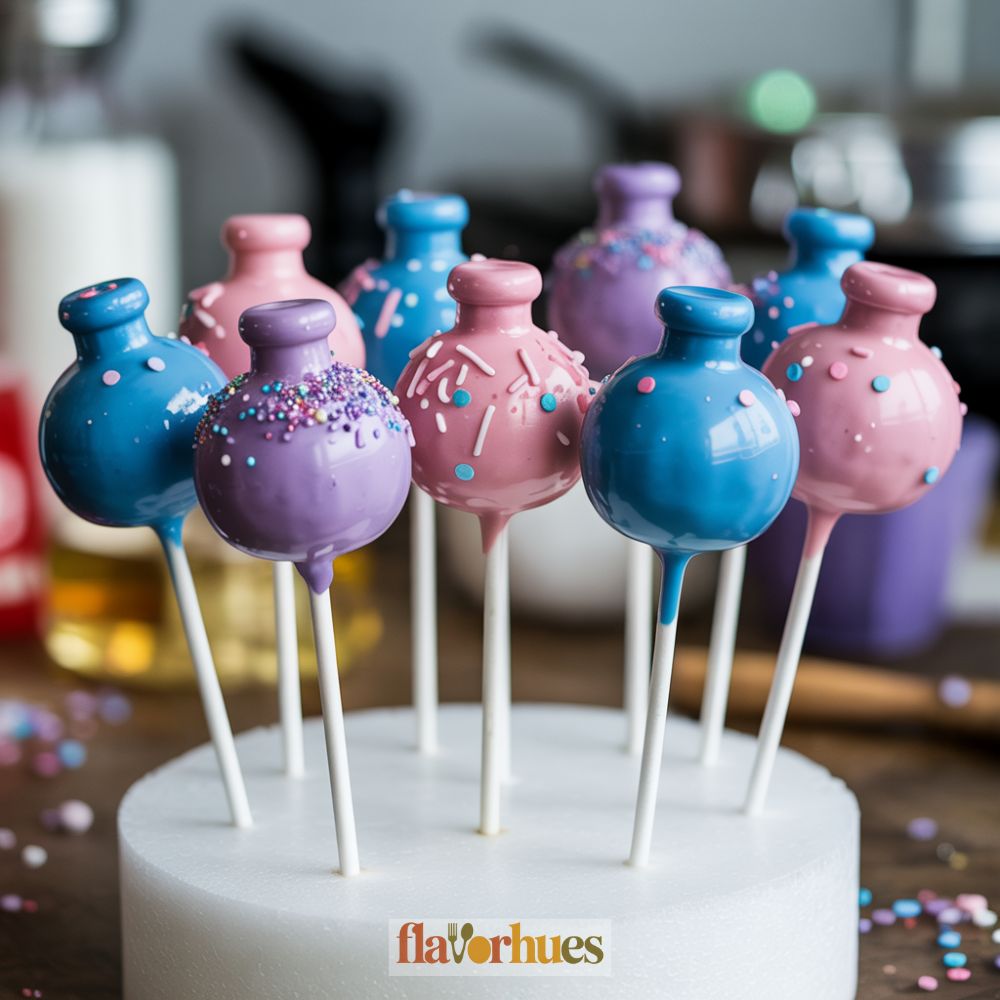
Potion Bottle Cake Pops with Sprinkles Recipe
Ever wish you could make a dessert that looks like it came straight out of a fantasy book? My Potion Bottle Cake Pops with Sprinkles are cute, colorful treats that honestly look like tiny magical potions.
I love how each pop is easy to personalize with your own favorite colors and a handful of sparkly sprinkles.
These cake pops are simple to put together—great for birthdays, parties, or just a fun baking day at home. I’m excited to show you how I shape, decorate, and pack up these sweet little potion bottles.
Why I Love Them
Making Potion Bottle Cake Pops is just a blast. They look so fun and magical, and the bright sprinkles and wild colors make each one feel special—honestly, it’s like holding a treat from a fantasy story.
They’re easy to share with friends or bring to a party. People always smile when they see them, and it’s fun to watch everyone pick their favorite color.
One more thing I love: the recipe is super simple to follow.
I like adding different sprinkles or edible glitter to make each one a little unique. Sometimes I toss in a bit more frosting if the cake feels dry—it helps shape the balls better.
This is such a fun project to do with my family, too. We always end up laughing while decorating and trying to decide whose potion bottle looks the coolest.
Equipment
For making potion bottle cake pops with sprinkles, I use a few tools that make the job easier (and a lot less messy).
Here’s what I have ready:
- 1 large mixing bowl
- 1 sturdy spoon or spatula
- 1 baking tray
- 1 roll of parchment paper
- 15 cake pop sticks
- 1 microwave-safe bowl
- 1 small cup for sprinkles
I also use a stand or a block of foam to hold the pops while they dry. Trust me, it helps.
I always double-check that my sticks are about 6 inches long. Any shorter and the cake pops might fall apart when I dip them.
Using parchment paper is honestly a must. It keeps the cake balls from sticking to the tray and saves a lot of cleanup.
Having a separate bowl for sprinkles just makes it easier to roll the cake pops and coat them evenly.
Ingredients
To make my potion bottle cake pops, I stick with a few simple things you’ll find at most stores. Here’s what I need:
Cake:
- 1 box of vanilla cake mix (about 15.25 ounces)
- Ingredients listed on the box (usually eggs, oil, and water)
Frosting:
- 1/2 cup (about 120g) vanilla frosting
Coating and Decoration:
- 2 cups (about 340g) white chocolate or candy melts
- Gel food coloring (blue, purple, or whatever magical color I’m feeling)
- 1/4 cup (about 40g) colorful sprinkles
Other Supplies:
- 12–15 lollipop sticks
- 1 tablespoon vegetable oil (optional, for thinning chocolate)
I bake the cake as directed on the box. Once it’s cool, I crumble it into a bowl and mix it with the frosting until it’s soft and doughy.
I use food coloring to get the potion colors I want, then roll the cake balls and dip them in the candy melts. Sprinkles go on top for that extra bit of magic.
Instructions
First, I crumble one baked 8-inch vanilla cake into a large bowl. I try to get the pieces as small and even as possible.
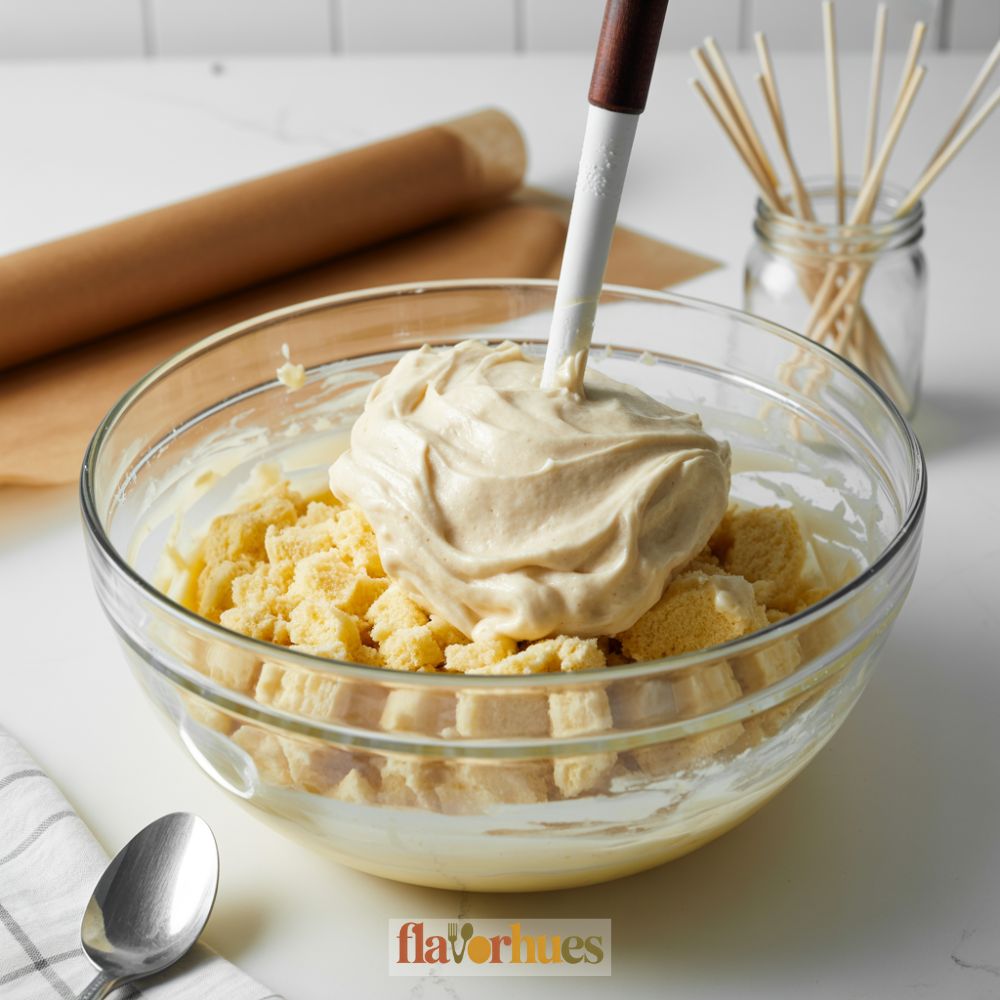
Then I mix in 1/2 cup of vanilla frosting. I stir it until it feels soft and sticks together when pressed.
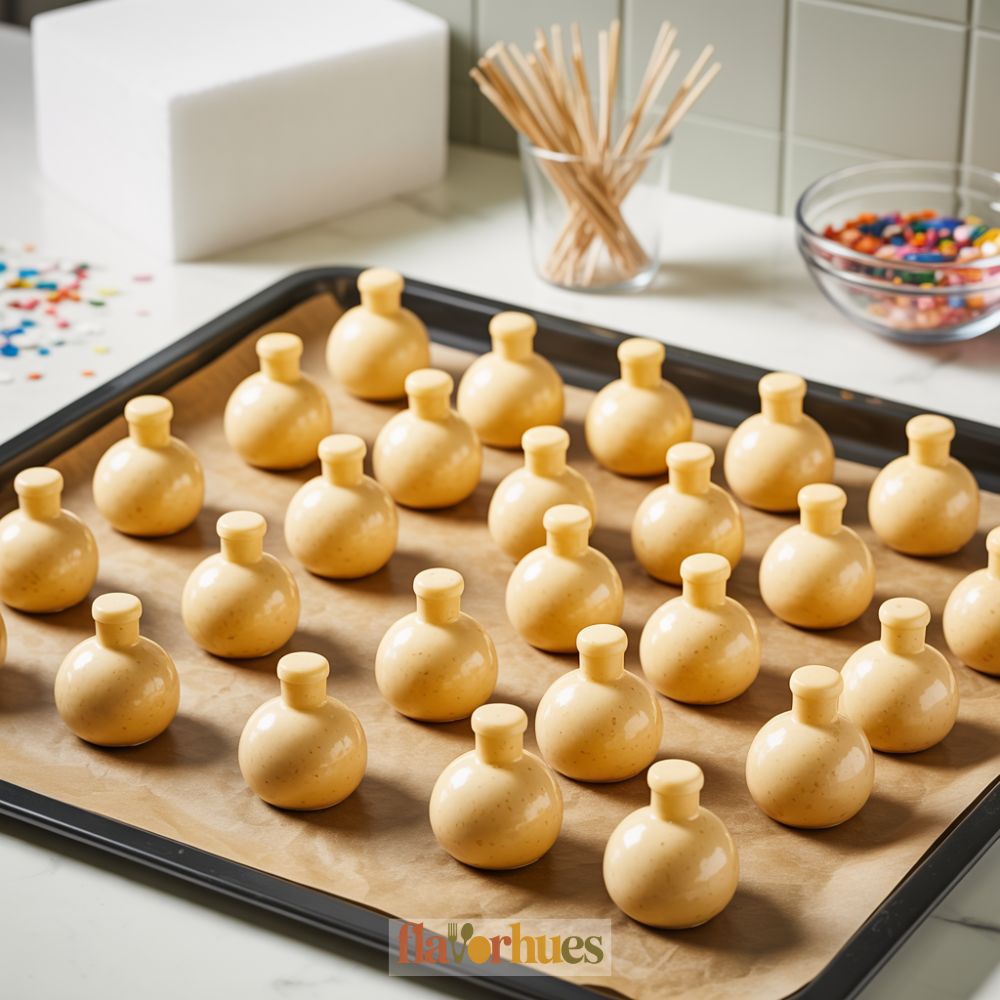
I grab a tablespoon of the cake mixture and roll it into a ball. After that, I gently shape the top so it looks like a potion bottle.
I keep going until all the mix is used up. Each ball goes onto a baking sheet lined with parchment paper.
I chill them in the fridge for about 30 minutes. While they’re cooling off, I melt 12 ounces of white chocolate in the microwave, stirring every 30 seconds.
Once the cake pops are cool, I dip the tip of each lollipop stick into the chocolate and push it halfway into the cake pop.
I dip each cake pop into the melted chocolate, turning so it’s coated all over. While the coating is still wet, I sprinkle 1/2 cup of pastel sprinkles over the tops to look like magic dust.
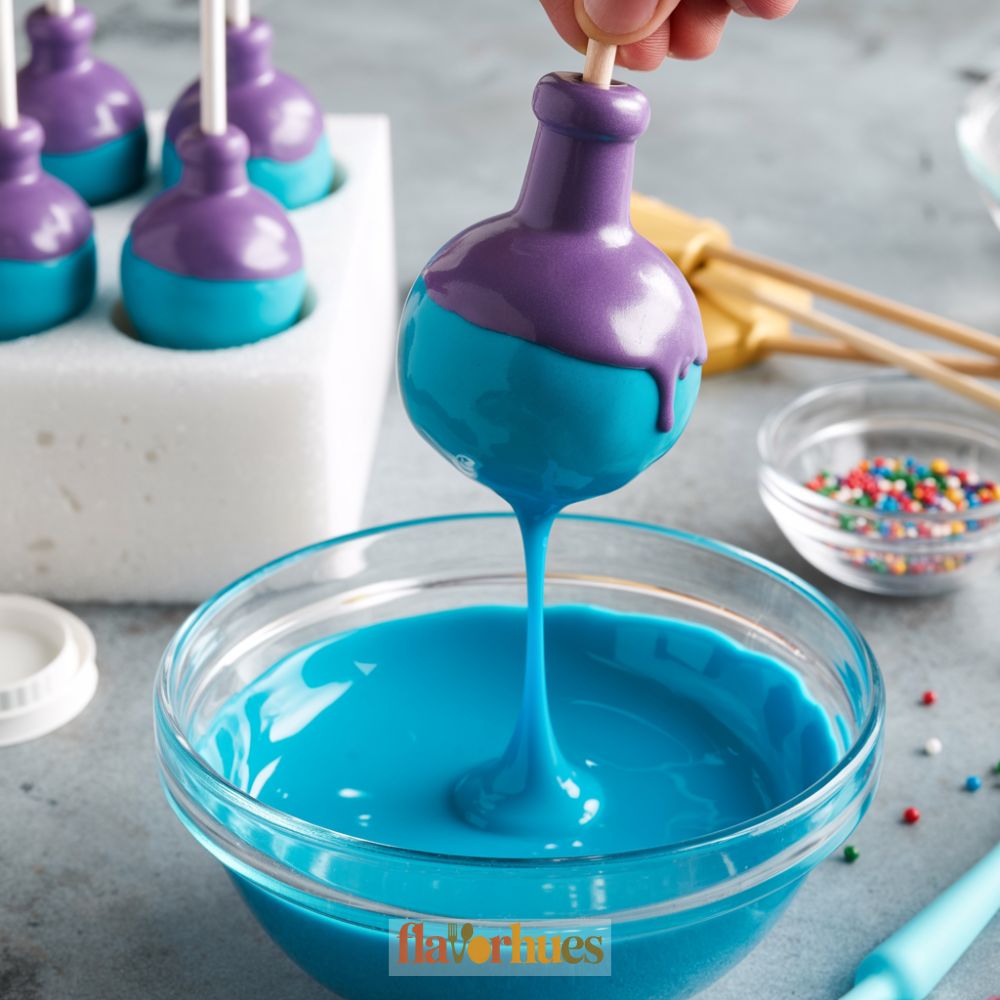
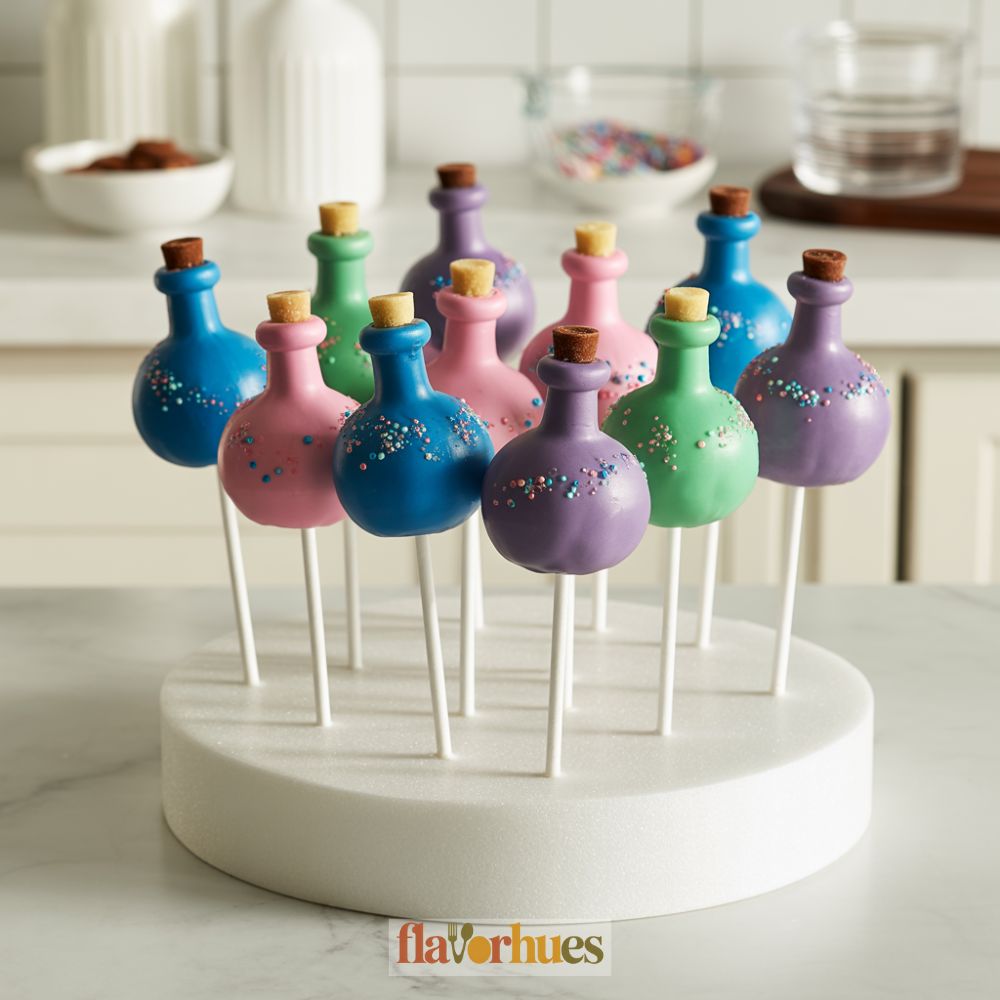
I stand the cake pops upright in a Styrofoam block or cup to let them dry and harden. This really helps keep their shape.
After the coating sets, I draw on the potion bottle neck using edible markers or pipe a thin line of colored icing. If I’m feeling fancy, I’ll add a small candy for the bottle cap.
Decoration Tips
I like to use colorful candy melts for dipping the cake pops. Melting about 1 cup (6 oz) of candy melts gives me enough to dip around 12 cake pops.
After dipping, I quickly add sprinkles before the coating hardens. Using 2 tablespoons of assorted sprinkles is usually enough for a small batch.
To make potion bottles look magical, I sometimes use 1 tablespoon of edible glitter or shimmering sugar along with regular sprinkles.
Toothpicks are handy. If I want neater lines, I’ll gently drag the tip through the coating before it sets.
Here’s a simple table of my favorite sprinkle colors:
| Color | Use For |
|---|---|
| Blue | Water potions |
| Pink | Love potions |
| Green | Healing potions |
| Gold | Special effects |
Standing the pops upright in a foam block lets them dry evenly without smudging the decorations. It’s a little thing, but it makes a difference.
Once the cake pops are decorated, I store them in an airtight container. That way, the sprinkles stay crisp and don’t fall off.

Equipment
- 1 spatula or sturdy spoon
- 1 roll parchment paper
- 1 small cup for sprinkles
- 1 Foam block or cake pop stand (for drying)
Ingredients
Cake
- 15.25 oz Vanilla cake mix
- 3 eggs or as listed on box
- 1/2 cup vegetable oil or as listed on box
- 1 cup water or as listed on box
Frosting
- 1/2 cup 120g vanilla frosting
- Coating and Decoration
- 2 cups 340g white chocolate or candy melts
- A few drops gel food coloring blue, purple, etc.
- 1/4 cup 40g colorful sprinkles
- 1 tablespoon vegetable oil optional, for thinning chocolate
- 1 teaspoon edible glitter optional
Other
- 12 lollipop sticks
- Candy pieces for bottle caps optional
- Edible markers or colored icing for neck decoration
Instructions
- Bake the cake: Prepare and bake the vanilla cake according to the box instructions. Allow it to cool completely.
- Crumble the cake: Break the cooled cake into fine crumbs in a large mixing bowl.
- Mix with frosting: Add 1/2 cup of vanilla frosting and mix until a dough-like consistency forms.
- Shape the pops: Scoop 1 tablespoon of mixture and roll into a ball. Slightly shape the top to resemble a potion bottle.
- Chill: Place the shaped cake balls on a parchment-lined tray and chill in the fridge for 30 minutes.
- Melt the coating: In a microwave-safe bowl, melt 2 cups of candy melts, adding 1 tbsp oil if needed. Stir every 30 seconds until smooth.
- Insert sticks: Dip each stick tip into melted coating and insert halfway into each cake ball.
- Dip and decorate: Dip the cake pops fully into melted coating. Before the coating sets, sprinkle with 1/4 cup of colorful sprinkles and edible glitter if using.
- Dry upright: Stand the pops in a foam block or stand until completely dry.
- Decorate: Add necklines using edible markers or colored icing. Optionally, add small candies as bottle caps.
- Serve or store: Store in an airtight container at room temperature for up to 3 days or in the refrigerator for up to 7 days.
Creative Potion Bottle Cake Pops With Sprinkles Variations
I like to make my potion bottle cake pops extra fun by trying out new looks and flavors. Changing up the colors, sprinkles, and shapes always keeps things interesting.
Here are some simple ideas I use:
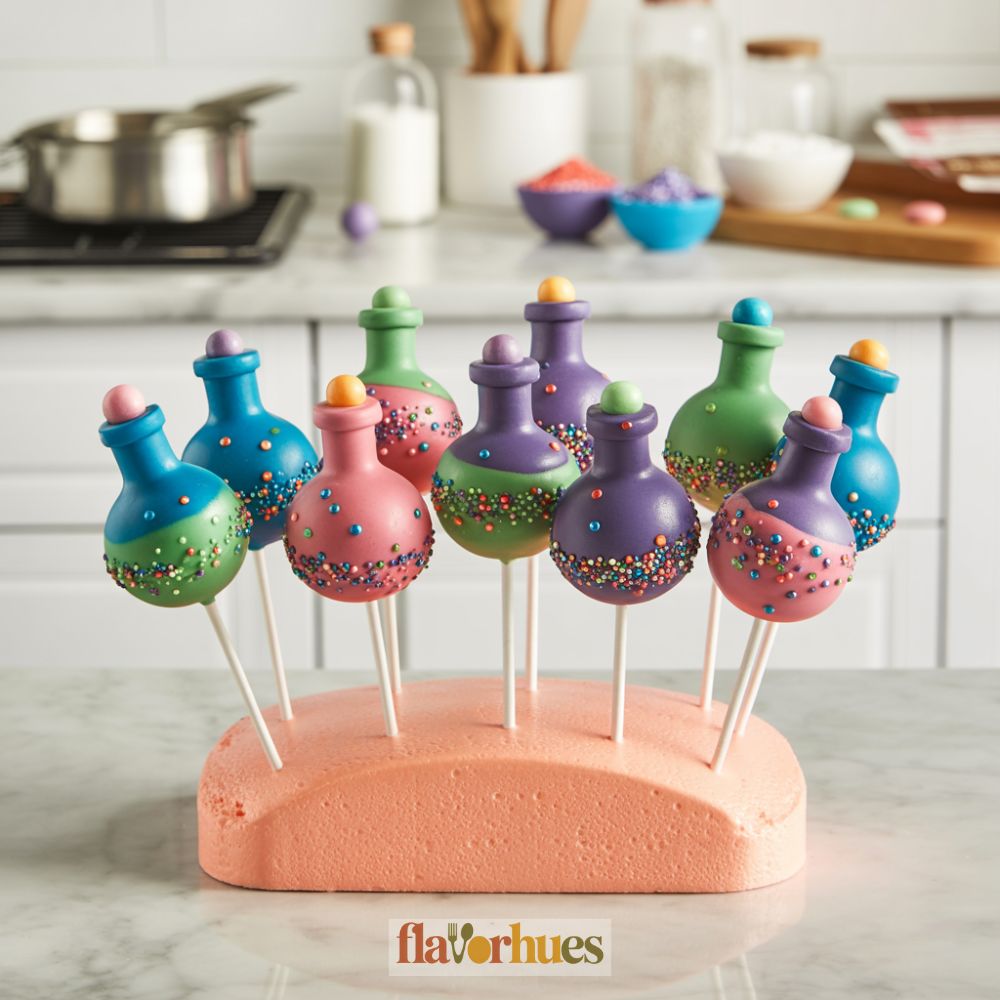
- Colorful Potions: I dip cake pops in blue, green, or purple candy melts.
- Magical Sprinkles: I add star, heart, or pearl sprinkles while the coating is still wet.
- Layered Effects: Sometimes I dip half the cake pop in one color and the other half in a different one.
- Glittery Shine: I use edible glitter, brushing it on lightly for a sparkly finish.
Here’s a table with one of my favorite potion bottle cake pop variation ingredient lists:
| Ingredient | Quantity |
|---|---|
| Baked cake | 2 cups |
| Frosting | 3 tablespoons |
| Blue candy melts | 1 cup |
| White candy melts | ½ cup |
| Purple candy melts | ½ cup |
| Star sprinkles | 2 tablespoons |
| Edible glitter | 1 teaspoon |
| Lollipop sticks | 12 |
I always try different sprinkle shapes depending on the party theme. Mixing and matching lets me create cake pops that look like real magic potions—at least, that’s the goal!
Substitute
Sometimes, I just don’t have every ingredient for potion bottle cake pops sitting around. Here are a few swaps I’ve tried that actually work pretty well.
Cake Mix Alternatives:
- 1 box of vanilla cake mix—sometimes I go with chocolate or even red velvet, depending on what’s in the pantry.
- 3 large eggs (honestly, 2 eggs plus about 1/4 cup applesauce does the trick too).
- 1/2 cup oil, but I’ll swap in melted butter or coconut oil if that’s what I’ve got.
Frosting Alternatives:
- 1/2 cup vanilla frosting (cream cheese frosting is a nice change, if you ask me).
- 1/4 cup Nutella or peanut butter—sometimes I just want to mix it up with different flavors.
Chocolate/Candy Coating:
- 1 cup white candy melts (almond bark has saved me more than once).
- 1/2 cup chocolate chips melt just as well, and give a more classic chocolate look.
Sprinkle Options:
- 3 tablespoons rainbow sprinkles—I’ll use edible glitter or colored sugar if I’m out of the usual stuff.
- Tiny confetti or pearl sprinkles add a “magic dust” vibe that’s kind of cute.
Other Helpful Swaps:
| Ingredient | Substitute |
|---|---|
| Lollipop sticks | Toothpicks or skewers |
| Edible markers | Food coloring and brush |
When I’m missing something, I’ll just glance at this list and improvise. No need to stress—makes the whole process a lot more fun, honestly.
What Can Go Wrong?
Let’s be real, sometimes my potion bottle cake pops end up looking nothing like the picture in my head. Here are a few classic problems I’ve run into:
- Cake Crumbles: If the cake’s too dry, or I skimp on frosting, the pops just fall apart. It’s annoying.
- Candy Melts Too Thick: I’ve melted candy that turns out way too gloopy, and then dipping gets messy fast.
- Sprinkles Won’t Stick: Wait too long and the coating sets, so the sprinkles just bounce right off. Oops.
| Problem | What Happens | How I Try to Fix It |
|---|---|---|
| Cake falls off stick | Pop drops in the coating | Chill cake balls longer |
| Lumpy coating | Pops look uneven or messy | Thin the candy melts |
| Crack in coating | Candy shell splits | Let pops come to room temp first |
Honestly, handling cake pops is messy work. Sometimes I push the stick in too far, and the whole thing slides off or breaks apart.
I have to watch the timing, too. If I get distracted and don’t decorate fast enough, the coating hardens, and the sprinkles refuse to stick.
Just a note to myself: they don’t have to be perfect. The best part is just making them, anyway.
Storage And Shelf Life Tips
I always want my potion bottle cake pops to stay fresh as long as possible. The trick? Store them in an airtight container.
I usually lay them out in a single layer. That way, the sprinkles don’t get all smushed together—nobody wants that.
If I’m leaving them at room temp, they’re good for about three days. I try to keep them out of the sun and away from any heat sources, just to be safe.
But if I need them to last longer, I’ll pop them in the fridge. They’ll hang in there for up to a week, which is honestly pretty convenient.
Here’s a quick little reference chart:
| Storage Method | Shelf Life |
|---|---|
| Room Temperature | Up to 3 days |
| Refrigerator | Up to 7 days |
| Freezer | Up to 1 month |
If I’m freezing them, I’ll wrap each cake pop in plastic wrap first. Then I toss them into a freezer-safe bag—seems to do the trick against freezer burn.
Tip: I always let frozen cake pops sit out and come back to room temp before serving. They taste way better that way, and the coating keeps its crunch.