Cheshire Cat Grin Cake Pops Recipe
I love making treats that bring a smile to everyone’s face. Cheshire Cat Grin Cake Pops do just that.
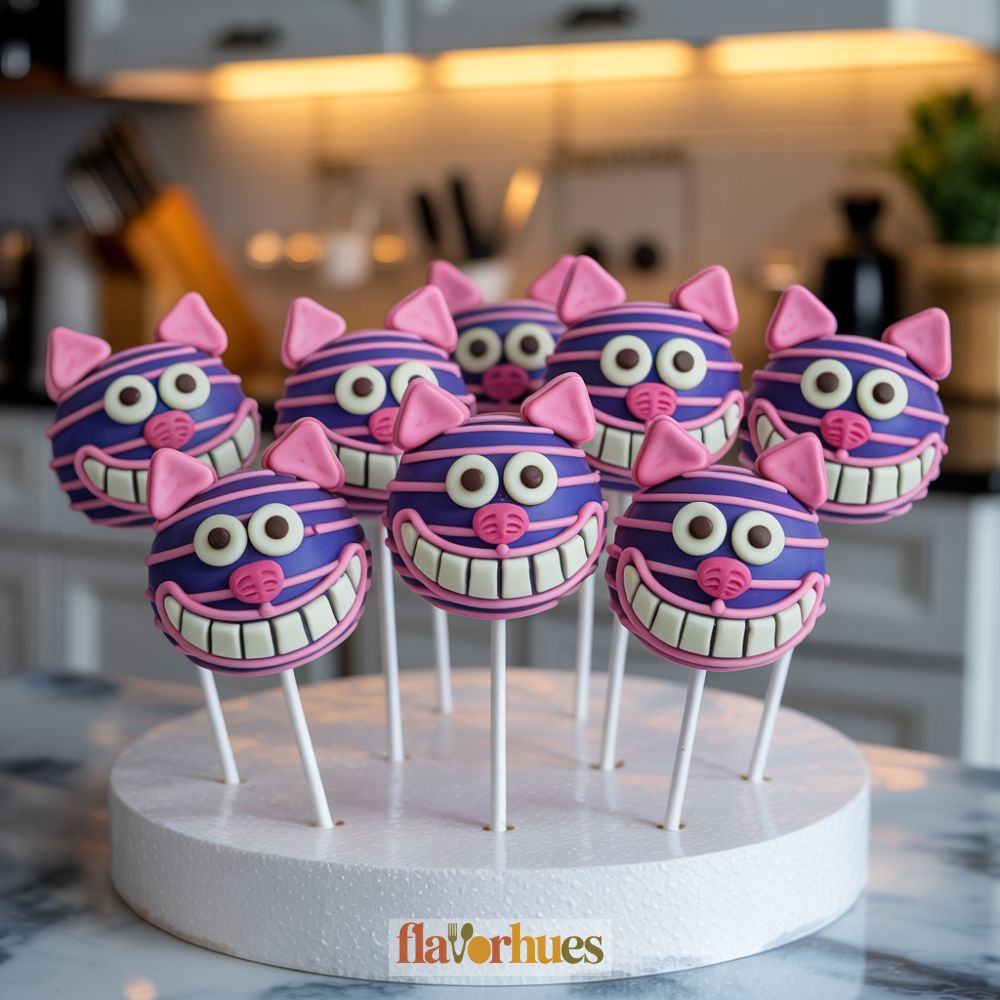
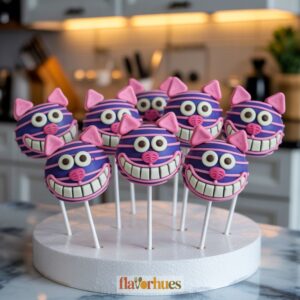
These cake pops are inspired by the mischievous cat from Alice in Wonderland and are perfect for parties, themed events, or just as a sweet surprise.
With easy steps and a simple ingredients list, anyone can whip up these colorful, grinning treats at home. The bold purple and pink colors, plus that big white smile, make them pop on any dessert table.
I can’t wait to show you how simple it is to bake, decorate, and share these playful cake pops.
Why I Love Them
Cheshire Cat Grin Cake Pops always make me smile. They look so cheerful with their big, bright grins and those fun purple stripes.
I love how simple these are to make, even though they look fancy. Making them with friends or family turns into a fun afternoon.
We always end up laughing while decorating the faces. The flavor is sweet but not too rich.
Each bite is soft and creamy inside, with a crisp shell outside. I like that I can switch up the cake flavor or colors depending on my mood.
Sharing them with others feels special. Kids and adults both get excited about those grinning faces.
Sometimes, I even let people design their own faces, which makes everyone happy. The cake pops don’t take up much space and are easy to bring to parties.
I always get asked how to make them. They’re a unique treat that stands out at any event.
Equipment
To make Cheshire Cat Grin Cake Pops, I like to keep my tools simple. Here’s what I use:
Basic Equipment:
- Mixing bowls (I use two: one for cake, one for frosting)
- Electric mixer or a whisk
- Spatula
- Baking tray
- Parchment paper
When it’s time to shape and decorate, I reach for these:
- Cookie scoop or tablespoon
- Lollipop sticks (at least 20 for a dozen pops)
- Microwave-safe bowl (for melting candy melts)
For the faces and details, I use:
- Black, white, and purple candy melts (about ½ cup each)
- Toothpicks for details
- Edible food markers (black and pink are handy)
- Piping bags, or small zip-top bags with the corner snipped
Here’s a quick table to keep track:
| Item | Estimated Amount |
|---|---|
| Lollipop sticks | 20 |
| Candy melts (each color) | ½ cup |
| Parchment paper | 1 sheet |
| Toothpicks | 5 |
| Mixing bowls | 2 |
I like to set everything out before I start. That way, I’m not searching for tools when my hands are sticky.
It helps keep the kitchen a little less chaotic and the cake pops looking their best.
Ingredients
To make Cheshire Cat Grin Cake Pops, I gather all my supplies before getting started. Here’s what I use:
| Ingredient | Amount | Notes |
|---|---|---|
| Cake | 1 box (about 15 oz) | Any flavor you like |
| Frosting | 1/2 cup | Store-bought or homemade |
| Candy melts (pink) | 12 oz | For coating the cake pops |
| Candy melts (purple) | 2-3 oz | For stripes |
| Mini chocolate chips | 1/4 cup | For eyes |
| White candy melts | 2 oz | For smiles and teeth |
| Cake pop sticks | 20 | |
| Vegetable oil | 2 tsp | To thin candy melts, if needed |
First, I bake the cake. Most box mixes need eggs, water, and oil, so I just follow the package instructions.
After cooling, I crumble the cake into a bowl and mix it with the frosting. This helps the cake stick together.
For the faces, I use chocolate chips for the eyes. I pipe on the smiles with melted white candy.
Pink and purple candy melts create that bright, striped Cheshire Cat look. Sometimes, I add a drop of oil to get a smoother coating.
With just these simple ingredients, I can put together colorful, cheerful cake pops that really nail that famous Cheshire Cat grin.
Instructions
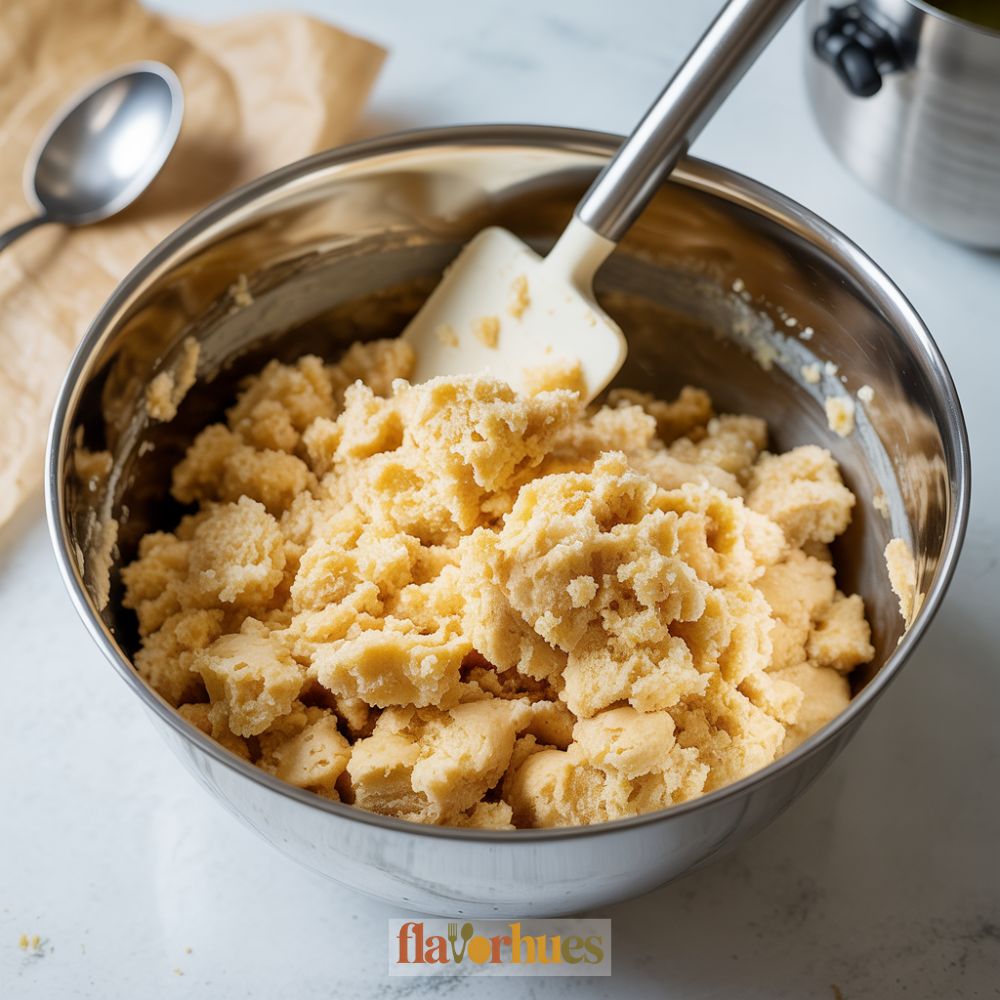
First, I crumble 1 box (about 15 oz) of vanilla cake into a large bowl. Then I mix in 1/2 cup of vanilla frosting until it feels a bit like dough.
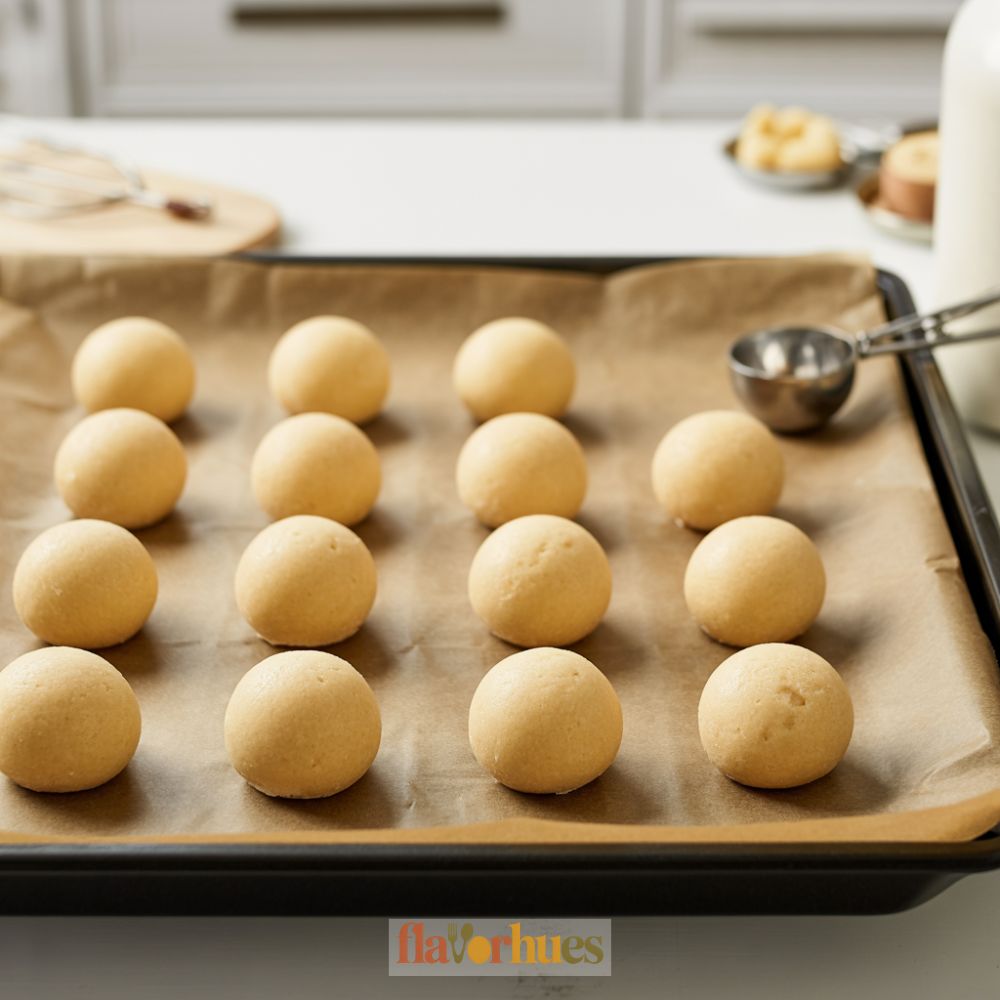
I roll the mixture into balls, about 1 tablespoon each. These go on a baking sheet lined with parchment paper.
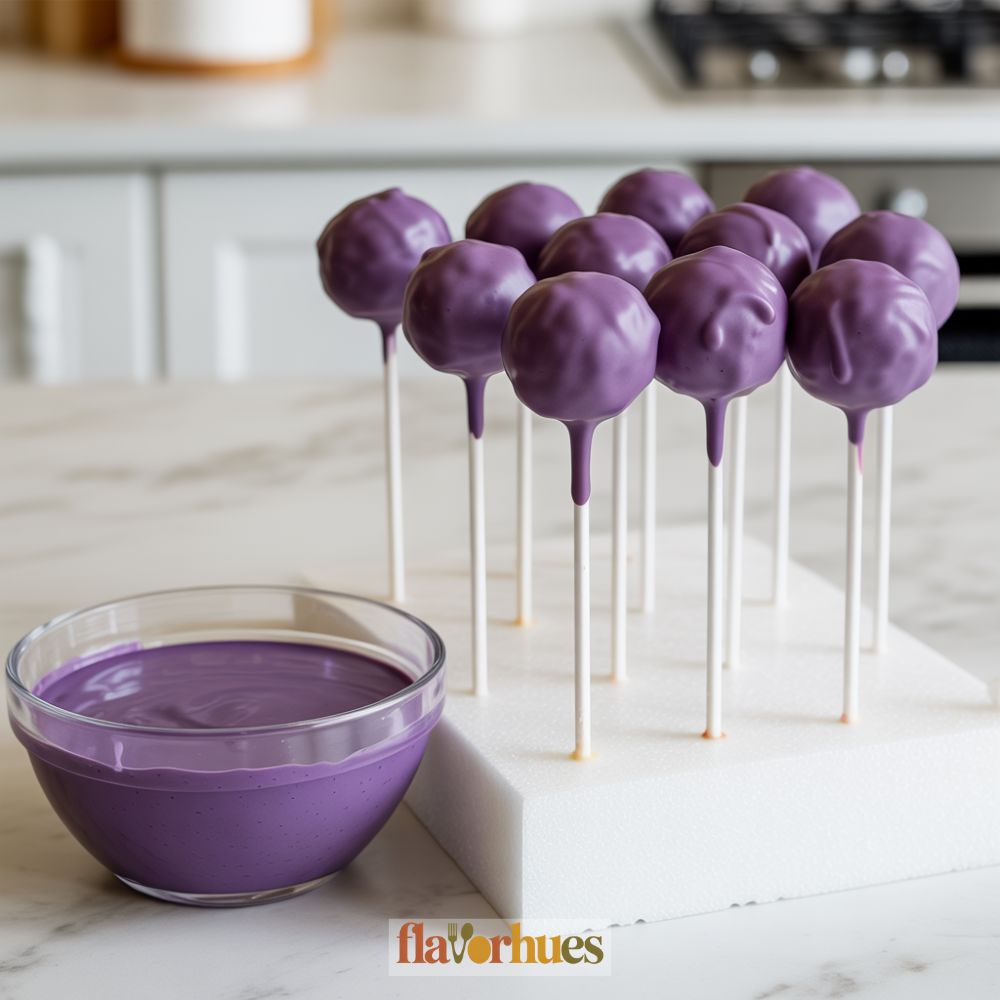
After that, I chill them in the freezer for 30 minutes. I melt 12 oz of purple candy melts in a microwave-safe bowl.
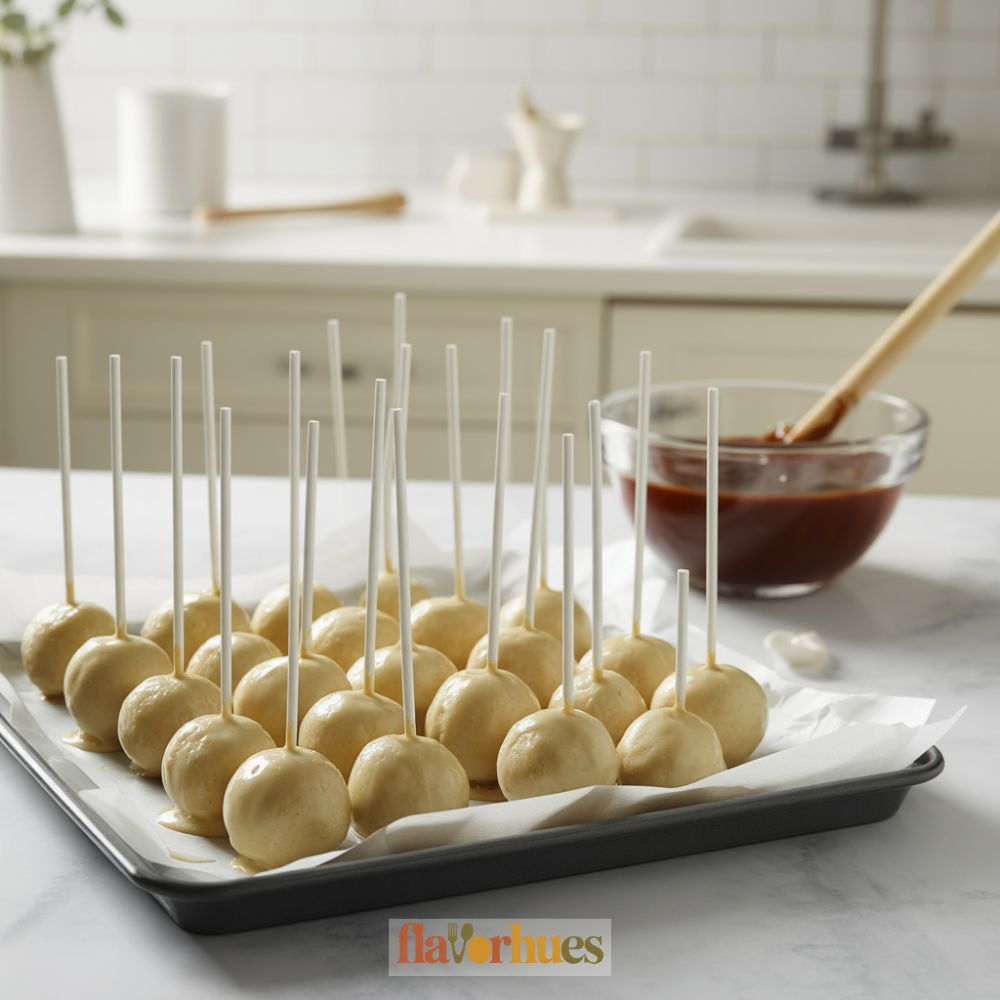
Using a lollipop stick, I dip the tip into the candy melts, then stick it into each cake ball. This helps the sticks stay in place.
Next, I dip each cake ball fully into the melted candy coating. I gently tap off any extra coating and put the pops back on the baking sheet to set.
For the cat’s wide grin, I use white candy melts. I pipe a big smile on each pop, then use a black edible marker to add teeth and some details.
Here’s a quick table for decorating:
| Decoration | How I Use It |
|---|---|
| Purple candy melts | Outer coating |
| White candy melts | Grin/mouth |
| Pink sprinkles | Nose |
| Black edible marker | Teeth/details |
I let the pops sit until the coating is firm. Then, they’re ready to serve!
Decoration Tips
Decorating Cheshire Cat Grin Cake Pops is my favorite part! I start by gathering all the ingredients and tools I need:
| Ingredient/Material | Quantity |
|---|---|
| Purple candy melts | 1 cup |
| Pink candy melts | 1/2 cup |
| Black edible marker/gel | 1 |
| White chocolate chips | 12 (for 12 pops) |
| Lollipop sticks | 12 |
| Mini pink fondant triangles | 24 (ears) |
| Toothpicks | as needed |
I melt the purple candy melts in a microwave-safe bowl, heating in 30-second bursts. I dip each cake pop into the melted candy, turning to coat evenly.
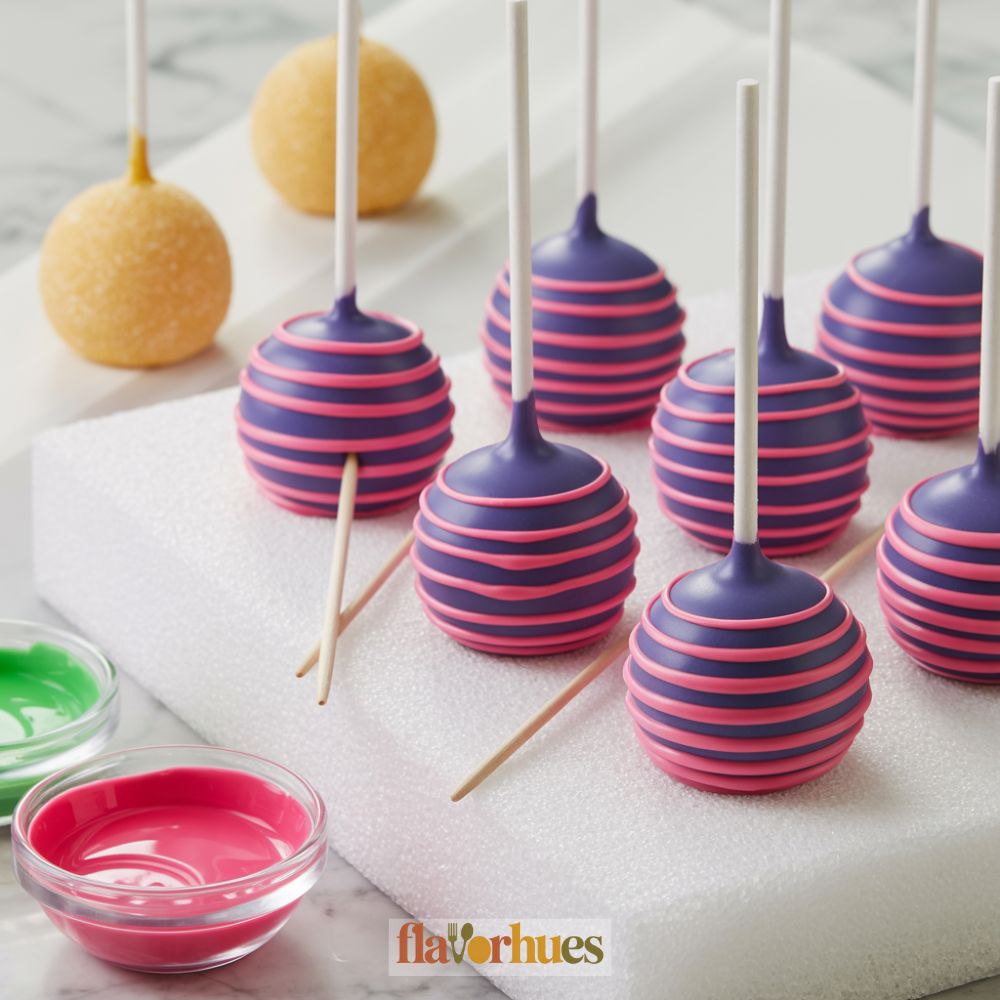
When the coating is still wet, I add pink stripes with melted pink candy melts. I use a toothpick to help with the stripes.
For the eyes, I press white chocolate chips (flat side out) near the top front. After the coating dries, I use a black edible marker to draw big pupils, the iconic grin, and whiskers on each pop.
I finish by sticking two mini pink fondant triangles on top for the cat’s ears. If needed, I use a dot of melted candy to help the ears stick.
Keeping the cake pops upright while they set helps keep them neat and lets the decorations dry smoothly.
Creative Cheshire Cat Grin Cake Pops Variations
I like to make my Cheshire Cat grin cake pops stand out with fun colors and details. Here are some ways I change things up each time:
Classic Pink and Purple Swirl
I mix 1/2 cup purple candy melts and 1/2 cup pink candy melts for a swirled effect. Before the coating sets, I use a toothpick to draw the cat’s grin with melted white chocolate.
Bright Blue Twist
Sometimes, I use 1/2 cup blue candy melts with a hint of purple for a unique look. Edible markers make it easy to draw the smile and sharp teeth.
Mini Sprinkle Faces
I add small eyes using 1/4 cup white royal icing and black gel for pupils. Then, I use just a few purple and pink sprinkles for cheeks, making each face a little different.
Fun Variations Table
| Variation | Candy Melts | Decoration |
|---|---|---|
| Classic Swirl | 1/2 cup pink + purple | White chocolate grin |
| Bright Blue | 1/2 cup blue + purple | Edible marker teeth |
| Mini Sprinkle Faces | 1/4 cup purple | Sprinkles & royal icing eyes |
I like to mix and match these ideas depending on who I’m making the cake pops for or what theme I’m in the mood for. Small changes can make every batch unique!
Substitute
Sometimes I run low on ingredients. Or maybe I just want to shake things up and try something new.
Here’s what I usually reach for as easy substitutes when I’m making Cheshire Cat Grin Cake Pops.
Cake Substitute Ideas:
- 1 box (15 ounces) vanilla cake mix instead of homemade cake
- 1 box (15 ounces) chocolate cake mix if I’m in the mood for something a little richer
Frosting Substitute Options:
| Original Ingredient | Substitute | Amount |
|---|---|---|
| 1 cup cream cheese icing | 1 cup vanilla frosting | 1 cup |
| 1 cup cream cheese icing | 1 cup chocolate frosting | 1 cup |
I’ll admit, sometimes I just grab store-bought frosting when I’m in a hurry. It saves me a bunch of time and honestly, it still tastes pretty good.
Chocolate Coating Substitutes:
- 2 cups purple candy melts → 2 cups white chocolate chips plus a few drops of purple gel food coloring
- 2 cups pink candy melts → 2 cups white chocolate chips with a little pink food coloring mixed in
If I’m out of candy melts, I just melt chocolate chips and add food coloring. A splash of oil helps keep it smooth—otherwise, it gets weirdly thick.
Stick Substitute:
No cake pop sticks? I’ll use pretzel sticks, or even snap some wooden skewers in half.
Swapping things out like this lets me make cake pops even when I’m missing an ingredient. Plus, I get to play with new flavors and colors—sometimes that’s half the fun.
What Can Go Wrong?
Making Cheshire Cat Grin Cake Pops is a blast, but honestly, things don’t always go smoothly. I’ve had my share of mishaps.
Cake Too Crumbly:
If I go overboard with the frosting—like, more than 1/3 cup for 12 cake pieces—the mix gets mushy. It’s nearly impossible to roll into neat balls at that point.
Candy Coating Issues:
Sometimes I mess up melting the candy melts (12 ounces is my usual). If I overheat them, they get all lumpy. And if the coating’s too thick, the pops just look…well, not great.
Common Problems Table
| Problem | Possible Cause | Simple Fix |
|---|---|---|
| Cake pops fall off the stick | Cake isn’t firm or stick too big | Chill pops longer or use thinner stick |
| Cracks in candy coating | Pops too cold or coating too hot | Let pops warm up a bit first |
| Grins look uneven | Used wrong piping tip | Try a small round tip (size #2 or #3) |
Face Details Smudge:
If I touch the pops before the coating dries, the violet and white details can smear. Super annoying.
Storing them? That’s another thing. If I stack the pops before they’re set, they might stick together or get a little squished.
I try to double-check my ingredients before starting, just in case:
- 12 regular-sized baked cake pieces (about 1-inch each)
- 1/3 cup cream cheese frosting
- 12 ounces purple candy melts
- 48 mini chocolate chips (for eyes and nose)
- Food-safe black and white decorating gel
Storage And Shelf Life Tips
I always make sure my Cheshire Cat Grin Cake Pops are cooled all the way before I store them. If they’re even a little warm, condensation sneaks in and makes the coating annoyingly sticky.
I usually go for an airtight container. I’ll line the bottom with wax paper so they don’t end up glued together.
Here’s a simple storage guide:
| Storage Area | Shelf Life | Tips |
|---|---|---|
| Room Temperature | 2-3 days | Keep away from heat and sun |
| Refrigerator | Up to 1 week | Cover well to prevent drying |
| Freezer | Up to 1 month | Wrap each pop in plastic wrap |
When I freeze my cake pops, I wrap each one in plastic wrap. Then I toss them in a zip-top bag—keeps them fresher and their faces intact.
To thaw, I move them to the fridge first. After that, I let them come to room temp on the counter.
I never use the microwave for thawing; it just melts the coating and ruins the look. If I spot cracks in the coating after freezing, I let them sit at room temperature for 10-15 minutes, and usually, they smooth out on their own.
I also try not to store my cake pops next to foods with strong smells. Cake’s like a sponge for odors, and nobody wants garlic-scented sweets, right?
Equipment
- electric mixer or whisk
- Piping bags or zip-top bags (with corner snipped)
- Edible food markers (black and pink)
- Small scissors (to snip bag corners)
Ingredients
- 15 oz cake mix (any flavor, prepared as directed)
- 1/2 cup frosting store-bought or homemade
- 12 oz pink candy melts for full coating
- 2 oz purple candy melts for stripes
- 2 oz white candy melts for grins and teeth
- 1/4 cup mini chocolate chips for eyes
- 2 tsp vegetable oil to thin melts if needed
- 20 Pieces cake pop sticks
Instructions
- Prepare cake according to box instructions. Let cool completely.
- Crumble cooled cake into a bowl. Mix with 1/2 cup frosting until the mixture is dough-like.
- Roll into 1-tablespoon-sized balls. Place on parchment-lined baking tray. Chill in freezer for 30 minutes.
- Melt a small amount of pink candy melts. Dip stick tips into the melted candy, then insert into each cake ball. Let set for 5 minutes.
- Melt 12 oz pink candy melts in a microwave-safe bowl (30-second intervals, stirring between). Dip each cake pop, gently tapping off excess.
- Melt purple candy melts. Using a piping bag or zip-top bag, pipe stripes while the pink coating is still wet. Use a toothpick to refine.
- Add mini chocolate chips as eyes before coating hardens. Pipe melted white candy melts for grins. Let dry fully.
- Use black edible marker to draw pupils, teeth, and whiskers. Optional: Attach pink fondant triangles or pipe ears with leftover melts.
- Stand pops upright until fully hardened. Store in airtight container.