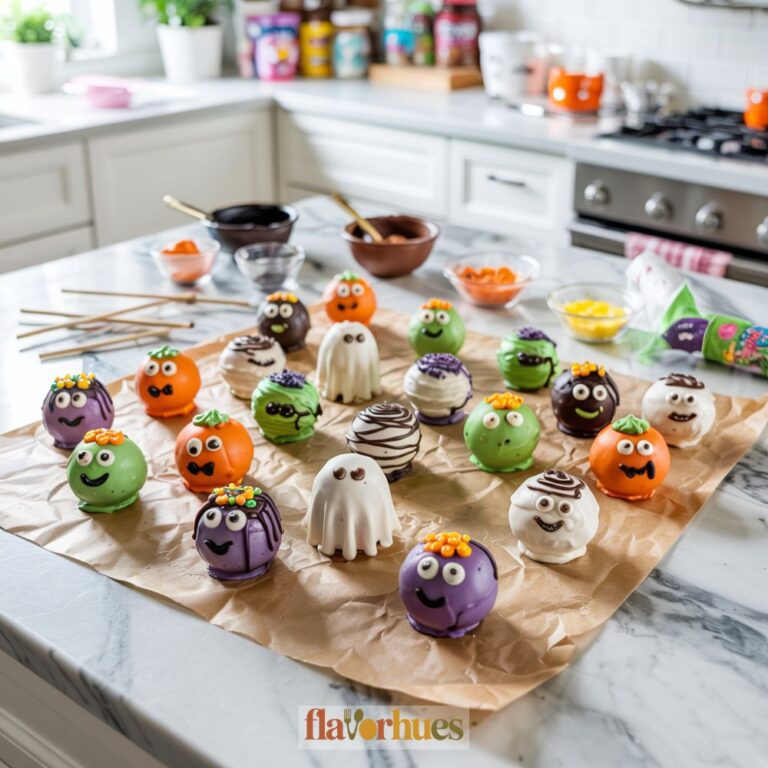
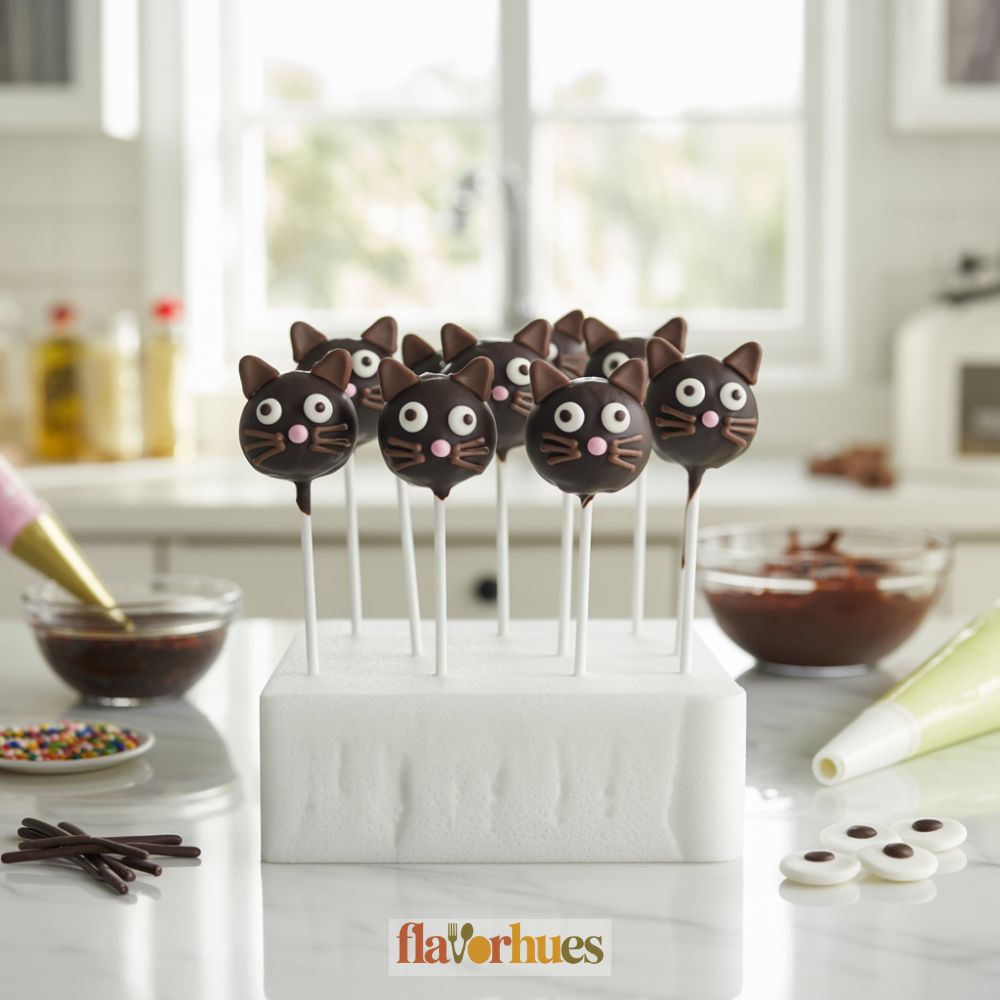
Black Cat Cake Pops Recipe
I love making treats that are both cute and tasty. Black Cat Cake Pops are honestly one of my favorites.
These fun cake pops are perfect for Halloween, parties, or any cat lover who likes sweet snacks.
I can show you exactly how to make Black Cat Cake Pops step by step, so you’ll get great results even if it’s your first try.
With soft cake, creamy frosting, and chocolate decorations, these treats always catch people’s attention.
My easy recipe lists the exact ingredients and gives clear, simple directions for shaping, dipping, and decorating your own adorable black cat cake pops.

Why I Love Them
I love making black cat cake pops because they’re a fun mix of baking and decorating.
Every time I finish a batch, I feel proud of the cute faces I create with simple ingredients.
They’re perfect for parties because everyone smiles when they see them. The dark chocolate coating and bright candy eyes catch people’s attention right away.
It’s fun to see both kids and adults enjoy eating them. Making them is a creative process.
I get to use my imagination for the cat faces and whiskers. When I share them, people ask how I made them, so I love giving tips and showing off my work.
Here’s why they’re so special to me:
| Reason | Details |
|---|---|
| Fun to decorate | I get to pick candy eyes, ears, and whiskers. |
| Easy to eat | Cake pops are the right size for a treat. |
| Great for sharing | Friends and family always want one. |
Some days, I use different flavors for the cake inside, like classic vanilla or rich chocolate. No matter what, they always look adorable as little black cats.
I also enjoy gathering all my supplies and setting up my workspace. Using sprinkles, melted candy, and tiny candies makes the decorating easy and fun.
It’s a great way for me to relax and be creative.
Equipment
When I make Black Cat Cake Pops, I always set out my tools first. Keeping everything ready helps me stay organized.
Here’s a list of the main equipment I use:
- Mixing bowls (at least 2)
- Hand mixer or spoon
- Measuring cups and spoons
- Baking sheet
- Parchment paper
- Lollipop sticks (20 sticks for 20 pops)
- Microwave-safe bowls for melting chocolate
- Toothpicks
- Cooling rack
I also like to gather my decorations before starting. This might include mini candy pieces for cat ears, edible gel for whiskers, and candy eyes.
I find this equipment makes creating and decorating the Black Cat Cake Pops much easier and more fun.
Ingredients
To make my Black Cat Cake Pops, I use simple, easy-to-find ingredients. Here’s a table to help keep things organized:
| Ingredient | Quantity |
|---|---|
| Chocolate cake (baked) | 2 cups, crumbled |
| Frosting (chocolate or vanilla) | 1/3 cup |
| Dark chocolate candy melts | 1 ½ cups |
| Mini chocolate chips | 20 |
| Candy eyes | 20 |
| Black licorice laces | 5, cut into 40 small pieces |
| Lollipop sticks | 20 |
| Pink heart sprinkles | 20 |
First, I make sure my cake is baked and cooled. Then I crumble the cake into a bowl.
I mix in the frosting until the texture feels like playdough. The amount may vary, but I usually need about 1/3 cup.
For coating, I use dark chocolate candy melts. I melt these in the microwave in 30-second bursts.
The decorations are fun and easy. I use mini chocolate chips for ears, candy eyes for the face, pink heart sprinkles for the nose, and small licorice pieces for whiskers.
This mix makes about 20 cake pops. If I want to make more, I just double the recipe.
Lollipop sticks hold everything together and make the cake pops easy to eat. All my ingredients are ready before I start, so I don’t have to stop in the middle.
Instructions
Step 1:
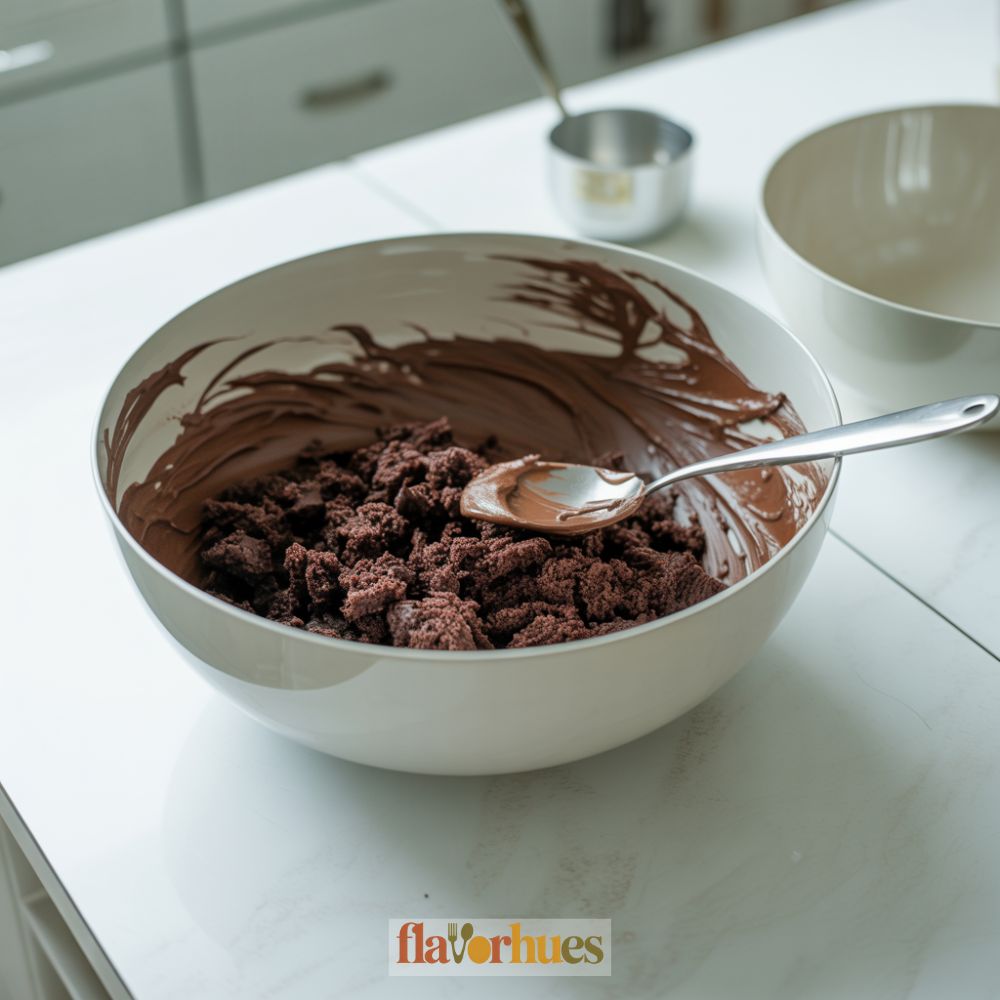
I crumble the chocolate cake into a big bowl until it looks like wet sand. Next, I mix in the frosting with my hands until the texture feels like playdough.
Step 2:
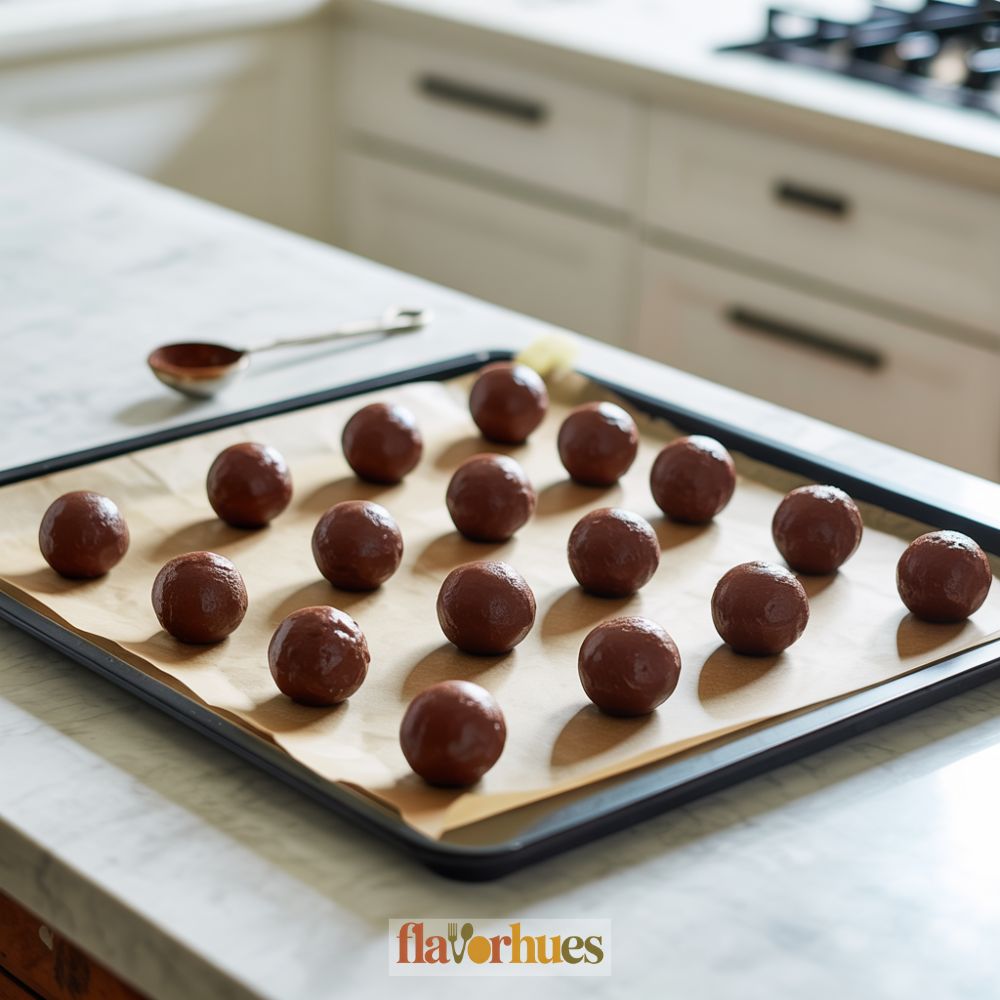
I scoop out some of the mixture and roll it into 20 even balls. Each ball should be about the size of a ping pong ball.
Step 3:
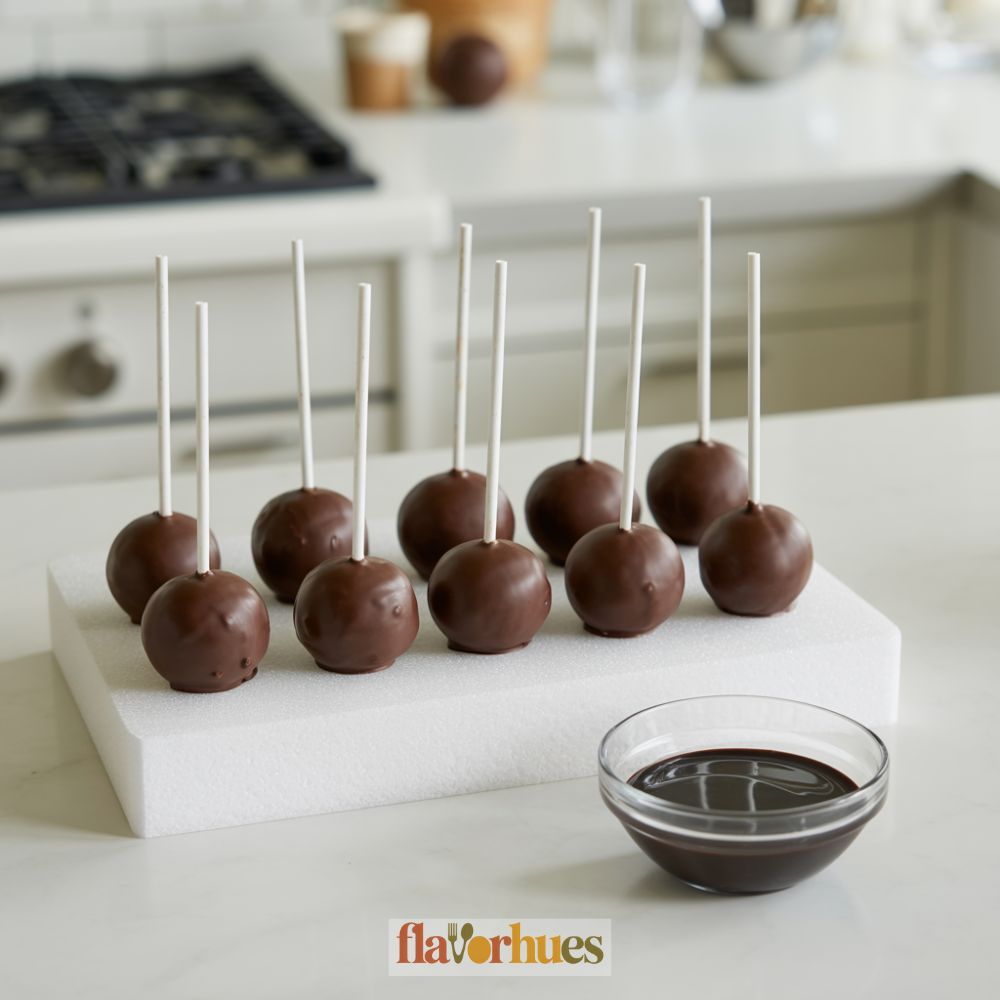
I melt the black candy melts according to the package directions. I dip a lollipop stick into the melted candy, then push it halfway into a cake ball.
I repeat this for each pop.
Step 4:
I dip each cake pop into the melted black candy. I tap off any extra coating and stick the pops into a styrofoam block to set.
Step 5:
While the coating is still soft, I press two mini chocolate chips into each pop for the cat’s ears. Once the coating sets, I attach white candy melt circles for the eyes, using some melted candy as glue.
Step 6:
With an edible black marker, I draw pupils on the eyes. I add a pink sprinkle for the nose.
I use tiny sprinkles or jimmies for the whiskers. Decorating each pop takes a few extra minutes, but it’s the fun part!
Decoration Tips
When I decorate my black cat cake pops, I like to gather all my ingredients first. Here’s what I use and how much I need:
| Ingredient | Quantity |
|---|---|
| Black candy melts | 1 cup |
| White candy melts | 1/4 cup |
| Mini chocolate chips | 24 pieces |
| Pink heart sprinkles | 20 pieces |
| Lollipop sticks | 20 pieces |
| Sprinkles (optional) | as needed |
First, I melt the black candy melts in a microwave-safe bowl. I dip each cake pop into the melted coating, making sure it is covered evenly.
While the candy is still wet, I stick two mini chocolate chips on top for ears. I use a toothpick dipped in the white candy melts to draw small eyes.
To make cute noses, I press one pink heart sprinkle just below the eyes. If I want extra decoration, I add a few tiny white dots or sprinkles around the face.
Letting the cake pops dry completely on a stand or foam block helps keep the faces neat. I always make sure the details face forward while drying.
It makes the cats look friendly and fun!
Creative Black Cat Cake Pops Variations
I like to try new ideas when making black cat cake pops. For fun twists, I sometimes add colorful candy bows, different shaped eyes, or whiskers.
Here are a few ways I make my pops unique:
1. Marshmallow Ears
Instead of chocolate chips, I use mini marshmallows cut in half for soft, rounded ears.
2. Candy Bow Ties
I stick on a small bow shape made from red fondant or a gummy candy for a playful touch.
3. Edible Glitter
A sprinkle of edible glitter adds sparkle to the black candy coating and makes the pops look special.
Here’s a quick table with a basic recipe and some change-ups:
| Ingredient | Alternate Ideas |
|---|---|
| Chocolate cake | Red velvet or vanilla cake |
| Frosting | Cream cheese frosting |
| Black candy melts | Dark chocolate or purple melts |
| Lollipop sticks | Paper straws |
| Mini chocolate chips | Marshmallows cut in half |
| Candy eyes | Gel icing dots |
| Licorice strings | Thin pretzel sticks |
| Pink sprinkle hearts | Pink gel dots |
Steps I follow:
- I mix cake crumbs and frosting, then shape into balls.
- I attach sticks and freeze the balls for 15 minutes.
- I dip each ball in melted black candy then add ears, eyes, and details before the coating sets.
- I let them dry upright in a styrofoam block.
These little touches help me make each batch of black cat cake pops just a bit different and fun.

Equipment
- – Mixing bowls (at least 2)
- Hand mixer or spoon
- – Microwave-safe bowls (for melting candy)
- Cooling rack or styrofoam block
- Edible black marker (for drawing eyes)
Ingredients
- 2 cups chocolate cake crumbled (from a baked and cooled cake)
- 1/3 cup chocolate or vanilla frosting
- 1 ½ cups dark chocolate candy melts
- 20 mini chocolate chips for ears
- 20 candy eyes
- 5 black licorice laces cut into 40 small whiskers
- 20 lollipop sticks
- 20 pink heart sprinkles for noses
Optional Decoration Ingredients:
- 1 cup black candy melts for coating
- 1/4 cup white candy melts for eyes
- Sprinkles or jimmies optional, as needed
Instructions
- Crumble the chocolate cake into a large mixing bowl until it resembles fine crumbs. Add frosting and mix with your hands until the mixture holds together like playdough.
- Roll the mixture into 20 evenly sized balls, each about the size of a ping pong ball. Place them on a parchment-lined tray.
- Melt a small amount of black candy melts. Dip each lollipop stick into the melted candy, then insert halfway into each cake ball. This helps the stick stay in place.
- Place the tray in the fridge for 15–30 minutes to firm up the cake balls before dipping.
- Melt the remaining black candy melts in a microwave-safe bowl, stirring every 30 seconds until smooth. Dip each cake pop into the melted coating and gently tap off excess.
- While the coating is still wet, press two mini chocolate chips onto the top of each pop to form ears.
- After the coating sets slightly, use melted white candy melts and a toothpick to place small dots for the eyes. Stick on candy eyes and add a pink heart sprinkle as a nose.
- Use an edible black marker to draw pupils on the eyes. Insert two small black licorice pieces on each side for whiskers.
- Stand the finished cake pops upright in a styrofoam block or cake pop stand and let them set completely.
- Once fully set, your Black Cat Cake Pops are ready to serve. Store them in a cool place or refrigerate until needed.
Substitute
Sometimes, I run out of ingredients or just want to make these cake pops a bit different. I like having choices—it keeps things interesting.
If you want to switch things up, here are a few easy substitutes for the basics.
Cake Mix Substitute
| Original Ingredient | Substitute | Quantity |
|---|---|---|
| 1 box chocolate cake mix (425g) | 1 box vanilla cake mix (425g) | 1:1 |
| 1 box chocolate cake mix | 425g homemade chocolate cake | 1:1 |
Frosting Substitute
Depending on what I’ve got at home, I can use different frostings.
- 1 cup chocolate frosting
- Or swap for 1 cup vanilla frosting
- Or try 1 cup cream cheese frosting
Candy Melts Substitute
When I don’t have black candy melts, I usually improvise:
- 1 cup dark chocolate chips with 1 tsp black food coloring
- Or 1 cup white chocolate + black gel food coloring
Decorations Substitute
I like to get creative with the decorations for faces and ears.
- Mini chocolate chips or black jelly beans for ears (about 18 pieces for 18 pops)
- White sprinkles or small candy eyes (18 pieces)
- Pink heart sprinkles or cut marshmallows for noses (18 pieces)
Baking Instructions with Substitutes
- Bake the cake as usual, using your chosen cake mix.
- After it cools, crumble it up and mix in your favorite frosting from above.
- Roll into 18 balls and dip in your candy melt substitute.
- Decorate with whichever candy combos you picked.
What Can Go Wrong?
Sometimes, things don’t go as planned when I make Black Cat Cake Pops. Here are a few problems I’ve run into:
Cake Pop Cracks
If I use too much frosting in my cake mix (more than 3 tablespoons of frosting for every 2 cups of crumbled cake), the pops get too moist. Then, after dipping, the coating cracks as it dries. Annoying, right?
Candy Melt Trouble
Melting the candy coating too fast or overheating it can cause lumps. When the candy’s not smooth, I find it tough to dip the cake pops evenly.
| Problem | What I Did |
|---|---|
| Coating too thick | Didn’t stir enough while melting |
| Sticks fall out | Didn’t dip stick in melt first |
Cake Falling Apart
Sometimes, I use too little frosting, like only 1 tablespoon for all the cake. Then the pops don’t hold together and just crumble while shaping. Frustrating!
Decorations Sliding Off
If the coating is too hot, my decorations like sprinkle eyes and whiskers slide right off before they can set. It’s a bit of a mess.
Serving And Displaying
I like to serve black cat cake pops in a way that makes them stand out. Usually, I grab a clean white plate or a cake pop stand, so the black color really pops.
For a party, I’ll arrange them in a circle or in rows. Sometimes, I stick the cake pops in a decorated foam block covered with black or purple tissue paper—just depends on my mood.
When it’s a Halloween party, I toss in a few decorations around the display. Small plastic spiders or fake cobwebs make the setup look festive and fun, at least I think so.
Here are a few tips I follow for serving:
- Keep cake pops chilled until just before serving to help them hold their shape.
- I space each pop apart so guests can pick them up easily.
- If I use a cake pop stand, I line it with parchment paper or a pretty napkin for a clean look.
When I need to transport them, I put each cake pop in a plastic treat bag and tie it with a ribbon. It helps them stay fresh and look cute as favors.
Table: Display Materials I Use
| Material | Purpose |
|---|---|
| White plate | Simple, lets colors stand out |
| Foam block | Holds pops upright for nice display |
| Tissue paper | Adds color and covers foam block |
| Cake pop stand | Keeps pops stable and easy to serve |
I try to match my display colors to the party theme. It helps the black cat cake pops become a real centerpiece, or at least a conversation starter, at any gathering.
Storage And Shelf Life Tips
I like to keep my black cat cake pops fresh by storing them in an airtight container. A piece of parchment paper goes between the layers so they don’t stick together—learned that one the hard way.
Room Temperature:
Cake pops can stay fresh for up to 3 days at room temperature. I always keep them away from heat and sunlight—no one likes a melted cat face.
Refrigerator:
If I want them to last longer, I wrap each pop in plastic wrap and pop them in the fridge. They’ll hang in there for about 5 to 7 days.
Freezer:
For even longer storage, I freeze them. Each cake pop gets wrapped tight in plastic wrap, then tossed in a freezer bag. Frozen cake pops will keep for up to 1 month.
When I’m ready to eat, I let them sit at room temperature for about an hour. Patience is a virtue, right?
Here’s a quick reference table:
| Storage Method | Shelf Life | Extra Steps Needed |
|---|---|---|
| Room Temperature | Up to 3 days | Airtight container |
| Refrigerator | 5-7 days | Wrap in plastic wrap |
| Freezer | Up to 1 month | Wrap + freezer bag |
Tip: I always avoid putting the cake pops in a humid place. Moisture just ruins that nice chocolate shell—trust me.
If my cake pops have cream cheese frosting, I keep them in the fridge at all times. No exceptions.
When thawing frozen cake pops, I make sure not to open the bag until they reach room temperature. That way, condensation stays off the chocolate.