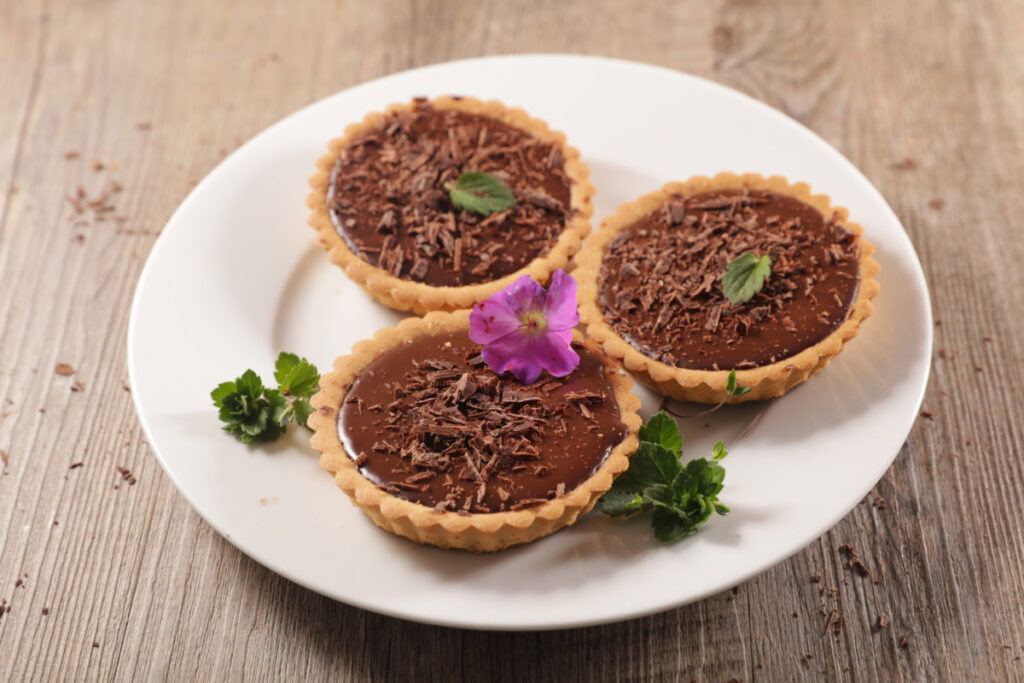
Mini Chocolate Tarts Recipe
Mini chocolate tarts are these little bite-sized desserts with a crisp pastry shell and a smooth, chocolatey ganache inside. I really like making them—they look kind of fancy, but honestly, they’re not as tricky as they seem.
They’re great for parties, special dinners, or just when you want a sweet treat that’s a bit more fun than your average cookie.
These mini tartlets use simple ingredients like chocolate, cream, and butter to make a rich ganache filling that tastes like something you’d find in a French bakery. You can make them ahead, which is a lifesaver if you’re having people over.
Once you try these, you might catch yourself making them again and again, just because they’re that good.
I’ll walk you through everything you need to pull off chocolate ganache tarts at home. From picking the right equipment to getting that shiny ganache top, this mini chocolate tarts recipe will have you making little restaurant-style desserts in your own kitchen.
Equipment
Making mini chocolate tarts doesn’t require a ton of gadgets. I’ve listed what I use to make these treats at home.
Essential Items:
- Mini tart pans – I use 3 to 4-inch pans with removable bottoms for easy release
- Mixing bowls in a few sizes
- Rolling pin for the dough
- Baking weights or dried beans to blind bake the crusts
- Parchment paper or foil
- Whisk for mixing the filling
- Spatula for scraping and spreading
Optional but Helpful:
- Food processor for quick dough
- Pastry brush for egg wash
- Cooling rack
- Piping bag if you want to get fancy with toppings
The mini tart pans are pretty important here. I really like the ones with removable bottoms—makes it way easier to get the tarts out without breaking them.
For baking weights, you can use ceramic pie weights or just grab some dried beans. They help keep the shells from puffing up while baking. I always line the shells with parchment before adding the weights.
If you don’t have mini tart pans, a muffin tin works too. The shape will be a bit different, but still tasty. Just make sure your pans are clean and lightly greased before adding the dough.
Ingredients
Here’s my go-to list for making mini chocolate tarts. You only need a handful of good ingredients to pull these off.
For the Tart Shells:
- 1 ¼ cups all-purpose flour
- ⅓ cup unsweetened cocoa powder
- ½ cup unsalted butter (cold, cubed)
- ¼ cup granulated sugar
- 1 large egg yolk
- 2-3 tablespoons ice water
For the Chocolate Ganache Filling:
- 8 ounces dark chocolate (I go for 70% dark chocolate or bittersweet)
- 1 cup whipping cream
- 2 tablespoons unsalted butter
- Pinch of salt
Optional Toppings:
- Whipped cream topping
- Chocolate curls
- Fresh berries
- Gold leaf
I recommend using dark cooking chocolate or semi-sweet chocolate for the ganache. The chocolate quality really matters for that super smooth ganache.
The chocolate shortcrust pastry (sometimes called pâte sablée) gives you those crisp tartlet shells. You can make the crust from scratch or grab store-bought tart shells if you’re short on time.
For the best results, stick with cooking/baking chocolate instead of regular candy bars. I think 70% dark chocolate makes the ganache rich without being too intense. But hey, you can adjust the percentage depending on what you like.
Make sure your butter is cold when you’re making the pastry. Cold butter gives you that flaky, tender crust that holds up to the filling.
Instructions
I start by preheating the oven to 350°F. While it’s heating, I grease each mini tart pan with a little butter or spray.
For blind baking, I press the dough firmly into each tart pan, making sure to get up the sides. I prick the bottoms with a fork to keep them from bubbling.
Then I put the pans on a baking sheet and bake for about 10-12 minutes, just until the edges look lightly golden.
- Press dough into greased mini tart pans
- Prick bottoms with a fork
- Bake at 350°F for 10-12 minutes
- Let cool completely
While the crusts cool off, I make the chocolate filling. I heat the cream in a small saucepan over medium, just until it starts to simmer.
Then I pour the hot cream over chopped chocolate in a bowl and let it sit for a couple minutes.
- Heat cream until it simmers
- Pour over chopped chocolate
- Wait 2 minutes
- Stir until smooth and glossy
I stir gently until the chocolate is melted and everything is smooth. This is your rich ganache filling.
Once the tart shells are cool, I spoon in the ganache, filling them almost to the top. I pop them in the fridge for at least 2 hours so the filling sets up nice and firm.
Right before serving, I add toppings—fresh berries, whipped cream, maybe a dusting of cocoa powder if I’m feeling fancy.
Notes
Room temperature ingredients really help your tarts turn out better. I usually take my butter and eggs out of the fridge about half an hour before I start. It just makes mixing easier and the pastry comes out nicer.
You can make the tart shells up to two days before you need them. I keep them in an airtight container at room temp until I’m ready to fill. The chocolate filling can also be made a day ahead—just cover and refrigerate.
A pinch of flaky salt on top of each tart is so good. I sprinkle it on right before serving for the best flavor and a little crunch. Table salt won’t give you the same vibe, so go for the flaky stuff if you can.
These tarts work with different chocolates. I’ve tried dark chocolate from 60% to 70% cocoa and it’s always good. If you want them sweeter, milk chocolate is an option.
The tarts keep in the fridge for up to three days. I let them sit out for about 10 minutes before serving so the ganache softens a little. You can freeze the unfilled shells for up to a month, which is handy for last-minute desserts.
Don’t skip the blind baking step for the tart shells. It keeps them crisp and avoids soggy bottoms. I use pie weights or dried beans to weigh down the pastry while it bakes.
Equipment
- Mini tart pans (3–4 inch) with removable bottoms
- Mixing bowls
- Rolling Pin
- Measuring cups and spoons
- Whisk
- rubber spatula
- Parchment paper or foil
- Baking weights or dried beans
- Baking sheet
- Small saucepan
- Cooling rack
Ingredients
- 1 1/4 cups all-purpose flour for the tart shells
- 1/3 cup unsweetened cocoa powder for the tart shells
- 1/2 cup unsalted butter cold, cubed
- 1/4 cup granulated sugar
- 1 large egg yolk
- 2–3 tbsp ice water add as needed
- 8 oz dark chocolate 70% or bittersweet, chopped
- 1 cup whipping cream
- 2 tbsp unsalted butter for ganache
- 1 pinch salt
- fresh berries optional topping
- whipped cream optional topping
- chocolate curls optional topping
- flaky sea salt optional topping
Instructions
- Preheat the oven to 350°F (175°C). Lightly grease mini tart pans and place them on a baking sheet.
- Make the cocoa dough: In a bowl, whisk flour, cocoa powder, and sugar. Cut in the cold butter until the mixture resembles coarse crumbs. Mix in the egg yolk, then add ice water 1 tablespoon at a time until the dough just comes together.
- Chill the dough for 15 minutes (helps prevent shrinking). Roll out on a lightly floured surface to about 1/8-inch thick.
- Press dough into the mini tart pans, making sure to cover the bottom and sides evenly. Trim excess and prick the bottoms with a fork.
- Blind bake: Line each shell with parchment/foil and fill with baking weights or dried beans. Bake 10–12 minutes, until the edges look set. Remove weights and liner; bake 2 more minutes if the base looks wet. Cool completely.
- Make ganache: Heat the cream in a small saucepan over medium heat until it just begins to simmer (do not boil). Pour hot cream over the chopped chocolate in a bowl. Let sit 2 minutes, then whisk until smooth and glossy. Whisk in butter and a pinch of salt.
- Fill: Spoon or pour ganache into cooled tart shells, filling almost to the top. Tap gently to level.
- Chill: Refrigerate tarts until fully set, at least 2 hours.
- Serve: Let tarts sit at room temperature for about 10 minutes before serving. Top with berries, whipped cream, chocolate curls, or a pinch of flaky salt if desired.
Notes
Nutrition
Tasting Notes
When I take a bite of these mini chocolate tarts, that buttery crust just sort of crumbles in my mouth. The pastry shell feels light and flaky—almost melts away before you know it.
The chocolate filling is smooth and full of flavor, but it’s not too much. I get a deep cocoa taste, with just enough sweetness to keep things interesting.
That creamy filling has a silky feel, honestly, it’s pretty satisfying. The combo of that crisp shell and soft ganache center really works.
The chocolate layer is thick enough to scratch that chocolate itch, but it doesn’t drown out the pastry. I’ve noticed these taste best when they’re a bit cool—definitely not straight from the fridge, though.
At that slightly cool temp, the chocolate stays firm but still has this velvety thing going on. The crust keeps its crunch, which I actually love.
The flavor kind of reminds me of a fancy chocolate truffle mixed with a good shortbread cookie. Every little tart packs a lot of chocolate into just a few bites.
I don’t find them too sweet, which is a relief—just the right amount for dessert. They’re so good with coffee or a cold glass of milk, and sometimes I’ll throw some fresh berries on the plate for a little tartness.
Honestly, these make a nice finish to dinner, but I’d be lying if I said I haven’t grabbed one as an afternoon snack.