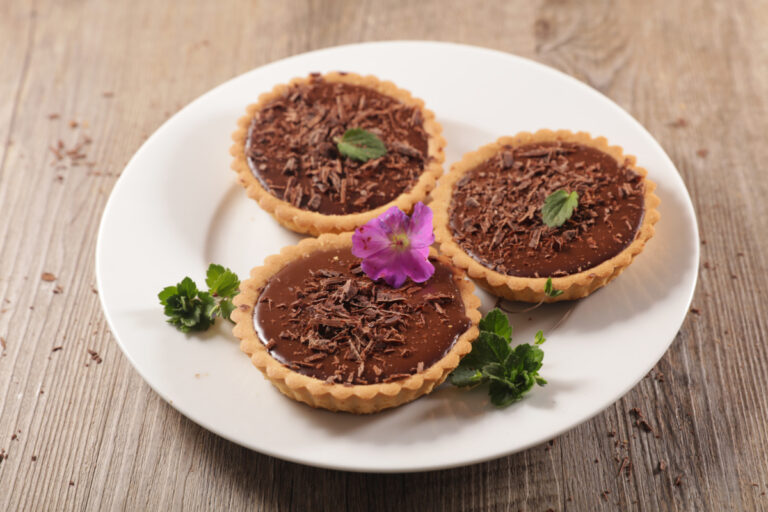
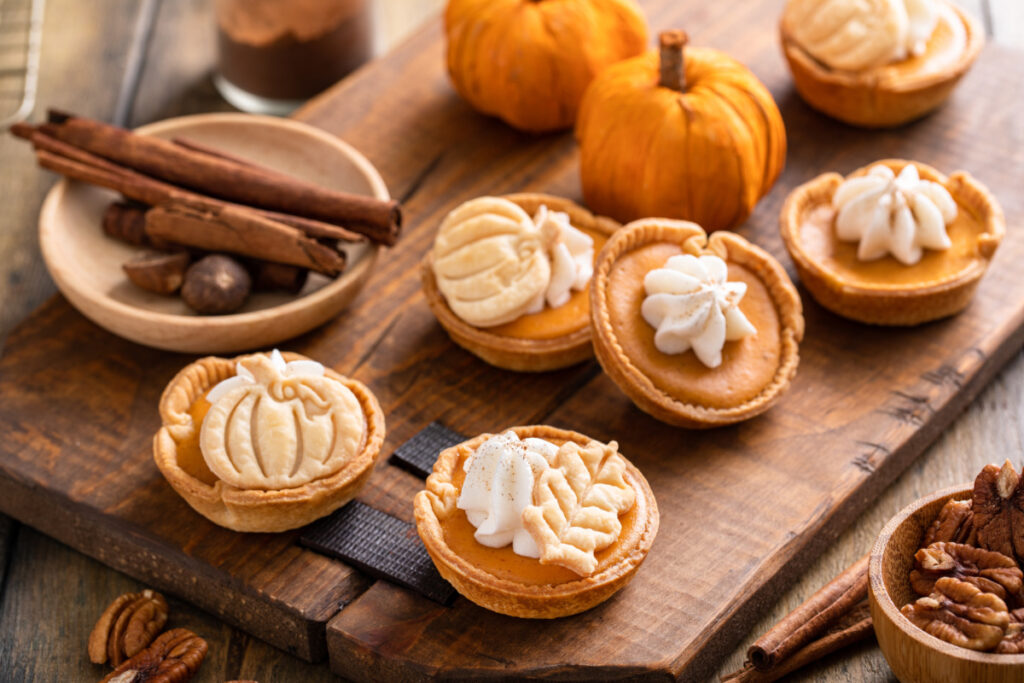
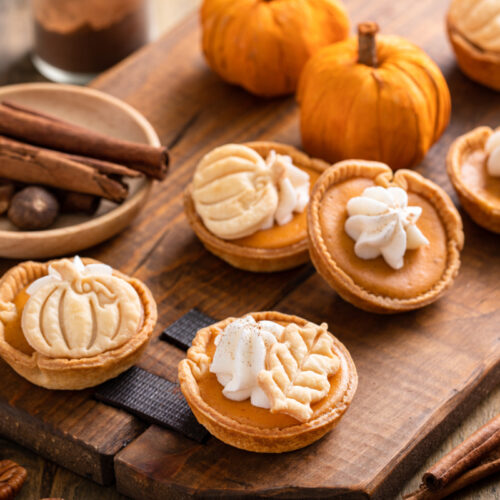
Mini Pumpkin Pie Tarts Recipe
Mini pumpkin pie tarts are basically tiny versions of the classic pumpkin pie, baked up in cute, individual portions. You get all that familiar fall flavor, but in a size that’s easy to grab at parties or just snack on yourself.
I always finish mine with a generous swirl of whipped cream and a sprinkle of cinnamon—honestly, that’s the best part for me.
These mini pumpkin pies are way less hassle than making a big pie, and they bake up in about half the time. No fancy skills needed here, just a little patience and a love of pumpkin.
The small size is actually pretty handy. You can serve them at gatherings, and people can just take one or two—no need for slicing or plates.
I find myself making these a lot once the weather turns chilly. They’re cozy but not a huge production, and everyone gets their own little pie.
There’s something about the combo of flaky crust, creamy filling, and that whipped cream that just feels right. If you ask me, the cinnamon on top makes them look and taste extra special.
Equipment
You really don’t need much to make these mini pumpkin pie tarts. Most of the tools are probably already in your kitchen.
The main thing you’ll want is a mini muffin pan—mine holds 24, which is perfect for a batch. That way, you bake them all at once and don’t have to keep swapping pans in and out.
Here’s my usual setup for making the tart shells and getting everything together:
- Mini muffin pan (24-cup)
- Mixing bowls (one big, one medium)
- Measuring cups and spoons
- Whisk or electric mixer (for the whipped cream)
- Spatula or wooden spoon (for mixing the filling)
- Rolling pin (if you’re making your own dough)
- Round cookie cutter (about 2.5 to 3 inches across)
- Piping bag or ziplock bag (if you want to get fancy with the whipped cream)
- Cooling rack
I like having a cookie cutter that’s just a bit wider than the muffin cups. Makes it so much easier to press the dough in without gaps.
If you’ve got an electric mixer, use it for the whipped cream—it saves your arms. But if not, a whisk works; just be ready for a little workout.
Sometimes I use a piping bag for the whipped cream, but honestly, a spoon does the job too.
Ingredients
I’ve broken everything down into two lists: one for the crust, and one for the pumpkin filling plus the toppings.
For the Crust:
- 1 package refrigerated pie crust (or homemade if you’re up for it)
- 1 tablespoon all-purpose flour (for dusting)
For the Pumpkin Filling:
- 1 cup pumpkin puree (canned or 100% pure pumpkin)
- 1/2 cup brown sugar
- 1/4 cup granulated sugar
- 2 eggs
- 1/2 cup evaporated milk
- 1 teaspoon vanilla extract
- 1 teaspoon ground cinnamon
- 1/2 teaspoon pumpkin pie spice
- 1/4 teaspoon ground ginger
- 1/4 teaspoon ground nutmeg
- Pinch of ground cloves
For the Whipped Cream Topping:
- 1 cup heavy whipping cream
- 2 tablespoons confectioners sugar
- 1/2 teaspoon vanilla extract
- Extra ground cinnamon for dusting
I’m a firm believer in using pure pumpkin puree, not pumpkin pie filling. The pie filling’s already got sugar and spices, and I like to season things my own way.
Homemade whipped cream is so much better than the stuff out of a tub. It only takes a few minutes, and if you want to get wild, add a splash of maple syrup for a little extra sweetness.
Instructions
Start by preheating your oven to 375°F (190°C). While that’s going, grease your mini muffin pan—either with spray or a swipe of butter.
Roll out your store-bought pie crust on a floured surface. Use a round cookie cutter or even a glass to cut circles about 4 inches across.
Press each dough circle gently into the muffin cups, making sure the crust goes up the sides.
Now for the pumpkin filling:
- Mix 1 cup pumpkin puree in a bowl.
- Add 1/2 cup sweetened condensed milk.
- Crack in 1 egg and stir it all together.
- Add 1 teaspoon pumpkin pie spice.
- Mix in 1/2 teaspoon vanilla extract.
- Stir until it’s nice and smooth.
Spoon the filling into each crust, filling them about three-quarters full. You want to leave a little space so they don’t overflow.
Bake for 18-20 minutes. They’re ready when the filling is set and the crust edges are golden. I usually give the pan a gentle shake—the centers should barely move.
Let the tarts cool in the pan for about 10 minutes, then carefully pop them out and let them finish cooling on a wire rack.
Once they’re cool, add a dollop of whipped cream to each and dust with cinnamon before serving.
Notes
If you want your mini pumpkin pie tarts to stay tasty, store them in an airtight container in the fridge. They’ll last up to 3 days, and the whipped cream keeps well when cold.
You can totally make the tart shells a day in advance. I bake them, cool them, and keep them in a sealed container at room temp. Makes things way less stressful when company’s coming.
The whipped cream is best if you make it fresh, but it’ll hold up for a couple hours in the fridge if you need to prep ahead.
Sometimes the tart shells crack a bit while baking—don’t sweat it. While they’re still warm, you can gently press the dough back together. Happens to me all the time and they still look cute.
Room temperature eggs and cream work best for the filling, so I try to set them out about half an hour before I start.
A dusting of cinnamon on top looks great and adds a little extra flavor. Sometimes I use a small sieve for a light sprinkle, or toss on a pinch of nutmeg if I’m feeling spicy.
If you want to freeze these tarts (without the whipped cream), just wrap them up individually and stash them in the freezer for up to a month. Thaw in the fridge overnight and top with fresh whipped cream when you’re ready to serve.
Equipment
- Mini muffin pan (24-cup)
- Mixing bowls
- Measuring cups and spoons
- Whisk or electric mixer
- Spatula or wooden spoon
- Rolling Pin
- Round cookie cutter (2.5–3 inches)
- Cooling rack
- Piping bag or zip-top bag (optional)
Ingredients
- 1 package Refrigerated pie crust usually contains 2 crusts
- 1 tbsp All-purpose flour for dusting
- 1 cup Pumpkin puree 100% pure (not pumpkin pie filling)
- 1/2 cup Brown sugar packed
- 1/4 cup Granulated sugar
- 2 Eggs room temperature if possible
- 1/2 cup Evaporated milk
- 1 tsp Vanilla extract for the filling
- 1 tsp Ground cinnamon for the filling
- 1/2 tsp Pumpkin pie spice
- 1/4 tsp Ground ginger
- 1/4 tsp Ground nutmeg
- 1 pinch Ground cloves
- 1 cup Heavy whipping cream cold
- 2 tbsp Confectioners sugar
- 1/2 tsp Vanilla extract for the whipped cream
- Ground cinnamon for dusting
Instructions
- Preheat the oven to 375°F (190°C). Lightly grease a 24-cup mini muffin pan.
- Unroll the pie crust on a lightly floured surface. Cut circles about 2.5–3 inches wide (large enough to fit the mini muffin cups). Press the dough rounds into the cups, smoothing up the sides.
- In a medium bowl, whisk together the pumpkin puree, brown sugar, granulated sugar, eggs, evaporated milk, vanilla, cinnamon, pumpkin pie spice, ginger, nutmeg, and cloves until smooth.
- Spoon the filling into each crust, filling each cup about 3/4 full.
- Bake for 18–20 minutes, or until the centers are set and the crust edges are lightly golden.
- Cool the tarts in the pan for 10 minutes, then transfer to a cooling rack to cool completely.
- Make the whipped cream: beat the cold heavy cream, confectioners sugar, and vanilla until soft-to-medium peaks form.
- Top each cooled tart with a dollop or swirl of whipped cream and dust lightly with cinnamon. Serve chilled or at cool room temperature.
Notes
Nutrition
Tasting Notes
Took a bite of these mini pumpkin pie tarts and, honestly, the mix of warm spices and creamy pumpkin hits just right. The filling reminds me of classic pumpkin pie, but the flavor kind of packs more of a punch in these tiny portions.
That buttery, flaky crust? It crumbles in the best way, and gives a nice bit of texture to balance out the smoothness of the pumpkin. I like how the cinnamon stands out, but it doesn’t drown out the pumpkin itself.
Whipped cream on top brings this light, sweet vibe that keeps the filling from feeling too rich. A dusting of cinnamon over everything not only adds some extra warmth but also makes these look pretty darn nice on a dessert table.
These little tarts are great when you want a Thanksgiving dessert that’s not a whole slice of pie—just enough to satisfy your sweet tooth. I’ve put them out for Christmas too, and, well, they vanished before I could blink. The single-serving size is honestly just so practical for parties.
The flavor profile? Think:
- Warm pumpkin with those classic pie spices
- A little nutmeg and ginger peeking through
- Sweet, vanilla-scented whipped cream
- Buttery pastry at the base
Inside, the texture is smooth and custardy, a bit firmer than a regular pumpkin pie, which I actually like. Cinnamon on top ties everything together with a gentle spice. They’re sweet, but not in that overwhelming way—so you can enjoy one even after a big meal and not feel like you overdid it.