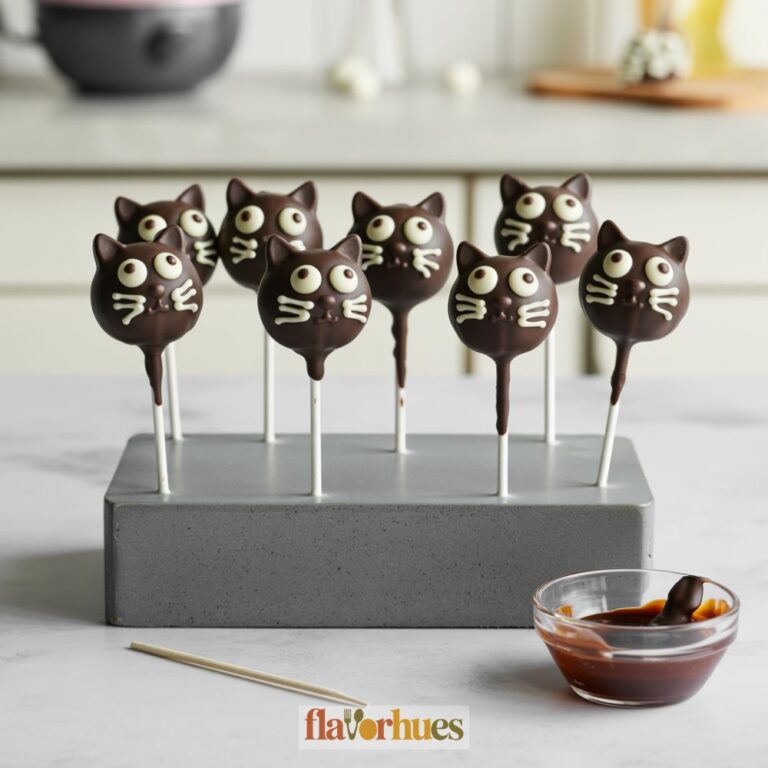
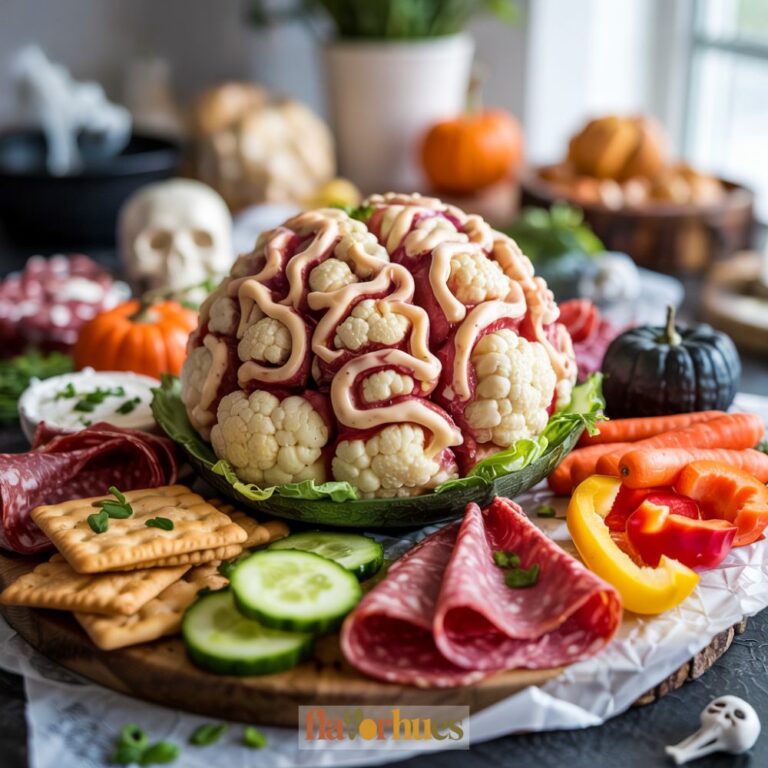
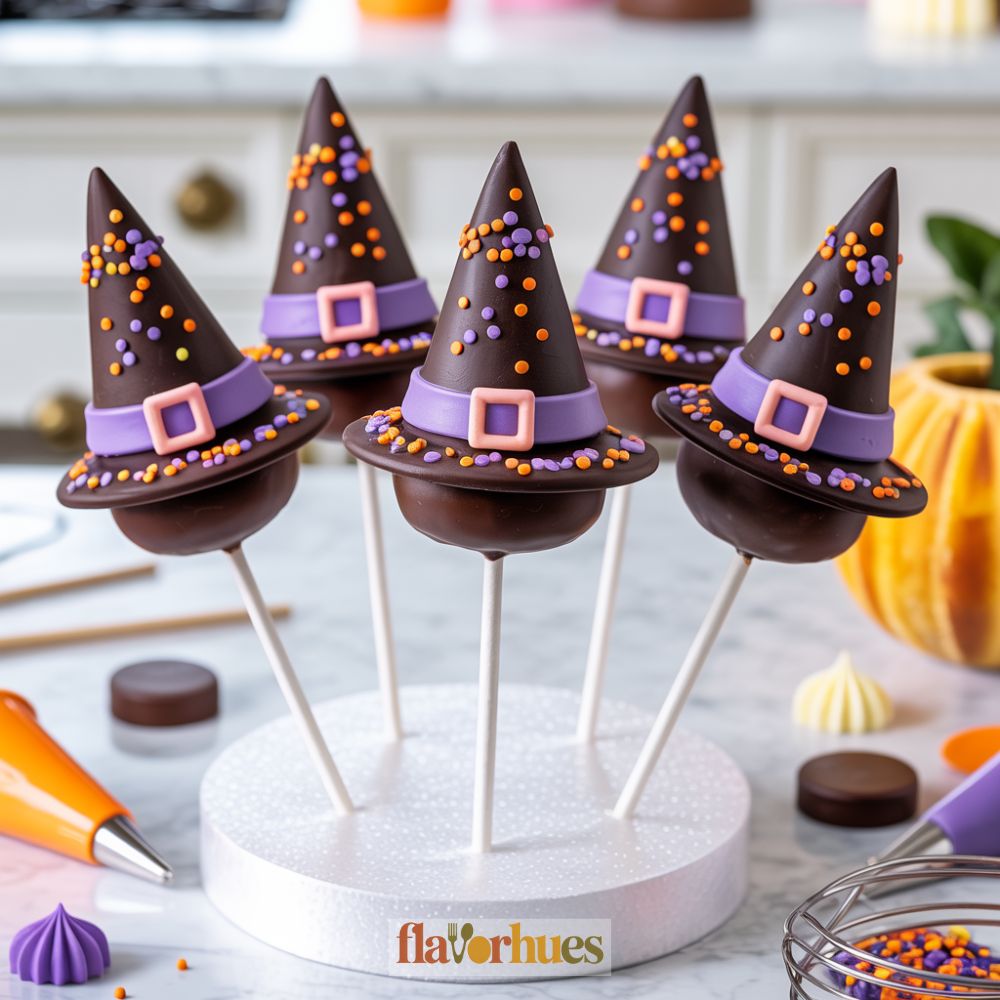
Witch Hat Cake Pops Recipe
I love making treats that look fun and taste delicious, so witch hat cake pops are one of my favorite recipes.
They turn out looking like little witch hats, making them perfect for Halloween parties or any spooky celebration.
When I make them, kids and adults both enjoy the taste and the fun design.
I find that making cake pops is a fun project that can get everyone in the kitchen, decorating together.
Why I Love Them
I love making Witch Hat Cake Pops because they look so cute for Halloween.
They’re fun to share with family and friends. Kids always get excited when they see them at parties.
The recipe is easy to follow, and I don’t need any hard-to-find tools.
I like that I can use leftover cake and simple ingredients from my pantry.
Decorating is my favorite part. I get to pick different sprinkles and colors for each pop.
Sometimes I add a candy star or sugar pearl to the hats. I enjoy how these cake pops look on a dessert table.
Equipment
To make witch hat cake pops, I need a few helpful tools. These make the process easier and keep everything neat.
Here’s what I use:
- 1 large mixing bowl
- 1 small bowl (for melting chocolate)
- 1 spatula
- 1 microwave-safe cup
- 12 lollipop sticks
- 1 baking sheet
- Parchment paper
- 1 stand or a block of foam (to hold pops upright)
I also use measuring cups and spoons—especially a 1/4 cup and a 1 tablespoon measure.
This helps me keep my ingredients accurate and avoid waste.
For decorating, I use a small piping bag or a plastic sandwich bag with the corner snipped off.
This makes it easy to create the details on the hats.
When I want the cake pops to chill quickly, I have some room in my freezer or fridge.
That way, the chocolate sets faster and the hats hold their shape.
Ingredients
To make my witch hat cake pops, I keep the ingredients simple.
You can find most of these at a regular grocery store.
Here’s what I use:
| Ingredient | Amount |
|---|---|
| Chocolate cake | 1 box (baked, cooled) |
| Chocolate frosting | 1/2 cup |
| Black candy melts | 1 bag (12 oz) |
| Mini sugar cones | 20 cones |
| Lollipop sticks | 20 sticks |
| Mini chocolate cookies | 20 cookies (like mini Oreos, with filling removed) |
| Orange sprinkles | 2 tablespoons |
| Purple candy melts | 1/4 cup |
I sometimes add food coloring or edible glitter for fun.
These are optional but make the cake pops look more magical.
I make sure to crumble the cake into fine crumbs before mixing it with the frosting.
The cones are for the hats, and the cookies make sturdy hat brims.
The lollipop sticks hold everything together, and the candy melts are for coating.
I melt the candy melts in the microwave in short bursts so they don’t burn.
If you can’t find mini cones or cookies, regular-size ones can be trimmed down. Just be careful not to break them.
Instructions
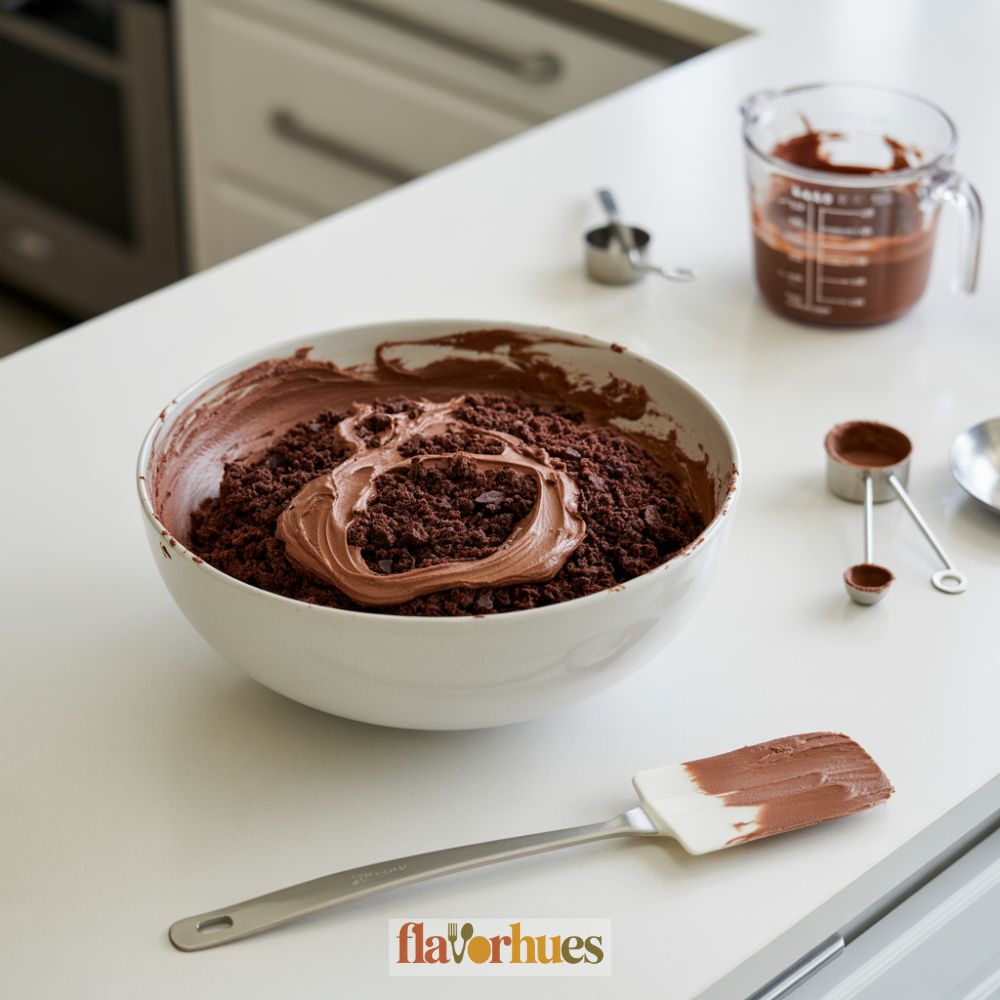
First, I crumble a baked chocolate cake (about 1 box mix or 9-inch round) into a large bowl.
I add 1/2 cup of chocolate frosting and mix until it’s like dough.
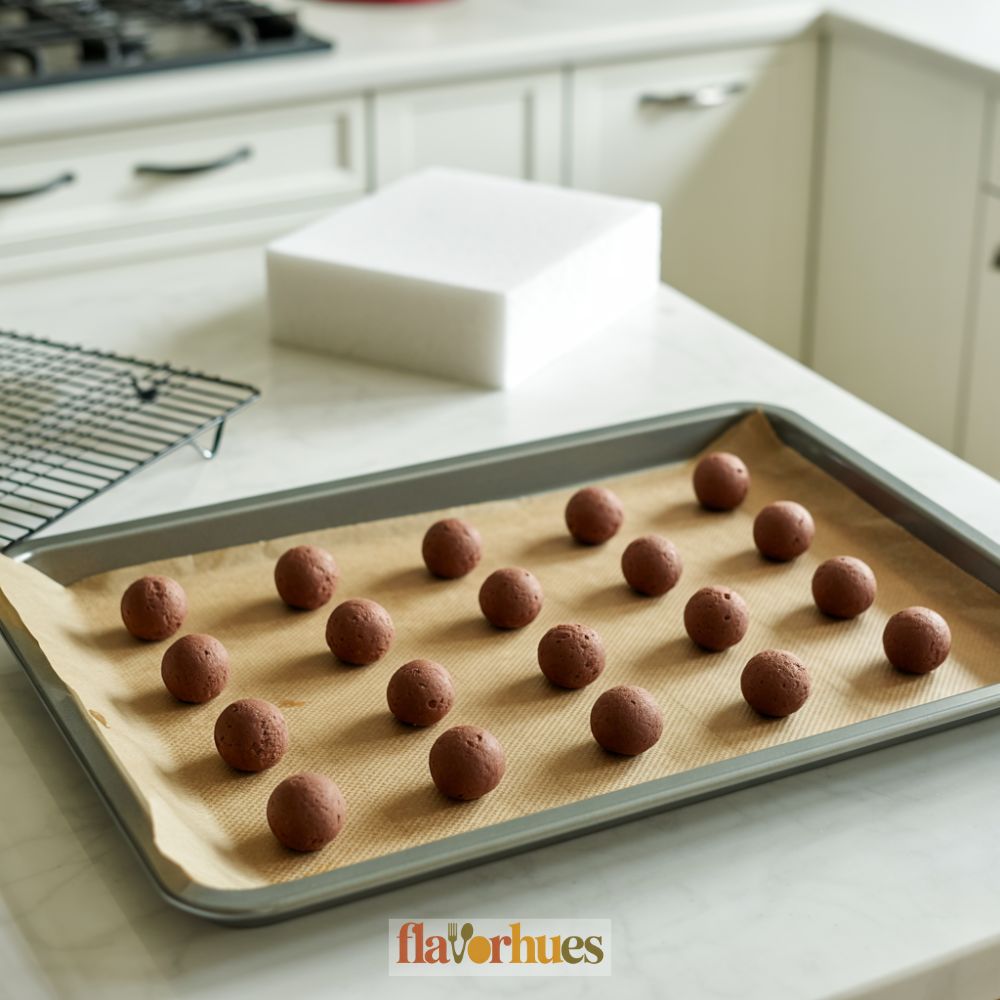
Next, I roll small amounts of this mix into 1-inch balls and place them on a baking sheet lined with parchment paper.
I chill them in the fridge for at least 30 minutes.
While the balls chill, I melt 1 cup of black candy melts in the microwave, stirring every 30 seconds.
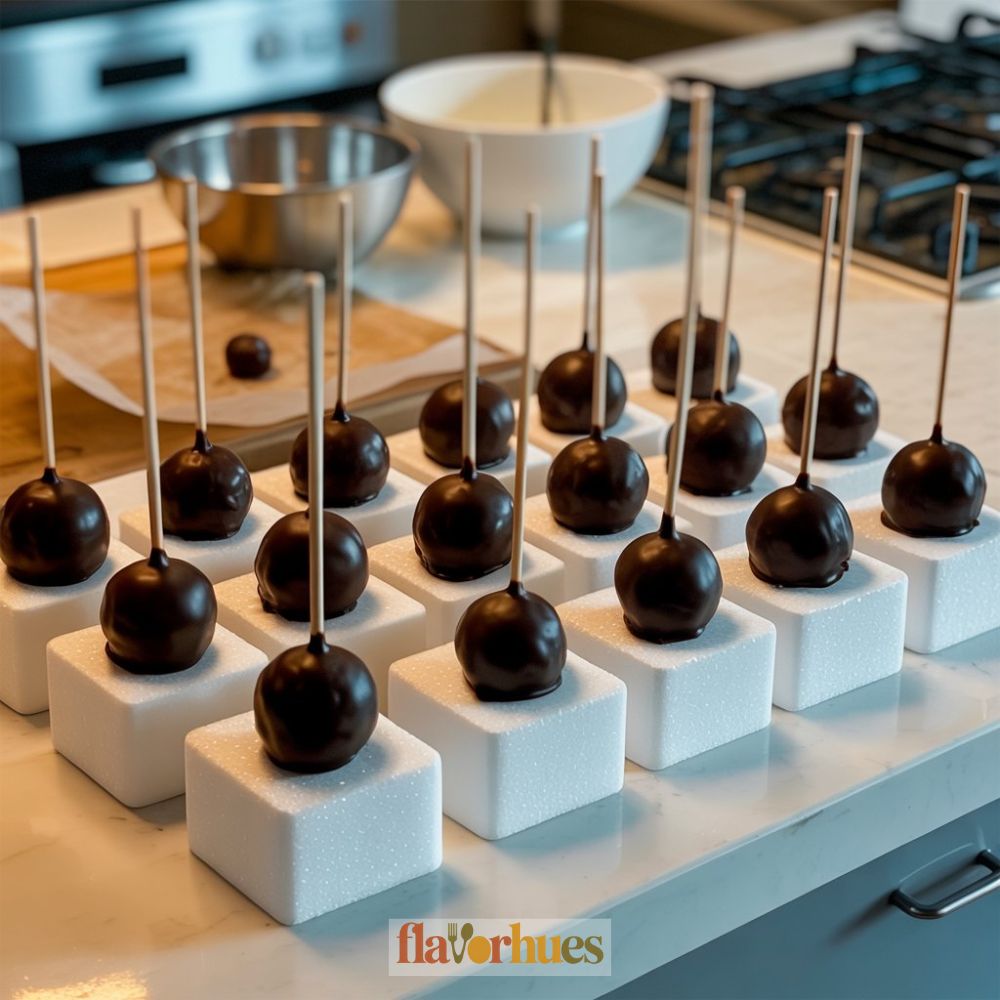
I dip the tip of a lollipop stick in the melted candy, then push it halfway into a cake ball.
Once sticks are in, I dip each cake pop fully into the melted candy.
I let any extra drip off and set them upright in a styrofoam block to dry.
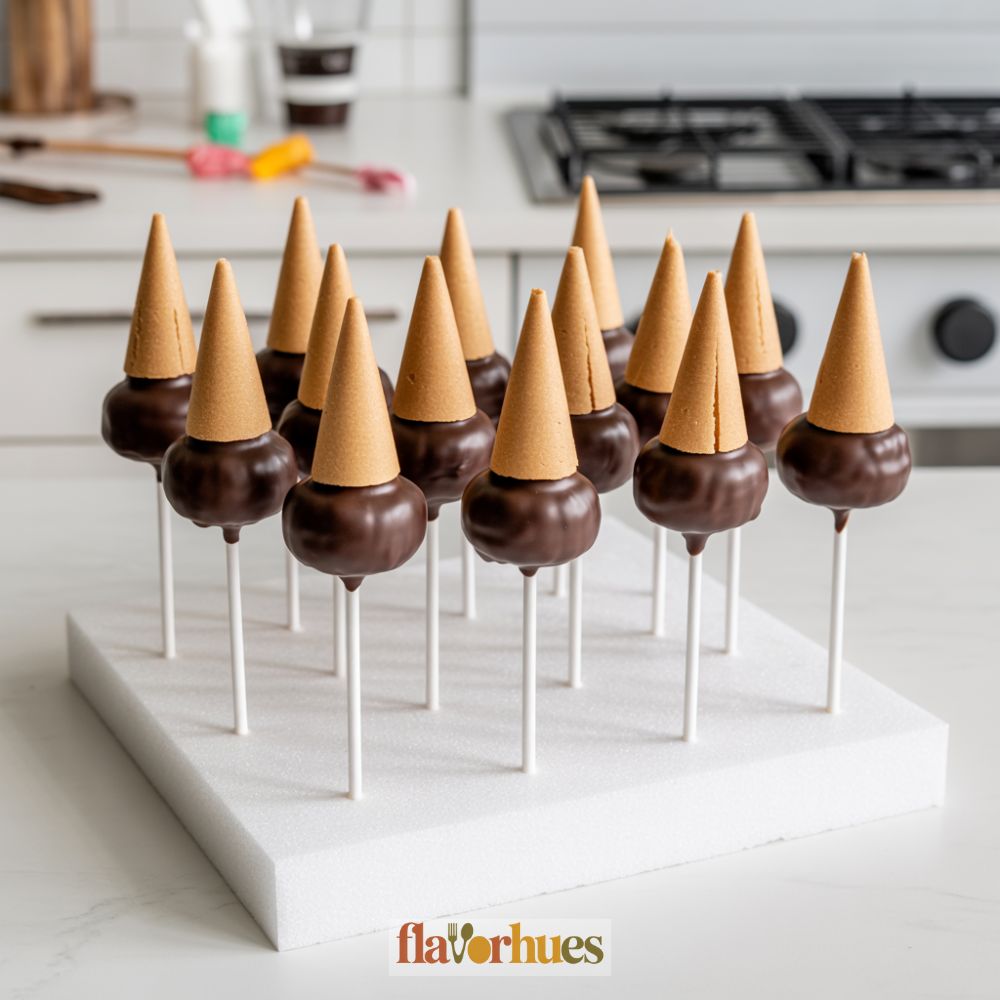
For the witch hats, I use chocolate cookies (like fudge-striped cookies) as the hat brim.
I place a cake pop on top of each cookie, bottom side down.
I make the cone of the hat by using chocolate kisses.
I attach one on top of each cake pop using a dab of melted candy.
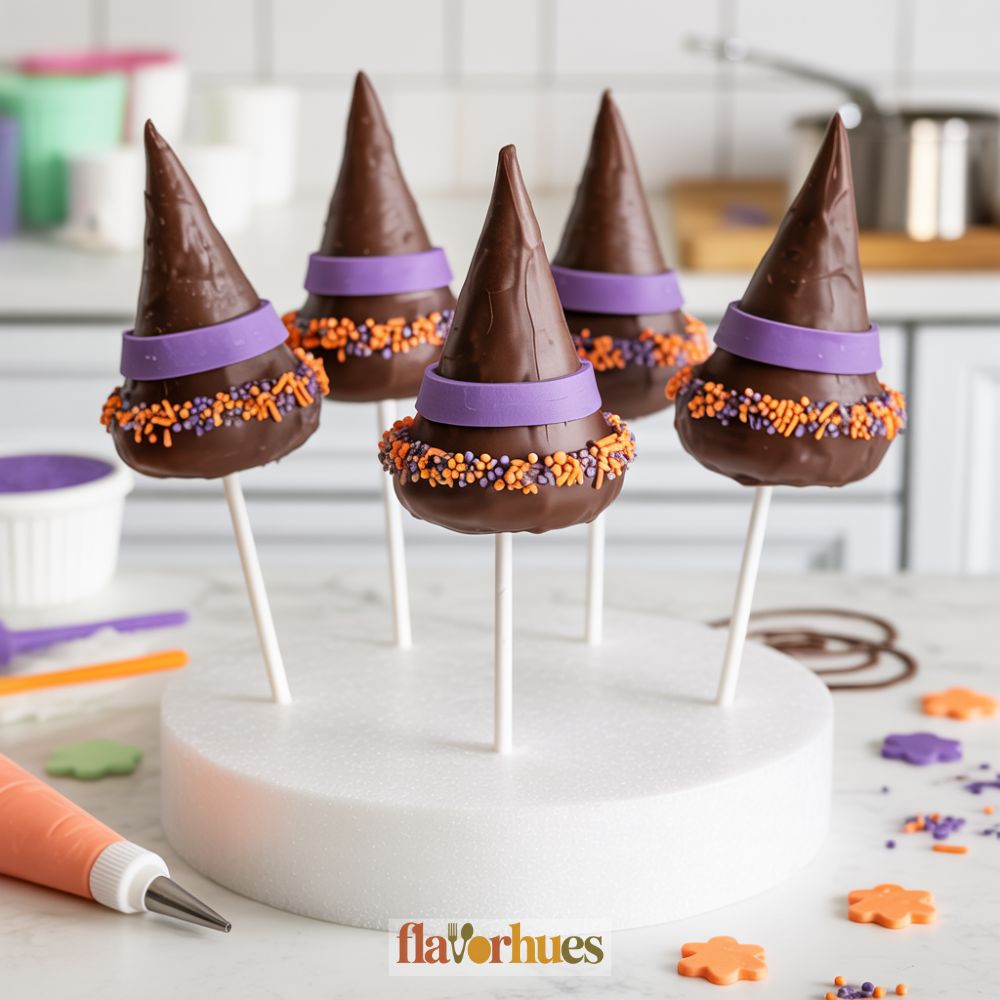
Finally, I decorate the hat with colored icing for a fun band and add sprinkles if I want.
I let everything set before serving.
Decoration Tips
When I decorate witch hat cake pops, I keep a few things in mind to make everything look neat and fun.
I use these ingredients for decoration:
| Ingredient | Amount |
|---|---|
| Black candy melts | 1 cup (about 170 grams) |
| Mini sugar cones | 12 cones |
| Orange sprinkles | 2 tablespoons |
| Purple fondant | 4 ounces (about 115g) |
| Edible glitter (optional) | 1 teaspoon |
| Candy eyes (optional) | 12 pieces |
First, I dip each cake pop in melted black candy melts.
I let extra coating drip off so the hats don’t get too thick or lumpy.
Next, I let the pops sit on a piece of wax paper until they’re dry.
This keeps the surface smooth.
For the hat bands, I roll out the purple fondant and cut thin strips.
I wrap a strip around the bottom of each cone and press gently so it sticks.
I add a sprinkle of orange for extra color. Sometimes, I press a candy eye near the base for a fun, spooky look.
If I want a little sparkle, I dust on a tiny bit of edible glitter.
This makes the hats look extra festive.
I always let each decoration layer dry before adding the next.
This helps the hats keep their shape and look tidy.
Equipment
- 1 microwave-safe cup or bowl
- 1 Stand or foam block
- Optional: piping bag or sandwich bag
Ingredients
- 1 box chocolate cake baked and cooled
- 1/2 cup chocolate frosting
- 1 bag 12 oz black candy melts
- 20 mini sugar cones
- 20 lollipop sticks
- 20 mini chocolate cookies like mini Oreos, filling removed
- 2 tablespoons orange sprinkles
- 1/4 cup purple candy melts
- Optional: edible glitter candy eyes, or purple fondant for decoration
Instructions
- Crumble the baked chocolate cake into a large mixing bowl until it forms fine crumbs.
- Add 1/2 cup chocolate frosting and mix until it forms a dough-like consistency.
- Roll into 1-inch balls and place on a parchment-lined baking sheet.
- Chill the cake balls in the refrigerator for at least 30 minutes.
- Melt black candy melts in a microwave-safe bowl, stirring every 30 seconds until smooth.
- Dip one end of a lollipop stick into the melted candy and insert halfway into each cake ball.
- Dip the entire cake pop into the melted candy, allowing excess to drip off.
- Stick the coated pop upright into a foam block or stand to dry completely.
- Place each cake pop onto a mini chocolate cookie to create the brim of the witch hat.
- Attach a mini sugar cone to the top of each pop using a dab of melted candy.
- Melt purple candy melts and pipe around the base of the cone for a hat band.
- Add orange sprinkles, candy eyes, or edible glitter for extra decoration.
- Let all decorations set fully before serving.
Creative Witch Hat Cake Pops Recipe Variations
I love switching up my witch hat cake pops to make parties more fun.
Here are a few ways I like to get creative.
Colorful Chocolate Coating
Instead of plain dark chocolate, I use candy melts in purple, green, or orange.
It makes each cake pop stand out!
I melt 1 cup of candy melts in the microwave in a microwave-safe bowl.
Different Cake Flavors
I sometimes swap classic chocolate cake for red velvet or carrot cake when making the pops.
For each batch, I use 2 cups of cake crumbs and 1/3 cup of frosting.
Edible Decorations Table
| Decoration Type | Amount Needed |
|---|---|
| Mini Sprinkles | 2 tablespoons |
| Edible Glitter | 1 tablespoon |
| Candy Corn | 12 pieces |
Try sticking a piece of candy corn at the top of each hat for a cute look.
I also press small star sprinkles into the brim before the chocolate dries.
If I want a surprise inside, I hide a marshmallow or a gummy candy in the center.
It’s a small twist but makes every bite fun.
Sometimes, I pipe icing faces onto the hats or use mini sugar flowers.
Kids love picking which one they want!
I just mix and match colors, flavors, and toppings.
Substitute
Sometimes, I run out of ingredients or want to try something new.
Here are some easy swaps for witch hat cake pops.
Cake:
- If I don’t have vanilla cake mix (1 box, about 15.25 oz), I use chocolate cake mix or even red velvet.
- For a homemade touch, I use 2 cups of any leftover cake scraps instead.
Frosting:
- Instead of store-bought frosting (1/2 cup), I make a quick glaze with 1/2 cup powdered sugar and 1 tablespoon of milk.
- Cream cheese frosting gives the pops a richer taste.
Chocolate Coating:
- If I don’t have candy melts (12 oz), I melt 2 cups of chocolate chips with 1 tablespoon shortening.
- White chocolate works too, and I use gel food coloring to tint it.
Decorative Cones:
| Original | Substitute |
|---|---|
| Fudge Striped Cookies (12 cookies) | Use 12 round chocolate cookies or Oreo thins |
| Sugar Cones (12 mini cones) | Cut waffle cones to size |
Sprinkles and Decorations:
- Sometimes, I use colorful sugar or small candies instead of sprinkles (2 tablespoons).
- If I’m out of mini M&M’s (24 pieces), I use chocolate chips or bits of regular M&M’s.
Making these switches helps me use what I have in my kitchen, and gives the cake pops a fun twist.
What Can Go Wrong?
Sometimes my cake pops just won’t stay put on the stick. If I go overboard with the frosting, the mix turns into a soggy mess and falls apart.
But if I skimp on frosting, then they’re too dry and crumbly—can’t win, right?
Possible Issues and Quick Fixes:
| Problem | Why it Happens | How I Fix It |
|---|---|---|
| Cake pops fall off the stick | Cake too moist or too dry | Adjust frosting amount |
| Chocolate coating cracks | Pops too cold before dipping | Let them warm a bit |
| Lumpy coating | Chocolate not melted smoothly | Stir well and melt slowly |
| Candy melts seize up | Water got into melts | Keep utensils dry |
I’ll admit, I sometimes make my hats too big for the cake pops and then the cones just topple right over. These days, I stick to small, store-bought sugar cones—they’re way more reliable and actually stay put.
- Decorations can slide off if the chocolate isn’t set. I try to wait until the coating’s just a bit tacky before adding sprinkles or details, but sometimes I get impatient.
If I rush, the pops usually end up looking a little messy. I try to chill them long enough before dipping—about 20 to 30 minutes in the fridge—so they hold their shape, but honestly, sometimes I cut corners and regret it.
Storage And Shelf Life Tips
I always let my witch hat cake pops set all the way before storing them. This really helps keep the chocolate coating smooth and shiny—nobody wants a dull pop.
For the best results, I stash cake pops in an airtight container. I usually slip a bit of wax paper between layers so they don’t stick together and make a mess.
Here’s a quick guide:
| Storage Method | How Long They Last | Notes |
|---|---|---|
| Room Temperature | 2-3 days | Keep away from heat or sun |
| Refrigerator | Up to 1 week | Let them come to room temp before serving |
| Freezer | Up to 1 month | Wrap each pop in plastic wrap first |
Never pop freshly made cake pops in the fridge straight away. The sudden chill can make the chocolate crack—learned that the hard way.
If it’s humid, I try not to leave cake pops out too long. Humidity just makes them sticky and sad.
When I freeze them, I always scribble the date on the container. Otherwise, I forget how long they’ve been hiding in there.
If I spot condensation after pulling cake pops from the fridge or freezer, I let them sit unwrapped until they dry out. That usually keeps the coating from getting all soggy and weird.