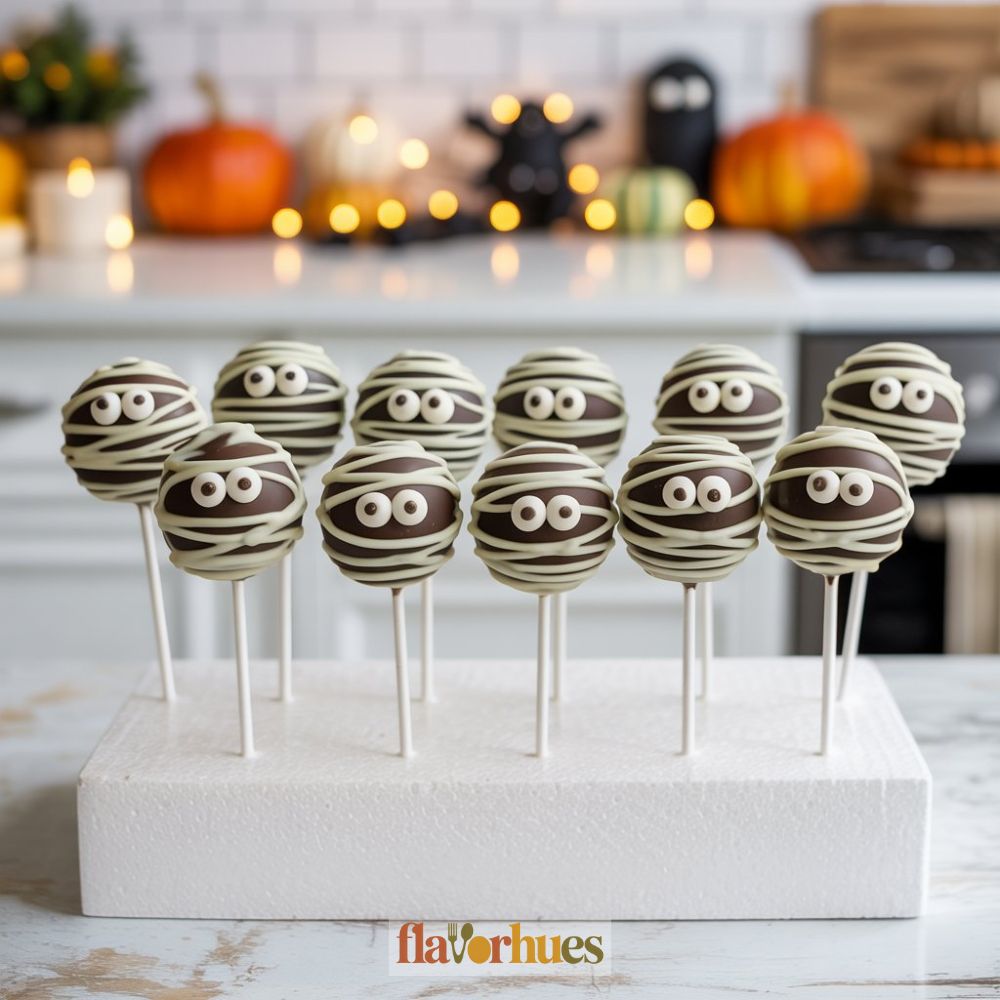
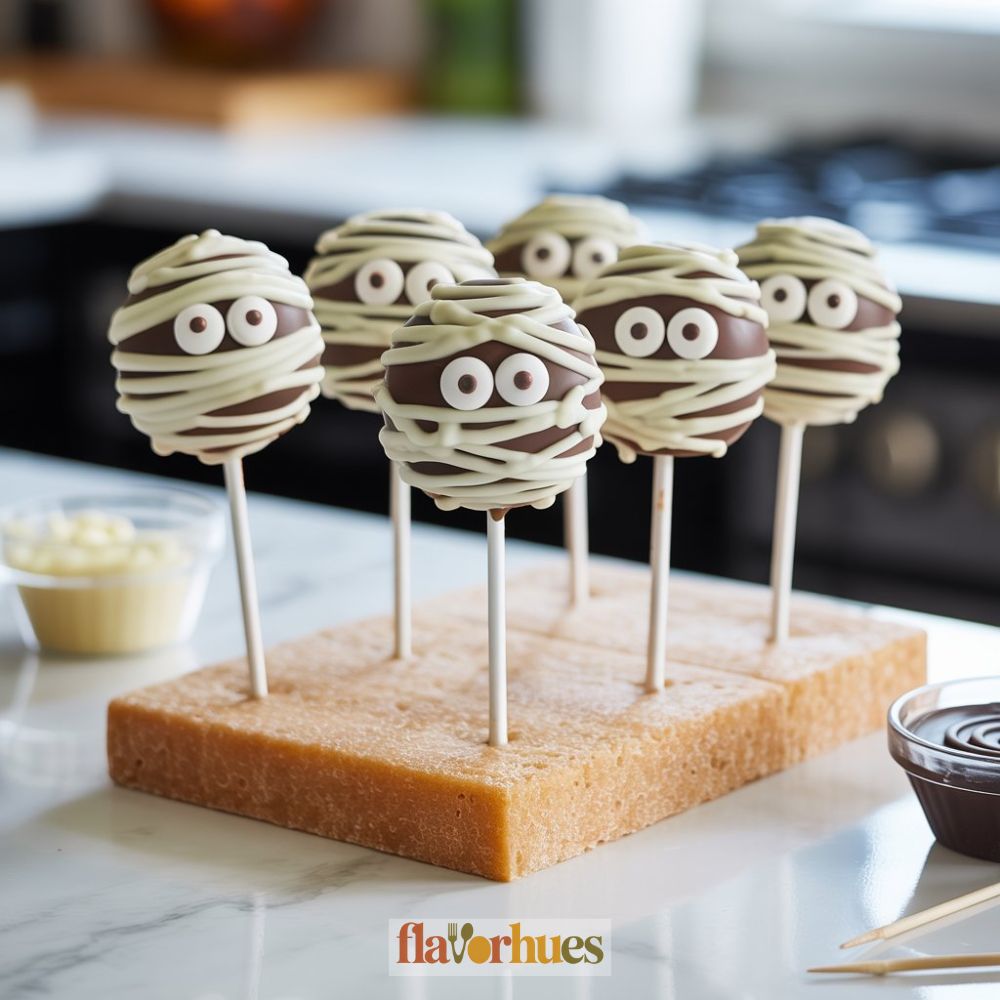
Mummy Wrapped Cake Pops Recipe
I love making cute treats, and mummy wrapped cake pops are honestly one of my favorites for Halloween. They’re soft, sweet, and look just like tiny little mummies.
You can make these cake pops with simple ingredients like cake, frosting, white candy melts, and candy eyes.
I find that these cake pops are always a hit at parties and school events. Kids and adults both enjoy how fun they look and how tasty they are.
If you want to try something new for your next gathering, give mummy wrapped cake pops a try. They’re easy to make, creative, and perfect for spooky celebrations.
Why I Love Them
One reason I love mummy wrapped cake pops is how fun they are to make. I get to use my hands and be creative with every step.
The decorating is simple but gives a cool effect. I enjoy swirling white chocolate around each cake ball to look like bandages.
These cake pops are great for Halloween parties. They always get my friends and family excited to try them.
I like how I can make these ahead of time. They keep well in the fridge for a few days.
When I share them, people always smile at the cute designs. It makes me happy to see everyone enjoying them.
Equipment
To make mummy wrapped cake pops, I need some simple kitchen tools. Using the right equipment helps me work faster and keeps my pops neat.
Here’s what I use:
- Mixing bowl: 1 large, for mixing cake and frosting
- Measuring spoons: For measuring frosting
- Hand mixer (optional): To make my mixture smoother
- Cookie scoop: 1 small or medium, for even cake balls
- Baking sheet: Lined with parchment paper
- Lollipop sticks: 20 sticks for 20 cake pops
- Microwave-safe bowl: For melting chocolate
- Fork or candy dipping tool: To help dip the pops
- Piping bag or zip-top bag: For the mummy “wraps”
- Black food marker: For drawing eyes
I always make sure my tools are clean before I start. Using the right equipment makes my mummy wrapped cake pops look neat and saves time.
Ingredients
To make my Mummy Wrapped Cake Pops, I gather a few simple supplies. Here’s exactly what I use every time:
Cake Base:
- 1 box of chocolate cake mix (about 432 grams)
- Ingredients needed to bake the cake (check the box—usually eggs, oil, and water)
- 1/3 cup (about 80 grams) vanilla or chocolate frosting
Coating and Decorations:
- 2 cups (340 grams) white candy melts
- 1 tablespoon (14 grams) vegetable oil (to thin the melts)
- 24 candy eyes
- 24 lollipop sticks
First, I bake the cake as the box instructions say. After it cools, I break the cake into small crumbs and mix in the frosting to get a dough-like consistency.
For wrapping, I use melted white candy melts. Candy eyes give every mummy a fun look.
I always set out all my decorating tools before I begin, so everything is close by and ready for each step.
Instructions
First, I get all my ingredients and tools ready.
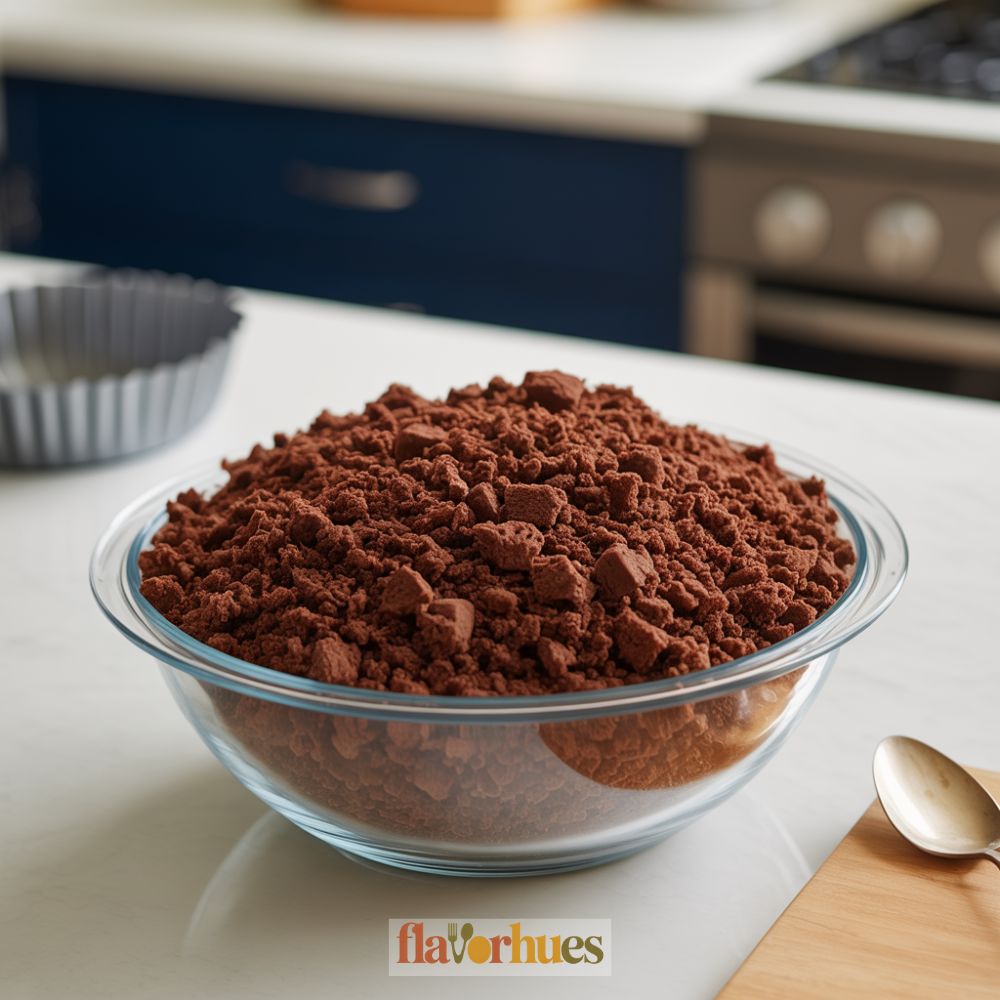
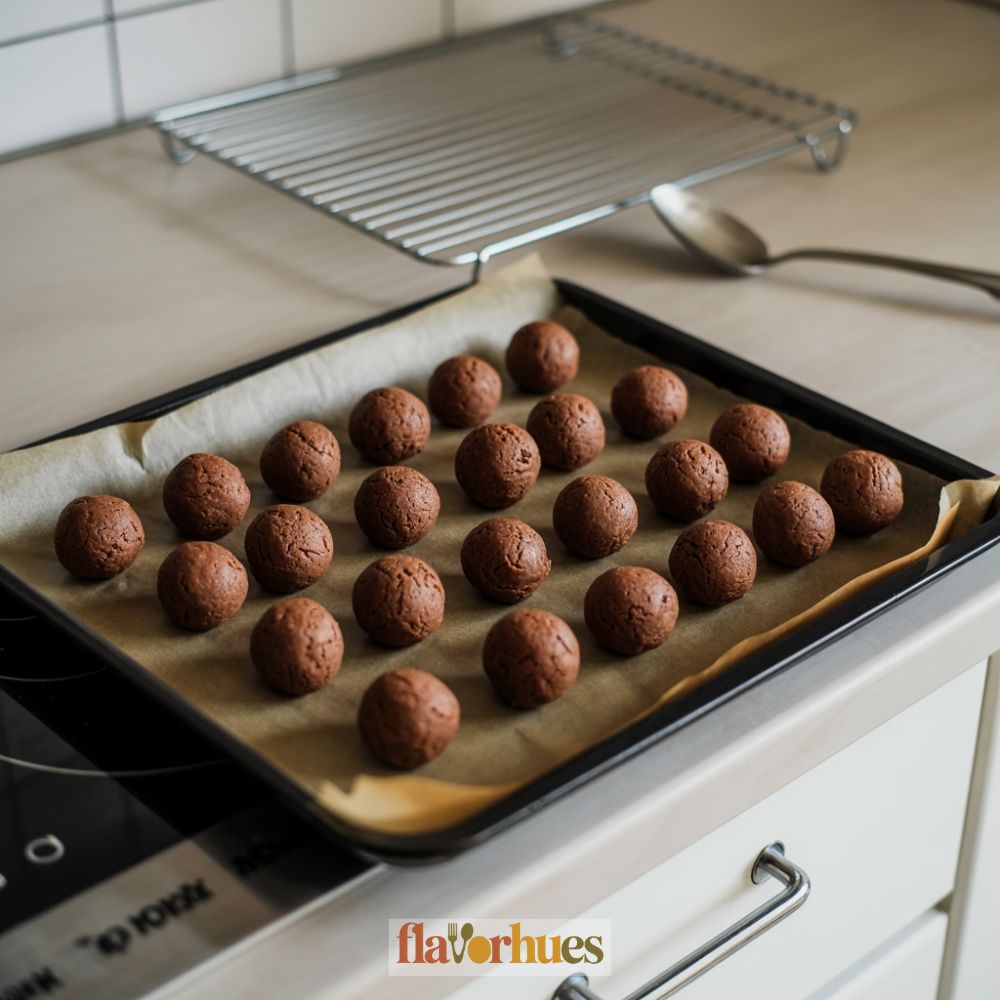
I mix the cake crumbs and frosting together in a bowl. I use my hands to form small balls, about the size of a ping pong ball.
Next, I melt the white candy melts in the microwave. I dip the end of each stick into the melted coating, then push it into a cake ball.
I do this so the cake balls stay secure. I dip each cake ball into the melted candy, making sure it’s fully covered.
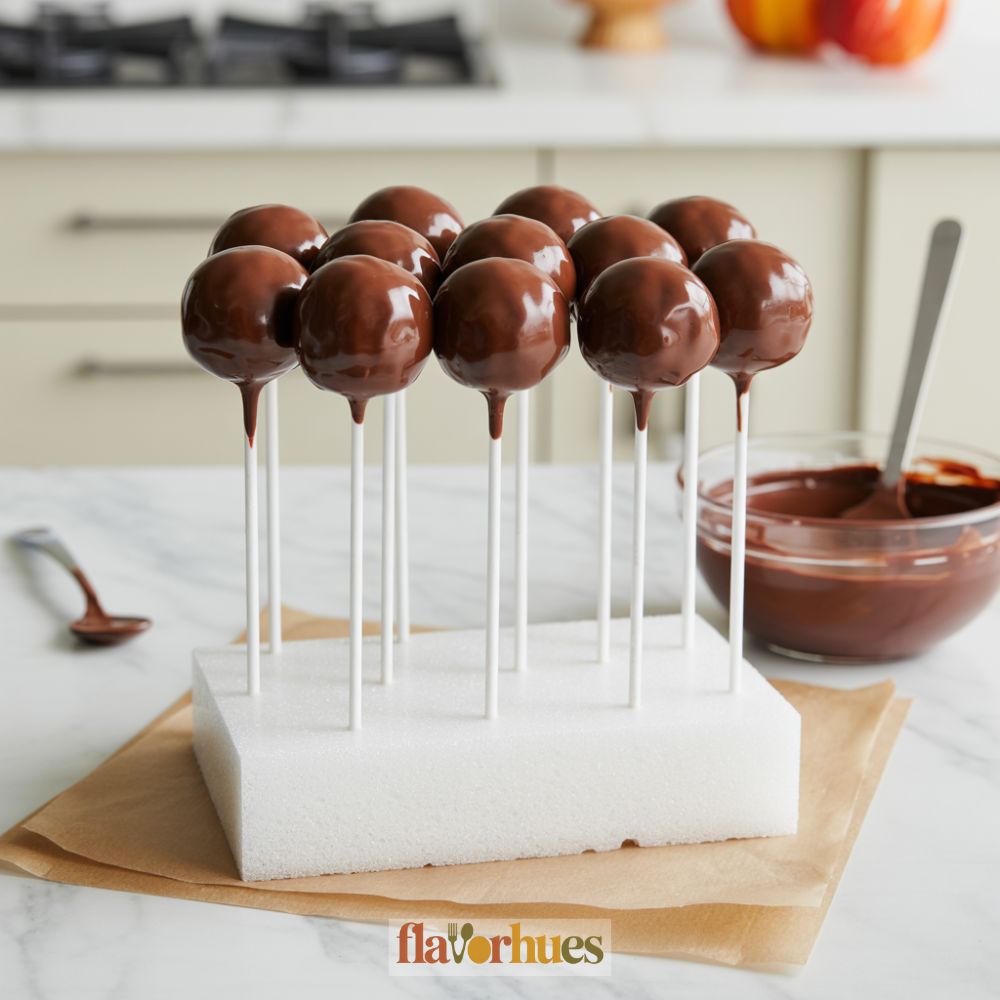
I set them upright in a foam block or a tall glass to dry. Once the coating hardens, I use a spoon or piping bag to drizzle more melted candy in thin lines to look like mummy bandages.
While the coating is still wet, I gently press two mini chocolate chips on each pop for eyes. I let everything set until it’s completely firm before serving.
That’s it—my mummy wrapped cake pops are ready!
Decoration Tips
When I make mummy wrapped cake pops, I like to set up all my supplies before I start. This makes decorating easier and helps the candy melts stay smooth.
Here are the ingredients I use for decorating:
| Ingredient | Quantity |
|---|---|
| White candy melts | 1 cup |
| Mini candy eyes | 24 pieces |
| Lollipop sticks | 12 sticks |
| Black decorating gel (optional) | 1 tube |
I melt the white candy melts in a microwave-safe bowl. I use 30-second bursts, stirring in between, until smooth.
After dipping each cake pop in the melted coating, I let the excess drip off. I add the candy eyes quickly before the coating hardens, so they stick well.
To create the bandage look, I put some melted candy into a ziplock bag and cut a tiny corner off. Then I drizzle lines over the cake pop in different patterns.
It does not have to be perfect—a messy look makes the mummies more fun. Sometimes, I use black decorating gel to add little mouths or extra details.
I let the pops sit upright in a foam block to dry completely before handling.

Equipment
- 1 baking sheet lined with parchment paper
- 1 fork or candy dipping tool
- 1 black food marker
- White Foam block or tall glass (for drying)
Ingredients
Cake Base
- 432 gram chocolate cake mix
- 3 eggs
- 1/2 cup vegetable oil 120ml
- 1 cup water 240ml
- 1/4 cup frosting vanilla or chocolate
Coating & Decoration
- 1 cup white candy melts 170g
- 1 tablespoon vegetable oil 14g
- 24 mini candy eyes
- 12 lollipop sticks
Instructions
- Preheat oven and bake chocolate cake according to the box instructions using eggs, oil, and water. Let it cool completely.
- Crumble the cooled cake into a large mixing bowl. Add 1/4 cup frosting and mix thoroughly until a dough-like texture forms.
- Use a cookie scoop or your hands to shape the mixture into 12 evenly-sized balls. Place them on a parchment-lined baking sheet.
- Melt a small amount of white candy melts. Dip one end of each lollipop stick into the melted candy, then insert into each cake ball. Chill for 20 minutes.
- Melt the remaining white candy melts in a microwave-safe bowl with 1 tablespoon of vegetable oil (in 30-second bursts, stirring in between). Dip each cake pop until fully coated. Let excess drip off.
- Immediately press two candy eyes onto each pop while the coating is still wet. Stand pops upright in a foam block or tall glass to dry.
- Spoon remaining melted candy into a piping or zip-top bag. Snip a tiny corner and drizzle lines across each cake pop to mimic mummy bandages. Allow to set completely.
- Let cake pops firm up completely. Store in an airtight container at room temperature for 2-3 days or refrigerate for up to a week.
Creative Mummy Wrapped Cake Pops Variations
I love trying out new ways to decorate my mummy cake pops. One fun idea is to mix up the cake flavors.
Sometimes, I use red velvet or carrot cake for a pop of color when you bite inside. Here’s a simple list of creative ideas I like:
- Eyes: Use mini chocolate chips, colored candy eyes, or even tiny sprinkles.
- Bandages: Try different colored candy melts, like white chocolate or even green for a “monster mummy” look.
- Faces: Draw funny or spooky faces with an edible marker or icing gel.
For making 12 mummy cake pops, I use:
| Ingredient | Amount |
|---|---|
| Baked cake | 2 cups, crumbled |
| Frosting | 1/4 cup |
| White candy melts | 1 cup |
| Candy eyes | 24 pieces |
| Lollipop sticks | 12 sticks |
Sometimes, I also add a dash of food coloring to the cake mix before shaping the pops. This gives a surprise color inside.
Mixing flavors, colors, and toppings keeps each batch fresh and fun. I find it’s an easy way to personalize my treats for different holidays or parties.
Substitute
Sometimes I run out of certain cake pop ingredients or want to try something new. Here are some easy swaps I’ve used:
Cake Mix Alternatives
If I don’t have vanilla cake mix, I use chocolate or red velvet instead. It changes the flavor, but works just as well.
| Ingredient | Substitute |
|---|---|
| 1 box vanilla cake mix | 1 box chocolate/red velvet/lemon cake mix |
| 3/4 cup frosting | 3/4 cup cream cheese or whipped topping |
Candy Melt Options
When I’m low on white candy melts, I melt white chocolate chips with 1 tsp of coconut oil. Almond bark also works.
- Candy Melts (1 cup)
- Substitute: White chocolate chips (1 cup) + 1 tsp coconut oil
Stick Substitutes
I sometimes run out of lollipop sticks. In that case, I use clean pretzel sticks or sturdy paper straws.
They hold up the cake pops and taste good, too! I like having options in case I’m missing something or someone has a food allergy.
These switches help me finish my mummy wrapped cake pops every time.
What Can Go Wrong?
Making mummy wrapped cake pops can be fun. Still, sometimes things just don’t go as planned.
Cake Pops Falling Apart:
If my cake pops start falling off the sticks, it’s usually because the cake mix is either too wet or too dry. I’ve found that about 1/4 cup of frosting for 2 cups of cake crumbs is my sweet spot.
Too much or too little frosting? That’s when things get messy.
- Too wet: Cake pops slip down the stick.
- Too dry: Cake pops crack.
Messy “Wraps”:
When I try to make the mummy wraps with melted white chocolate, sometimes it just doesn’t cooperate. If I overheat 6 oz of white chocolate melts, it gets lumpy and weirdly thick.
If the chocolate’s too runny, I can’t pipe neat lines at all. It’s a bit of a balancing act.
Candy Eyes Not Sticking:
If the eyes won’t stay on, it’s usually because my chocolate coating has already set. Now I make sure to press on two candy eyes right after dipping each cake pop.
Quick Troubleshooting Table:
| Problem | What I Did Wrong | Fix It By |
|---|---|---|
| Cake pop falling apart | Cake mixture too wet/dry | Adjust frosting amount |
| Coating looks bumpy | Overheated candy melts | Melt gently, stir often |
| Eyes won’t stick | Waiting too long to add eyes | Attach eyes while coating is soft |
Storage And Shelf Life Tips
I like to keep my Mummy Wrapped Cake Pops as fresh as I can. After making them, I let them set all the way.
Once they’re ready, I store them in an airtight container. I always put a piece of wax paper between layers, just so the pops don’t end up glued together.
If I plan to eat them soon—like, within two or three days—I’ll just leave the container out at room temperature. No need to complicate things.
If I want them to last longer, I move them into the fridge. They’ll stay good in there for about a week, give or take.
I always bring them back to room temperature before serving. Trust me, they taste way better that way.
Here’s a quick table I put together, just for easy reference:
| Storage Place | How Long They Last | Extra Tips |
|---|---|---|
| Room Temperature | 2-3 days | Use airtight container |
| Refrigerator | 7 days | Let them warm up before serving |
| Freezer | Up to 1 month | Wrap tightly in plastic, then foil |
If I freeze them, I double-wrap each cake pop in plastic wrap, then add foil. When it’s time to serve, I let them thaw in the fridge overnight.