Creepy Crawly Spider Cake Pops Recipe
I love making treats that are both fun to look at and tasty to eat. Especially for parties or special events, you know?
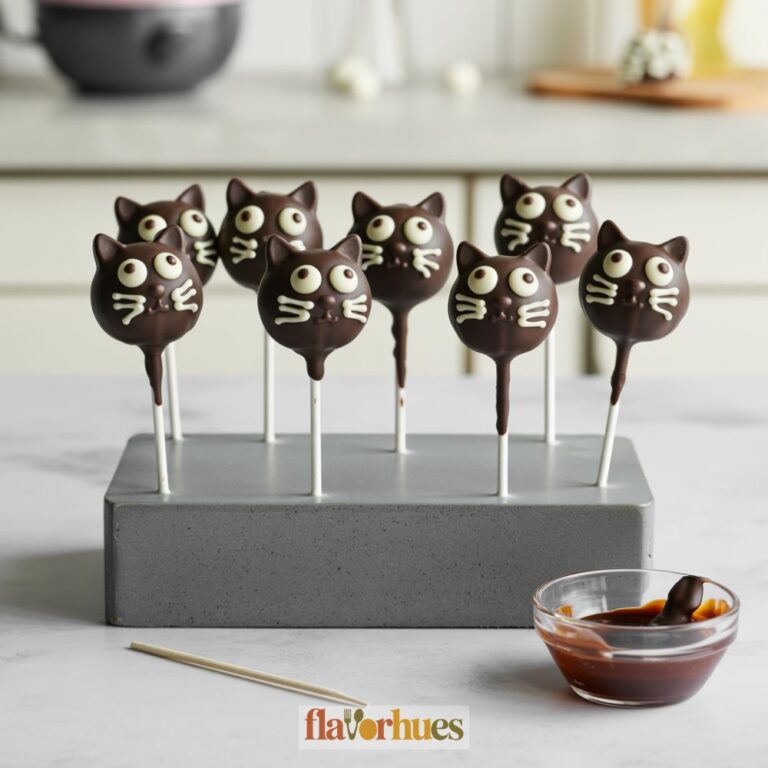
Spider cake pops are a cute and spooky way to add something special to your dessert table.
These cake pops are easy to make, use simple ingredients, and look just like little spiders—perfect for Halloween or any creepy party theme.
Whenever I bring out a batch of these, kids and adults always smile and grab one right away. The chocolate coating and candy eyes really make them stand out.
Making them is a great project to do with friends or family. Everyone gets excited to see how they turn out—there’s a bit of anticipation in the air.

Why I Love Them
I love making Creepy Crawly Spider Cake Pops because they look fun and a little silly. Kids always smile when they see them, and honestly, the wiggly legs make them extra cute.
They’re also easy for me to share. Each cake pop is already the perfect size for a treat, so I don’t need a knife or plates.
I like how these cake pops can be decorated in so many ways.
Sometimes I add colored sprinkles or use white chocolate for the legs—just depends on my mood.
Making them gives me a chance to try something new with baking.
The process is simple, but I still get to use my hands to shape and decorate, which makes it enjoyable for me.
Equipment
To make Creepy Crawly Spider Cake Pops, I need some basic kitchen tools. Here’s a list of what I use:
- Mixing bowls: At least 2 large bowls for combining cake and frosting.
- Electric mixer: A hand mixer or stand mixer helps blend the ingredients.
- Baking tray: 1 standard size baking tray for baking the cake.
- Parchment paper: Used to line the tray and keep things from sticking.
- Lollipop sticks: I recommend about 24 sticks for standard-sized cake pops.
- Microwave-safe bowl: For melting candy melts or chocolate.
- Spoon or scoop: 1 tablespoon scoop makes shaping even balls easier.
- Styrofoam block: Helpful for letting cake pops dry upright.
I also keep a few toothpicks on hand. They’re great for drawing on faces or attaching candy eyes—trust me, it helps.
Here’s a quick table to show exactly what I use:
| Equipment | Quantity | Purpose |
|---|---|---|
| Mixing bowls | 2 large | Mixing cake and frosting |
| Electric mixer | 1 | Blending |
| Baking tray | 1 | Baking cake |
| Parchment paper | 1 sheet | Lining tray |
| Lollipop sticks | 24 | Holding cake pops |
| Microwave-safe bowl | 1 | Melting chocolate |
| Scoop or spoon | 1 | Shaping cake balls |
| Styrofoam block | 1 | Drying cake pops upright |
I find these tools make decorating and assembling my cake pops much easier. Plus, it’s just more fun when you have what you need right there.
Ingredients
When I make Creepy Crawly Spider Cake Pops, I gather all my supplies first. Here’s everything I use for a batch of about 18 cake pops:
Cake and Frosting
- 1 box chocolate cake mix (15.25 oz)
- Ingredients called for on the box (usually eggs, oil, and water)
- 1 cup chocolate frosting
Decoration and Assembly
- 18 lollipop sticks
- 12 oz chocolate candy coating or melting chocolate
- 1/4 cup candy eyes
- Black or brown licorice strings (about 36 inches)
- Sprinkles for extra decoration
I use the table below to help me organize:
| Item | Amount |
|---|---|
| Chocolate Cake | 1 box (15.25 oz) |
| Frosting | 1 cup |
| Candy Coating | 12 oz |
| Lollipop Sticks | 18 |
| Candy Eyes | 1/4 cup |
| Licorice Strings | 36 inches |
If I want to switch it up, sometimes I use white chocolate or colored sprinkles. Gotta keep things interesting, right?
I make sure to have wax paper and a tray ready for cooling the cake pops after dipping. It just makes cleanup so much easier.
Instructions
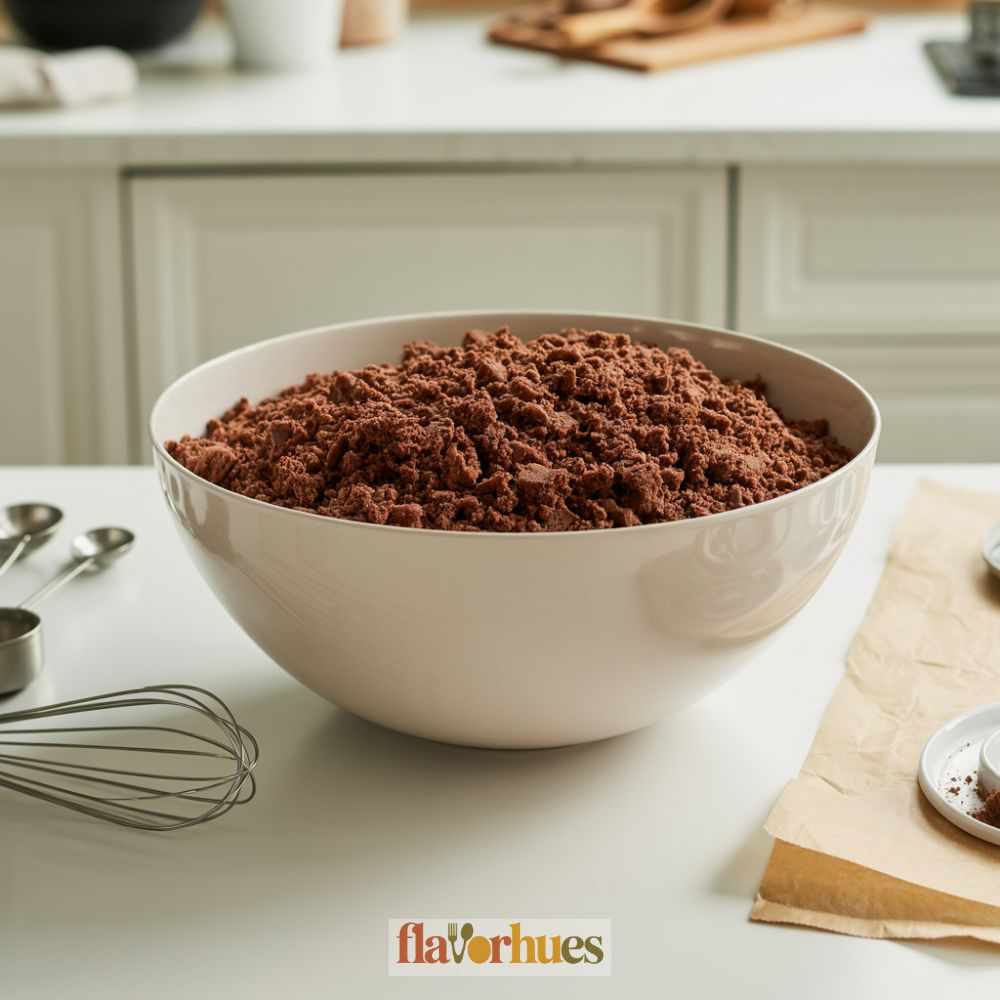
First, I bake one box of chocolate cake mix as the package says. After the cake cools, I crumble it into a large bowl.

I mix in 1/2 cup of chocolate frosting until it feels like playdough. Then, I shape the mixture into balls about 1 inch wide.
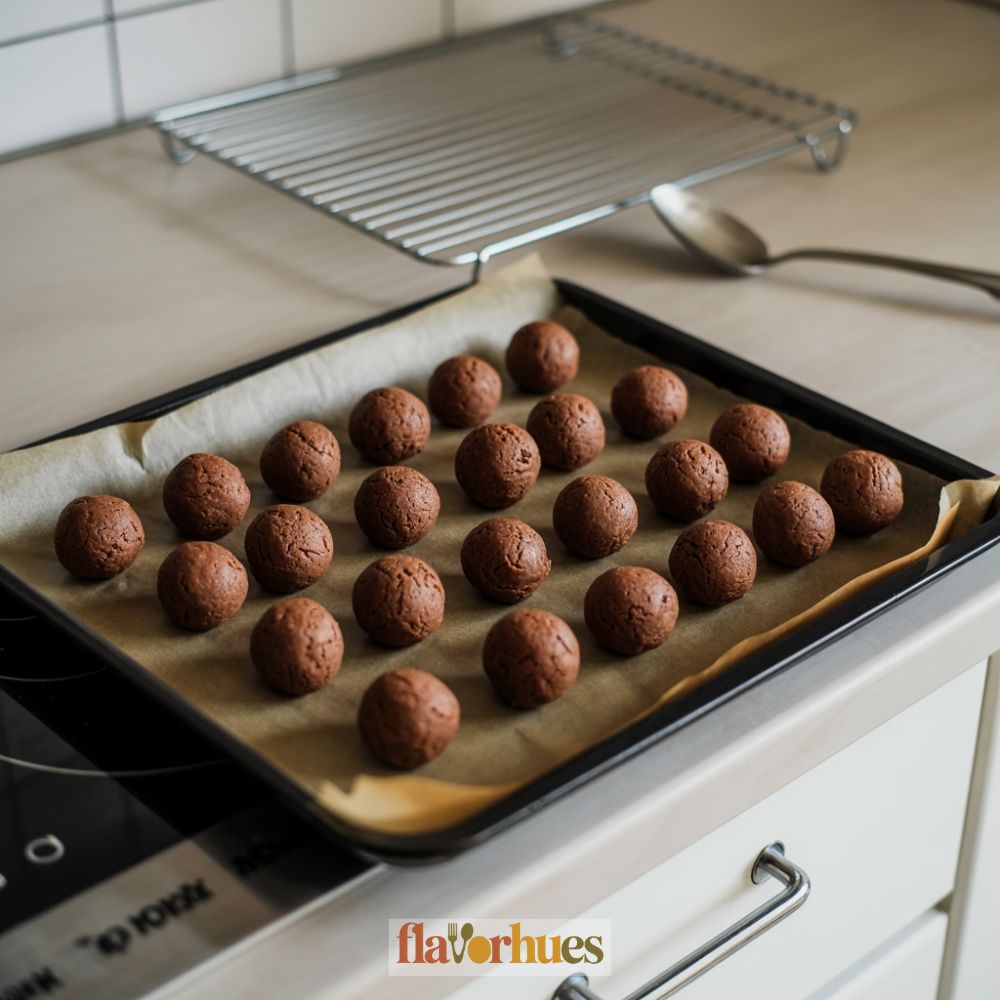
I put them on a tray and pop them in the freezer for 30 minutes to make them firm. While they chill, I melt 1 cup of chocolate candy melts in the microwave.
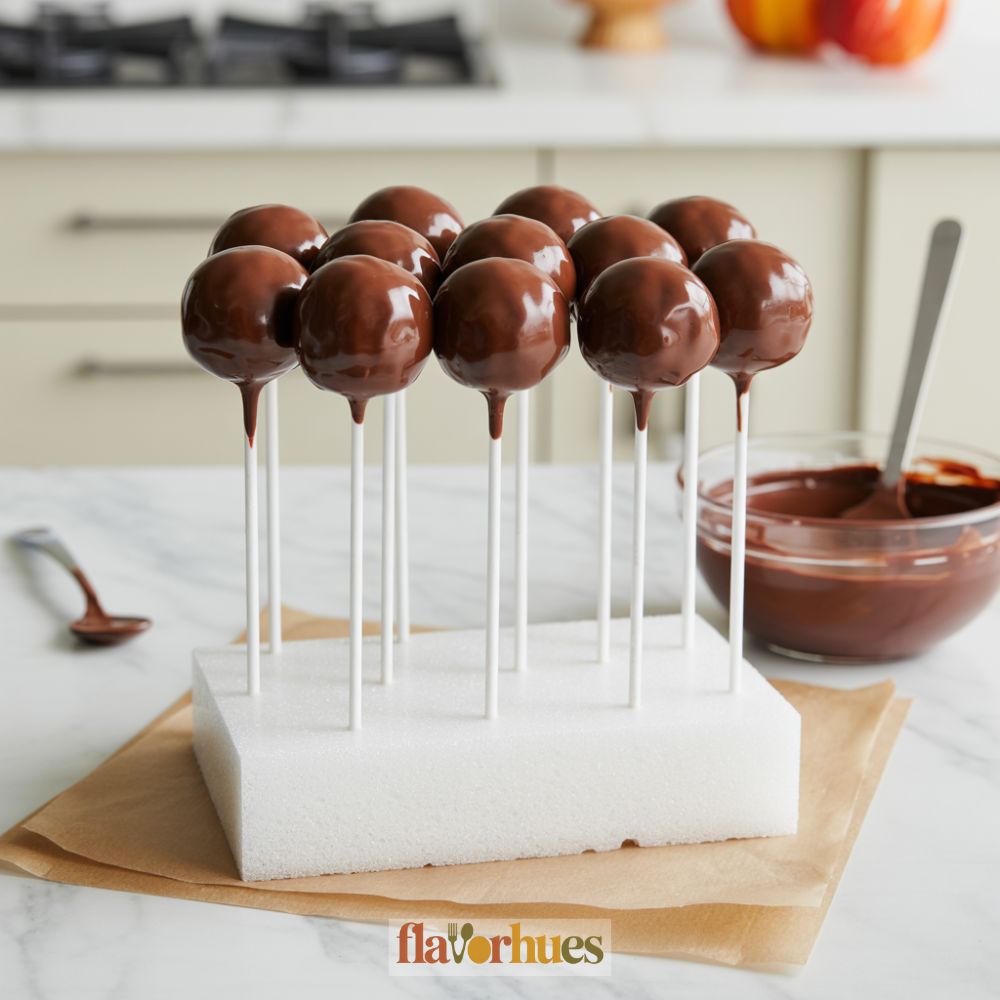
I dip a lollipop stick into the melted chocolate, then push it into each cake ball. This helps the sticks stay in place, and it actually works better than you’d think.
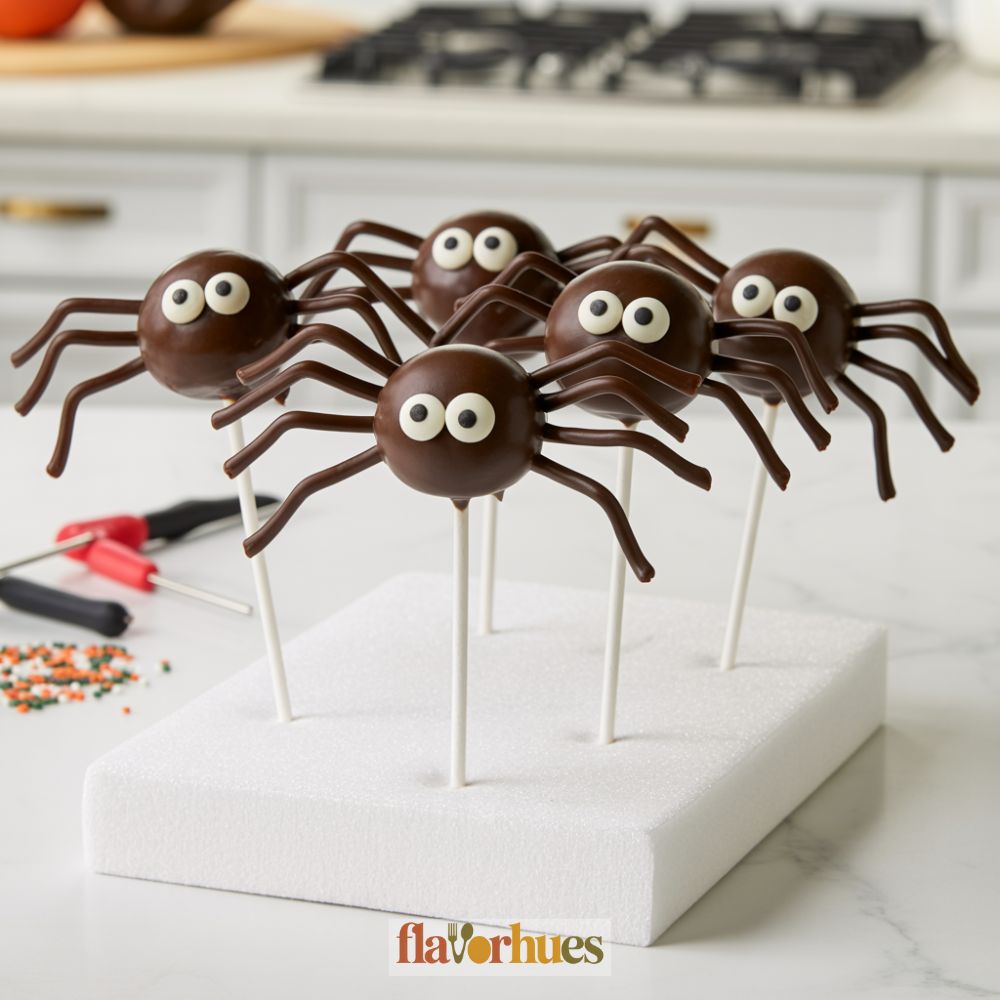
Next, I coat each ball with more melted chocolate using a spoon or by dipping. Before the chocolate hardens, I attach 2 candy eyes and 8 licorice pieces for the legs.
I let them sit until the chocolate sets. Now my Creepy Crawly Spider Cake Pops are ready for sharing!
Decoration Tips
When I decorate my Creepy Crawly Spider Cake Pops, I like to lay out all my supplies first. It helps me work faster and keeps things a bit less messy.
Here’s the list of what I use and how much I need:
| Ingredient | Quantity |
|---|---|
| Candy melts (black) | 12 oz |
| Lollipop sticks | 24 sticks |
| Mini candy eyes | 48 eyes |
| Black licorice strings | 8 feet |
| Sprinkles (optional) | 2 tbsp |
| Edible glue | 1 small tube |
| White gel icing | 1 small tube |
I dip each cake pop into the melted black candy coating. If the coating is too thick, I’ll microwave it for 10 seconds and stir—it usually helps.
While the coating is still wet, I press on two mini candy eyes. I let them set for a few minutes. Sometimes, I use a dab of edible glue if an eye just won’t stick.
For the legs, I cut black licorice into short pieces—about 1.5 inches each. I push four pieces into each side of the cake pop to make eight legs.
To give each spider a unique look, I use white gel icing to draw little mouths or fangs. Sprinkles can add a fun touch too! I just sprinkle them on before the coating dries.
If the pops are for a party, I stick them into a foam block to keep them upright and neat. It helps the decorations stay nice and tidy while they set.
Equipment
- 2 large mixing bowls
- 1 sheet parchment paper
- 1 Styrofoam block (for drying pops upright)
- 1 toothpick (optional, for attaching candy eyes)
Ingredients
Cake and Frosting
- 15.25 oz chocolate cake mix
- 3 eggs or as called for on box
- 1/2 cup vegetable oil or as called for on box
- 1 cup water or as called for on box
- 1 cup chocolate frosting
Decoration and Assembly
- 12 oz chocolate candy coating or melting chocolate
- 18 lollipop sticks
- 1/4 cup candy eyes about 36 eyes
- 36 inches black or brown licorice strings cut into 1.5-inch segments for legs
- 2 tablespoons sprinkles optional
- 1 small tube edible glue optional
- 1 small tube white gel icing optional
Instructions
- Prepare the chocolate cake mix according to package instructions using eggs, oil, and water. Bake in a prepared baking tray. Let it cool completely.
- Once cooled, crumble the cake into a large mixing bowl. Add 1 cup of chocolate frosting and mix until the texture is like playdough.
- Scoop and roll the mixture into 1-inch balls. Place them on a parchment-lined tray.
- Freeze the cake balls for about 30 minutes to firm up.
- In a microwave-safe bowl, melt the chocolate candy coating according to package directions.
- Dip the tip of each lollipop stick into melted chocolate, then insert it into a cake ball. This helps anchor the stick.
- Dip each cake pop into the melted chocolate until fully coated. Immediately press on 2 candy eyes and insert 8 short licorice legs (4 on each side). Add sprinkles if desired.
- Stand cake pops in a styrofoam block to dry and set fully.
- Use white gel icing to add fangs or smiles. Use edible glue if eyes or other decorations aren’t sticking.
- Allow to cool completely. Store at room temp (3 days), refrigerate (1 week), or freeze (1 month, tightly wrapped).
Creative Creepy Crawly Spider Cake Pops Variations
I like to try new looks with my spider cake pops. Adding different candy, sprinkles, or icing can really change things up.
Here are some simple ways you can make your own versions:
Ingredients List for Variations
| Ingredient | Amount |
|---|---|
| Chocolate cake mix | 1 box |
| Frosting (any flavor) | 1 cup |
| Candy eyes | 24 pieces |
| Black licorice laces | 16 strips |
| Mini pretzel sticks | 16 pieces |
| Colored sprinkles | 2 tablespoons |
| White chocolate chips | 1/4 cup |
Try different “legs” for your spiders:
- Black licorice laces are classic, but mini pretzel sticks work too. I sometimes use thin pretzel rods for a crunchy twist.
Switch up the body coating:
- Dip pops in dark chocolate, white chocolate, or even colored candy melts. Sprinkle with orange or purple sprinkles for a festive look.
Decorate the faces:
- Use mini candy eyes, or pipe on eyes with white chocolate for a homemade touch. Add a tiny red sprinkle if I want a “venomous” look.
If you want big spiders, I use two cake balls—one for the body, and a smaller one for the head. For extra creepy detail, I pipe on thin chocolate legs instead of using candies.
Substitute
Sometimes I just don’t have every ingredient on hand for Creepy Crawly Spider Cake Pops. So, I’ve figured out a few swaps that usually do the trick.
Ingredients List with Substitutes:
| Original Ingredient | Amount | Substitute Option |
|---|---|---|
| Chocolate cake | 1 box (15 oz) | Vanilla cake or red velvet cake |
| Cream cheese frosting | 1/2 cup | Canned vanilla or homemade frosting |
| Candy eyes | 24 | Mini chocolate chips |
| Black licorice strings | 16 | Pretzel sticks or gummy worms |
| Chocolate melts | 10 oz | Milk chocolate chips |
If I’m out of candy eyes, I just dot some melted chocolate on white chocolate chips. For the legs, thin pretzel sticks or chopped-up gummy worms have saved me more than once when black licorice is nowhere to be found.
No chocolate melts? Regular chocolate chips, melted in the microwave, work pretty well. If I’m craving a different cake flavor, I’ll swap it in, but I try to stick with something dense so it holds together.
Leftover birthday cake or a couple of cupcakes? I’ll crumble those up and mix with frosting instead of baking a new cake. It’s a lifesaver on busy days.
What Can Go Wrong?
Honestly, sometimes my cake pops just won’t stay on the sticks. If the mixture is too soft or I skip chilling, they tend to fall apart—super annoying.
The chocolate coating can get lumpy or even crack. Usually, that’s because I get impatient and don’t let the cake pops chill long enough before dipping.
I’ve had decorations slide right off before. That’s almost always when I use too much icing or try to stick candy on before the chocolate’s set.
Here are some common headaches I run into:
| Problem | What Causes It | How I Fix It |
|---|---|---|
| Cake falls off stick | Mixture too moist | Add more cake crumbs |
| Lumpy chocolate | Overheated or old chocolate | Melt chocolate slowly |
| Candy eyes slide off | Chocolate not set | Wait for chocolate to set |
I have to remind myself not to skip chilling the cake balls. If I do, they get sticky and it’s just a mess to shape them.
If I get carried away with too many legs or heavy candies, the spiders look kind of wild or even break apart. I usually keep the decorations simple now—less is more, right?
Storage And Shelf Life Tips
I always let my Creepy Crawly Spider Cake Pops cool and set before even thinking about storage. It just helps the chocolate coating firm up nicely—nobody wants a melty mess.
To keep them fresh, I toss the cake pops in an airtight container. I try to separate the layers with wax paper, otherwise they’ll stick together and pull off the coating. Not ideal.
Room Temperature:
- Up to 3 days
- Definitely keep them away from heat and sunlight
Refrigerator:
- Up to 1 week
- Always use a container to keep out moisture
If I need the cake pops to last longer, I’ll freeze them. Here’s how I usually do it:
- Wrap each pop tightly in plastic wrap—don’t skimp on this part.
- After that, pop them all into a freezer bag or a container.
- Freeze for up to 1 month, though honestly they rarely last that long in my house.
When it’s time to serve frozen pops, I let them thaw in the fridge overnight. That way, the chocolate stays smooth and you don’t get weird cracks. I try to avoid thawing at room temp—otherwise, they can get sticky or sweaty, and who wants that?