15 Red Halloween Food Ideas for a Spooky Party
Halloween is such a fun excuse to get creative with snacks and treats. I love making food that’s just as spooky as all the decorations around my house.
If you want to impress your guests or family, red Halloween food ideas can help make your party stand out.
These treats can look fun, creepy, or both—perfect for the holiday mood.
1) Blood Red Velvet Cupcakes

When I want my Halloween party to pop, I bake blood red velvet cupcakes. That bold, deep red grabs attention right away and just screams Halloween.
The cupcakes turn out soft and moist. I use buttermilk and a splash of vinegar in the batter, so they’re light but not dense.
I always add a generous amount of red food coloring for that dramatic inside. For frosting, I stick with classic cream cheese—smooth, tangy, and the white really pops against the red.
Sometimes I’ll drip a little red gel on top for a “bloody” effect. A few red sprinkles or even gummy vampire fangs finish them off.
Some friends get a kick out of the plastic syringe filled with “fake blood” (just red gel) on top. It makes the cupcakes look extra spooky and fun to eat.
They’re easy to serve—no forks needed, just grab and go. I love seeing the surprise when someone bites in and finds that bright red center.
The flavor isn’t too strong, so just about everyone likes them. A bit of cocoa powder gives a hint of chocolate, but it’s subtle.
Kids and adults both go for seconds when these are on the dessert table. I stash leftovers in the fridge if there are any—honestly, they usually disappear fast.
For me, these cupcakes are the easiest way to bring Halloween color and flavor to any gathering.
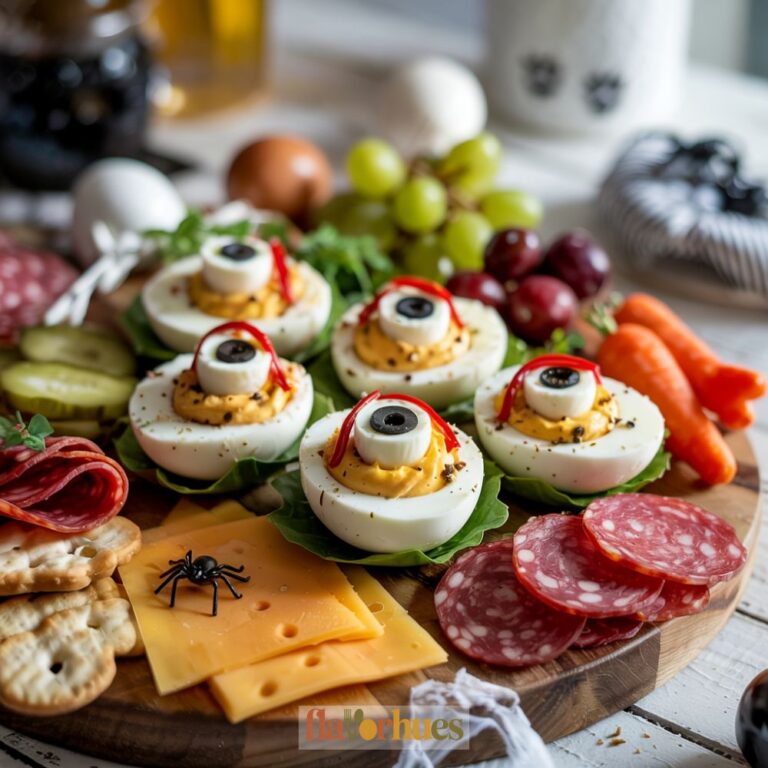
2) Cherry Tomato Eyeball Appetizers
I like making these Cherry Tomato Eyeball Appetizers because they’re quick and look hilarious on the table. The bright red cherry tomatoes make them eye-catching for any Halloween party.
The round shape really helps them look like little eyeballs. To make these, I use cherry tomatoes, mozzarella balls, and black olives.
I cut the tomatoes in half and scoop out some seeds. Then I tuck a mozzarella ball inside each tomato half.
For the iris, I slice a small round from a black olive and press it on the cheese. If I want a “bloodshot” look, I’ll use a toothpick to draw red lines on the mozzarella with food coloring or ketchup.
This makes each “eyeball” look even scarier and more fun for Halloween. They’re not just for show, either—they taste fresh and light.
The combo of tomato, cheese, and olive is simple and savory. Sometimes I finish with a sprinkle of salt or a drizzle of olive oil.
Kids usually find these funny, and adults love the creative twist. No cooking needed—I can make a whole tray in minutes.
They’re easy to pick up and eat, too. If I need a vegetarian snack that still looks spooky, these are my go-to.
They’re healthy, bite-sized, and fit right in with the rest of the Halloween snacks. I think they always get a few laughs and smiles.
3) Spicy Bloody Mary Jello Shots
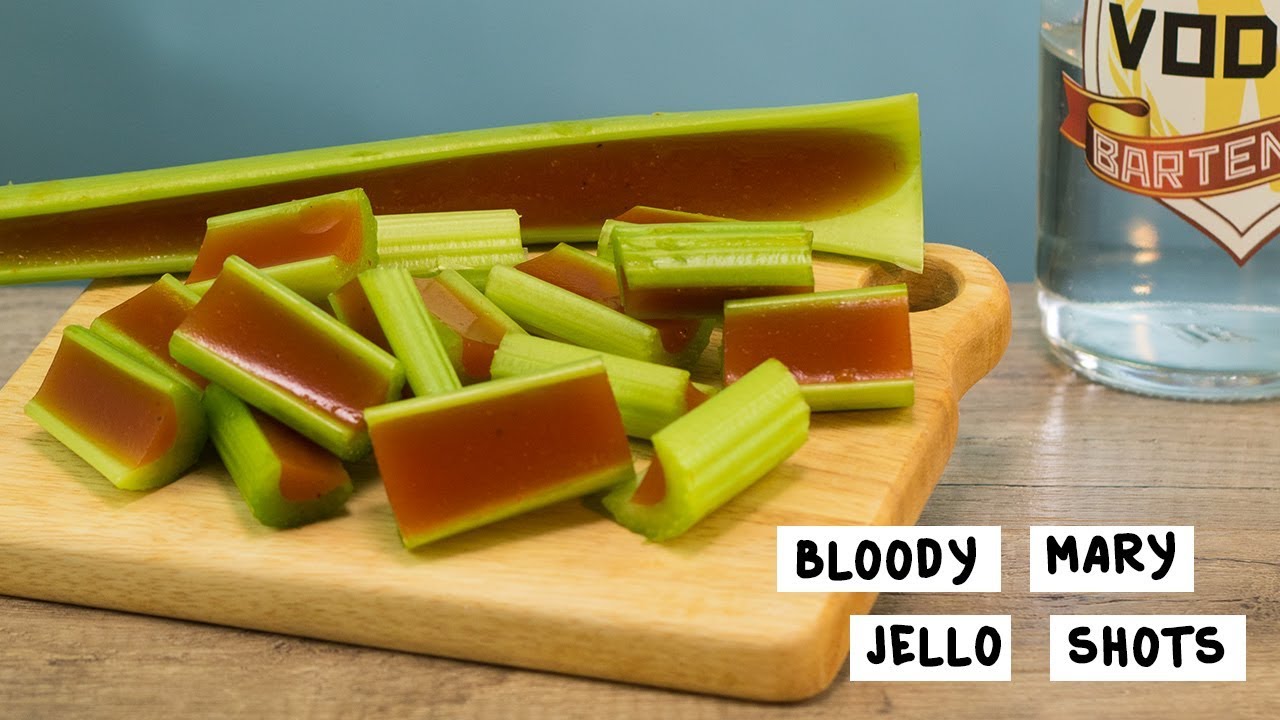
I love adding a fun twist to party food, and Spicy Bloody Mary Jello Shots are always a hit at my Halloween gatherings.
These bright red treats have that classic Bloody Mary flavor, but in a wiggly, jiggly form.
To make these, I use plain gelatin, tomato juice, and a little vodka. I also mix in hot sauce and Worcestershire for a real spicy kick.
A dash of black pepper and celery salt brings out the flavor. I pour the mix into tiny cups or molds and let them set in the fridge for a few hours.
Sometimes I add a little celery slice or an olive on top for extra Halloween flair. These jello shots are spicy and salty, not sweet.
They’re perfect for adults who want something different than the usual candy. I always remind guests that these are boozy, so they’re for grown-ups only.
There’s always a non-alcoholic version for anyone skipping the vodka. The bright red color really stands out on the snack table.
They look just as bold as they taste. I usually serve them in clear cups so the red shines through—fits the Halloween vibe and is easy to grab.
They’re great for a spooky party or anytime I want something a little out of the ordinary.
4) Red Candy Apple Slices
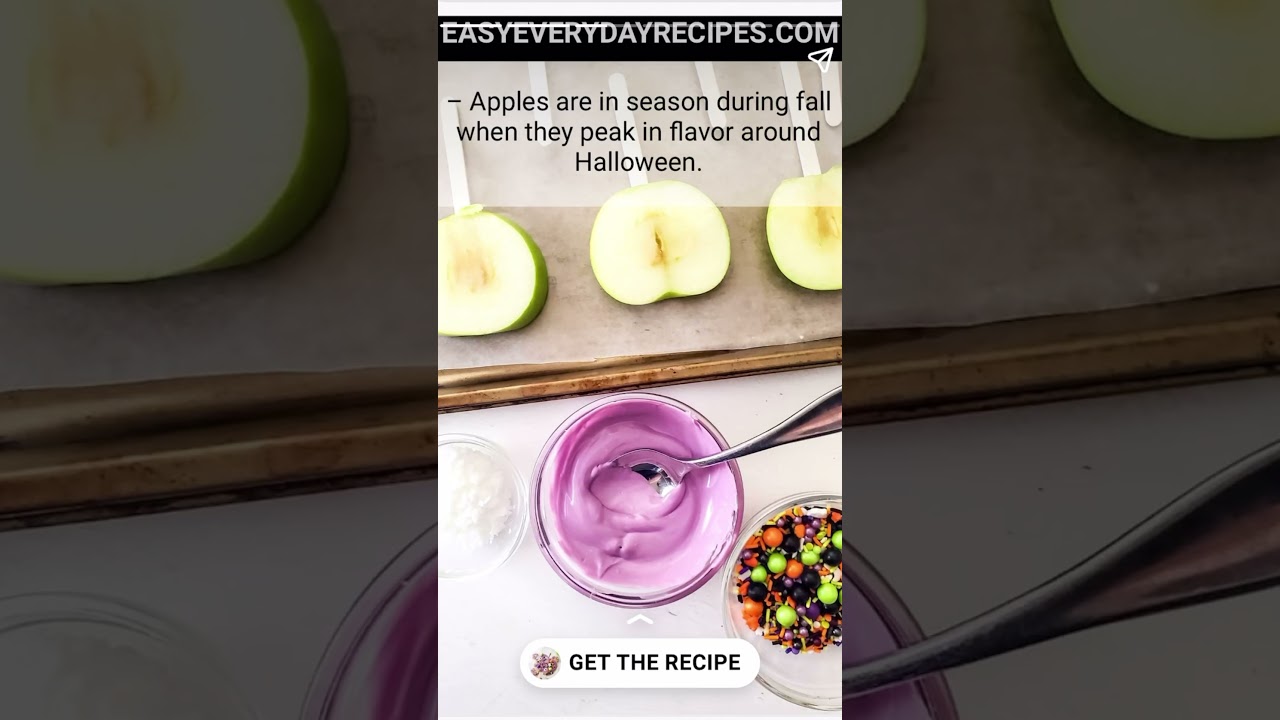
Red candy apple slices are a classic treat that look great at any Halloween party. I like them because they’re simple to make and easy to eat.
I slice apples into wedges and stick a toothpick or small stick in each one. That way, they’re easy to dip into the candy coating.
I use a basic candy apple coating—sugar, corn syrup, water, and red food coloring. The bright red color really pops and gives off a festive vibe.
When I dip the apples, I make sure each piece is well coated. Letting them set on wax paper keeps them from sticking.
The coating hardens in just a few minutes. I always let the slices cool before serving.
Biting into these gives me the perfect mix of tart apple and sweet candy. They’re easier to eat than full candy apples—less mess, more fun.
Sometimes I sprinkle on colored sugar or edible glitter before the coating sets. That adds a special touch if I’m matching a party theme.
Red candy apple slices brighten up any Halloween snack table. Kids and adults both like them.
I love how they add a pop of color next to all the spooky treats. If I need to prep ahead, I stash them in an airtight container until party time.
These little slices are a favorite at my parties every year.
5) Strawberry Ghost Smoothies
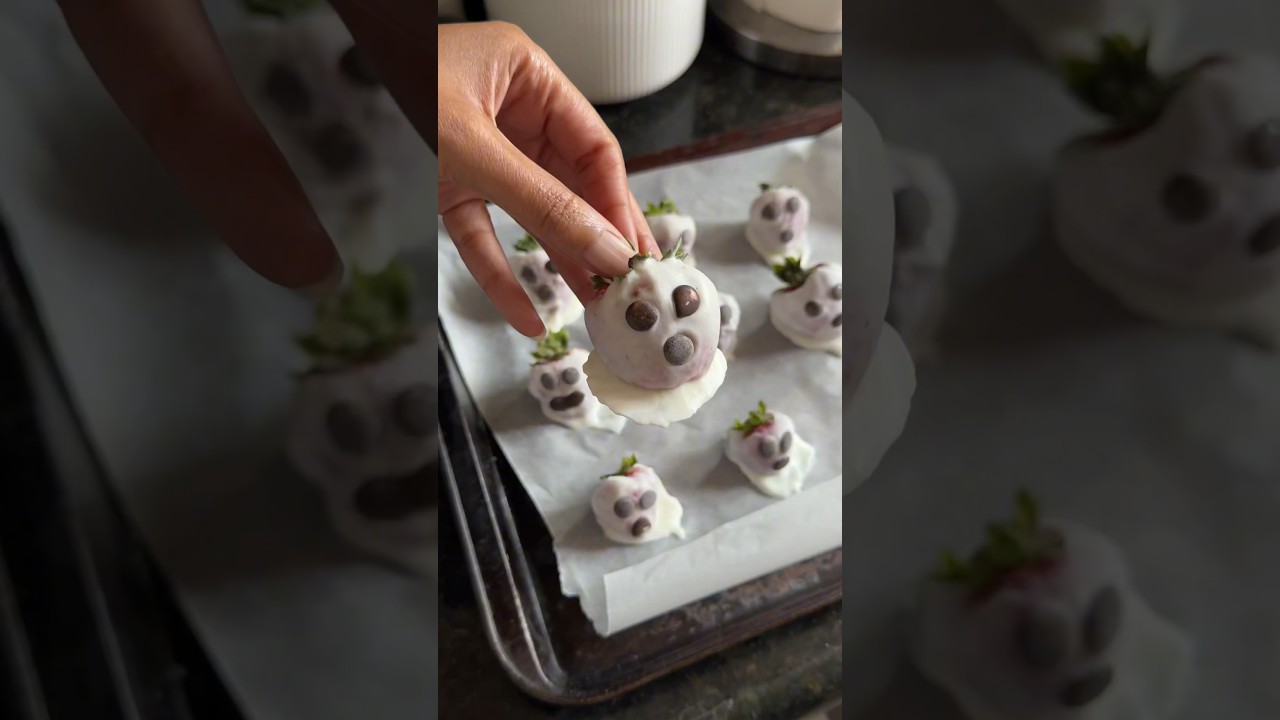
I love making Strawberry Ghost Smoothies for Halloween. They’re a fun, easy way to add something spooky and red to any party table.
The bright pink-red color pops, and those ghost faces always get a smile. I blend frozen strawberries, plain yogurt, and a little honey for the base.
The strawberries give the drink its deep red color. The yogurt makes it creamy and thick, which is perfect for drawing ghost shapes on the cups.
After pouring the smoothie into clear cups, I use a little melted chocolate to draw simple ghost faces on the outside. Two dots for eyes and a round mouth—done.
It’s a tiny detail, but it really brings the theme to life. You don’t need fancy ingredients—sometimes I swap in vanilla yogurt or toss in a banana for extra sweetness.
If I want an even brighter red, I’ll add a few raspberries. Kids love helping with these, especially adding the faces.
The drinks look cute, not scary, so everyone can enjoy them. Sometimes I even make these for breakfast on Halloween morning.
If you want to make them dairy-free, just use plant-based yogurt or fruit juice as the base. I’ve tried both—they’re great.
These smoothies are easy to make ahead and stash in the fridge. Just wait to add the ghost faces until serving so the chocolate doesn’t smear.
Blend, pour, decorate—three steps and you’re done. I’m always proud bringing out a tray of these. They disappear fast!
6) Pomegranate Witch’s Brew Punch
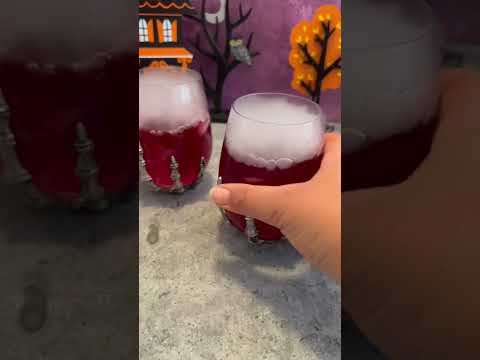
Pomegranate Witch’s Brew Punch is always popular at my Halloween parties. The deep red color looks spooky, and it’s easy to make for a group.
I like that it works for both kids and adults. I start with pomegranate juice for the base and pour it into a big bowl or pitcher.
Then I add lemon-lime soda or sparkling water to make it fizzy. If I want it sweeter, I’ll mix in a splash of cranberry or cherry juice.
Sometimes I toss in fresh pomegranate seeds for extra texture and a burst of flavor. The seeds look like little gems floating in the drink.
For parties with just adults, a splash of vodka or rum works great. Otherwise, it’s easy to keep it non-alcoholic for everyone.
I always use plenty of ice to keep it cold and refreshing. I like to decorate the punch bowl with gummy worms or plastic eyeballs to make it creepy.
Sometimes I’ll dip the rim of the cups in red sugar for a fun touch. The punch looks best in clear cups or glasses so everyone can see the color.
This punch is easy to tweak. If someone likes it less sweet, I just use more sparkling water and less juice.
It’s also easy to double for a bigger crowd. The fresh taste and bright color make this punch one of my favorite Halloween drinks.
It’s quick to put together, so I don’t spend much time in the kitchen. I always get compliments on how cool and festive it looks.
7) Red Bell Pepper Mummy Wraps
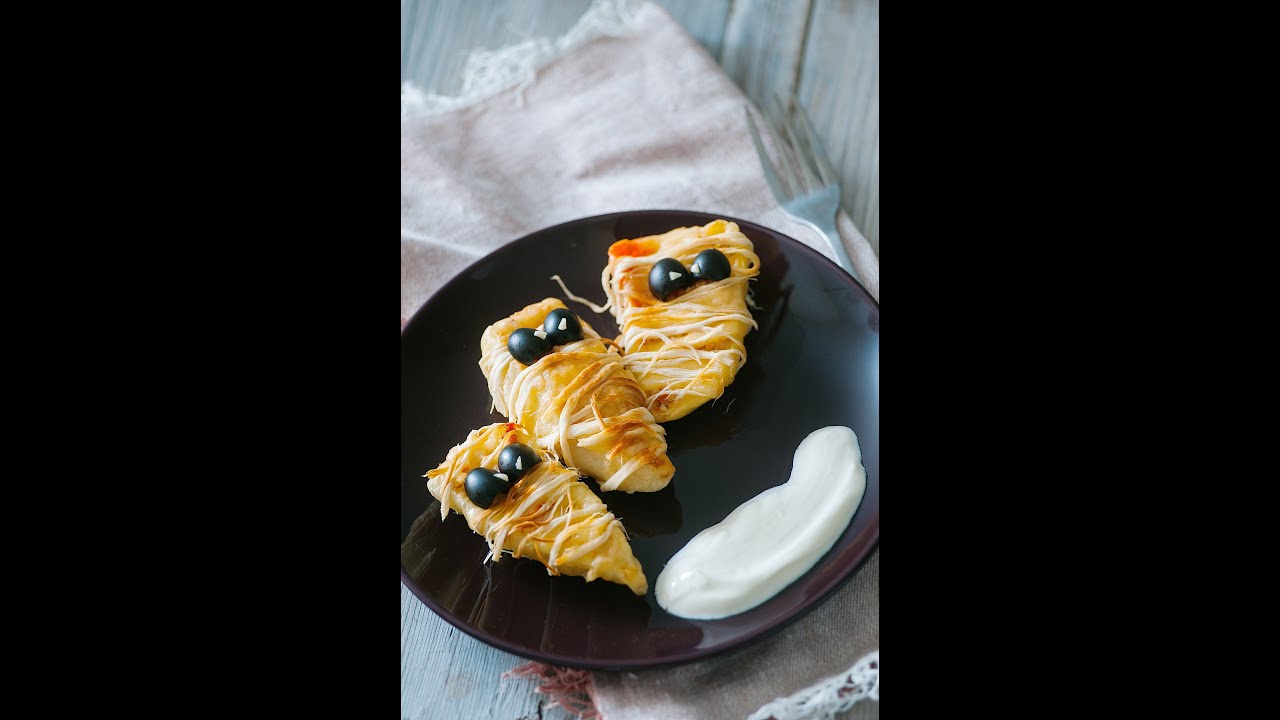
I love making Red Bell Pepper Mummy Wraps for Halloween parties. They look adorable and totally fit the spooky vibe.
Plus, they’re easy enough for anyone to make. All you really need are fresh red bell peppers, some cheese, and crescent roll dough.
I start by slicing each pepper in half and scooping out the seeds. Then I fill them up with cheese or whatever dip I’m feeling that day.
Next, I wrap strips of crescent dough around the peppers so they look like little mummies. I leave a few gaps to let the filling peek through—makes them bake more evenly, too.
Once they’re wrapped, I toss them in the oven until the dough turns golden brown. Sometimes I add tiny olive slices for the “eyes,” just for kicks.
They end up looking playful and festive. These wraps are colorful and mild, so kids and adults both go for them.
The combo of soft bread, creamy filling, and sweet pepper is just so good. And you can eat them with your hands, which is perfect for parties.
I like switching up the cheese or dip depending on who’s coming over. Cream cheese, hummus, shredded cheese—whatever works.
It’s easy to keep them vegetarian, which is a lifesaver if you’ve got guests with different diets. Red Bell Pepper Mummy Wraps are quick, simple, and add a pop of red to the snack table.
I always get a few laughs when I bring them out. Can’t beat that.
8) Cranberry Meatball Skewers
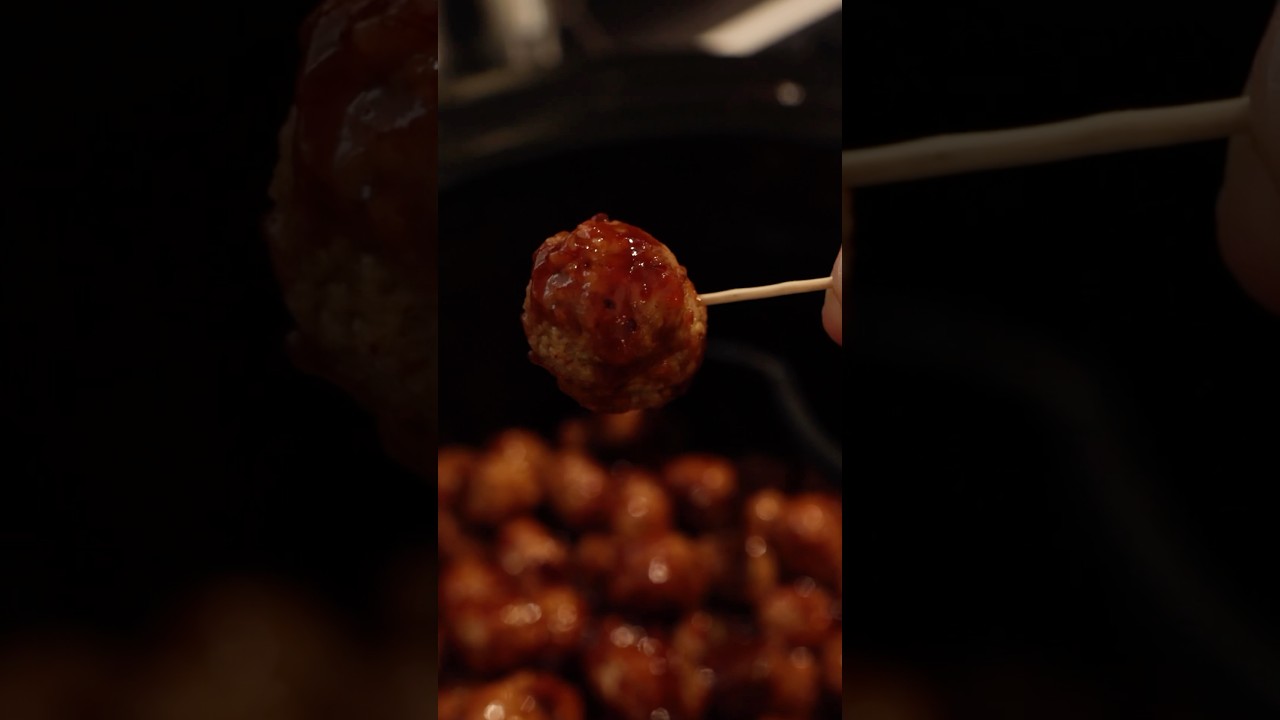
I’m a big fan of Cranberry Meatball Skewers for Halloween. They’re easy to grab and the bright red sauce really pops on the table.
Sometimes I use frozen meatballs, other times I make them from scratch. Either way, I heat them up in a pan or the oven until they’re good and hot.
While that’s going, I whip up a cranberry sauce—just cranberry jelly, a squirt of ketchup, and a pinch of brown sugar if I’m in the mood.
I stir it all together over medium heat until it’s smooth. Then I toss in the meatballs and let them simmer in that shiny red glaze.
Once they’re coated, I thread three or four meatballs onto each skewer. A little extra sauce on top never hurts.
The glaze gives them a sweet and savory flavor that’s hard to resist. Guests always seem to go back for seconds.
If I want a little heat, I’ll sprinkle in some red pepper flakes. Not too much—it’s just enough to wake up your taste buds.
Beef, chicken, turkey—they all work. I just use whatever’s in the freezer that day.
It’s nice that you can make these ahead and warm them up before serving. Makes life a bit easier, especially if you’re juggling a bunch of party snacks.
I like to arrange the skewers on a platter, sometimes with chopped herbs for a little green. The red and green combo looks great for Halloween, or honestly, any time.
Toothpicks or small wooden skewers do the trick. Keep napkins handy though—the sauce can get messy.
Sometimes I’ll stick a plastic spider on the platter or use Halloween-themed picks for extra fun. Both kids and adults dig these.
Every bite is juicy and packed with flavor. Folks usually ask for the recipe, which is always a nice compliment.
9) Tomato Soup Cauldron
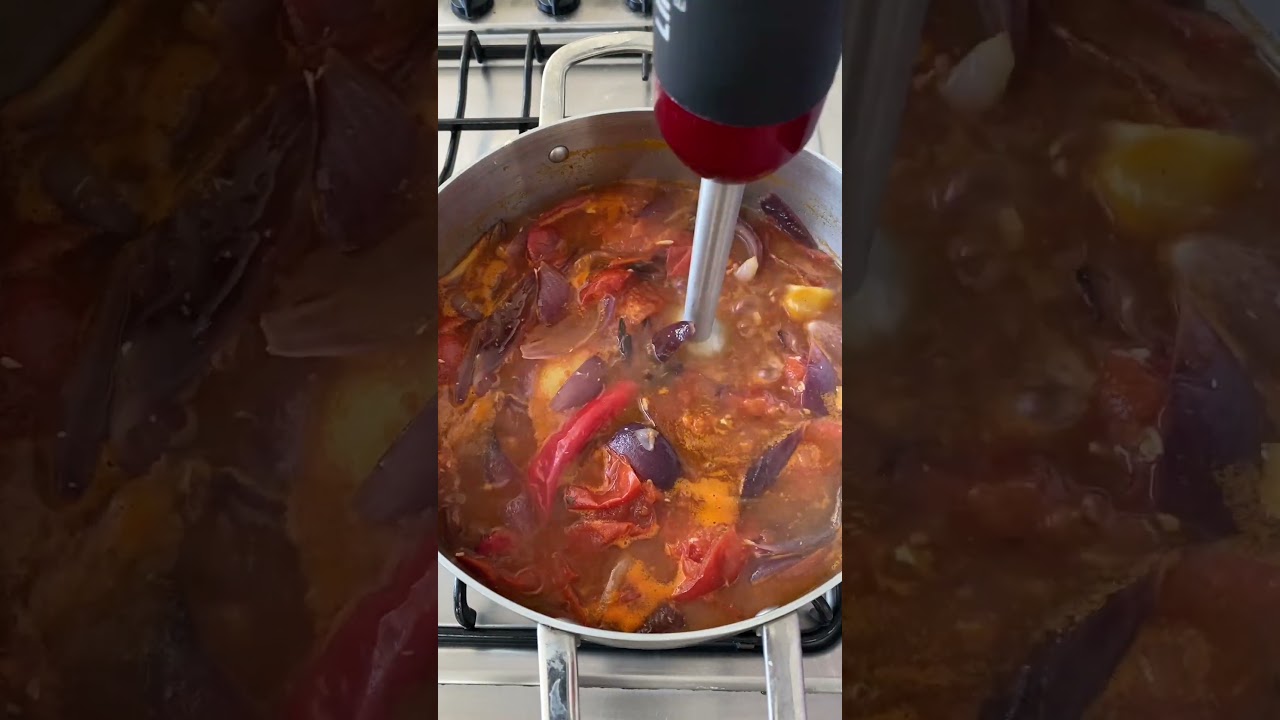
Tomato soup is one of my favorite cozy foods for Halloween night. That deep red color just screams spooky season to me.
I like to serve it in a big black pot, so it looks like a “cauldron.” Sometimes I get fancy and use hollowed-out bread bowls, too.
The steam rising off the soup makes it feel a little magical. My tomato soup is usually pretty simple—canned tomatoes, onion, garlic, and broth.
Sometimes I blend in a splash of cream for extra smoothness. Once it’s hot, I season it with salt, pepper, and a pinch of sugar to mellow out any tang.
For a little flair, I swirl cream on top or toss in some goldfish crackers. If I’m feeling playful, I’ll float mozzarella “eyeballs” or olive slices for a spooky touch.
The soup cauldron always ends up in the middle of my Halloween spread. People love dunking grilled cheese “witches’ brooms” or breadsticks into it.
That bright red color looks awesome on the table. If I’m making soup for a crowd, I just keep the pot warm and let everyone help themselves.
Leftovers are never a problem—tomato soup is even better the next day. Just reheat and you’re set.
10) Red Hot Spiced Nuts
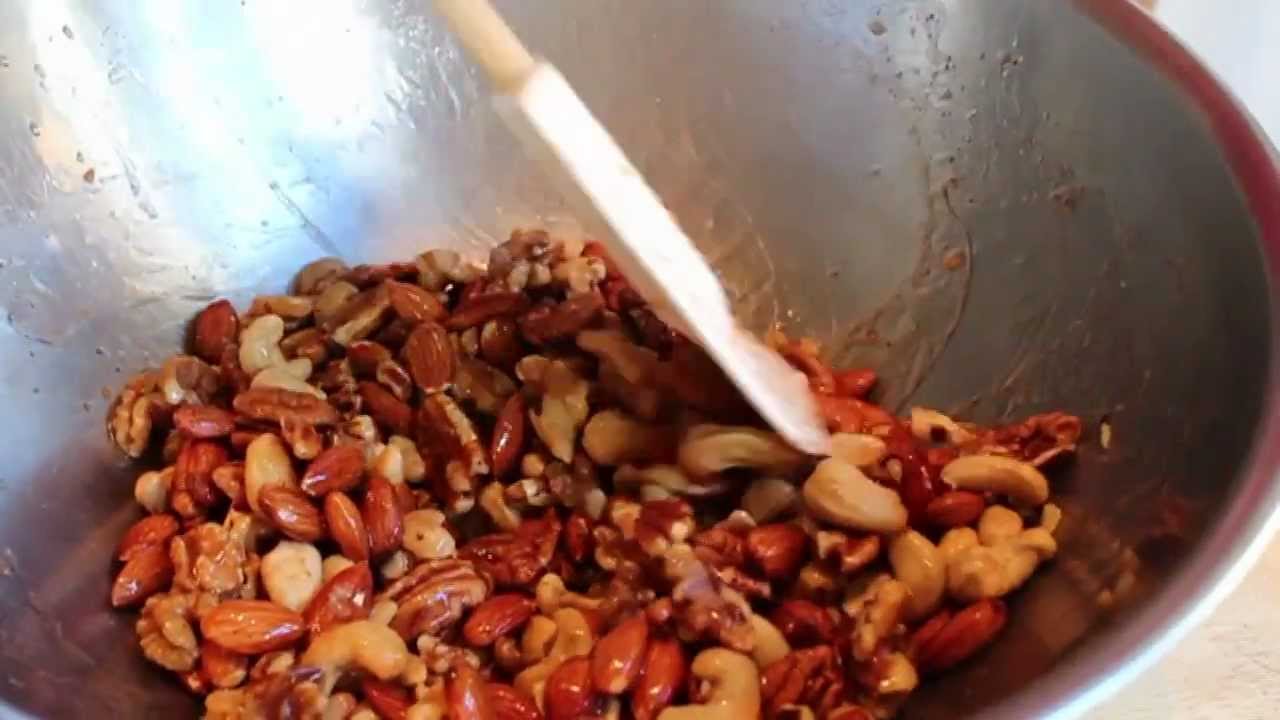
When I want a snack that stands out at my Halloween party, I always make red hot spiced nuts. They’re crunchy, bold, and pack a spicy kick.
The red color comes from paprika and cayenne. If I want them to really pop, I’ll add a drop of red food coloring.
I usually go with a mix of nuts—almonds, cashews, whatever’s on hand. I toss them in oil so the spices stick, then coat them well.
Baking them in the oven makes them even crispier. The smell is amazing—warm and spicy, fills up the whole kitchen.
Once they cool, they’re ready to snack on. That red coating looks festive and fun.
Sometimes I’ll add a little sugar or honey for a sweet-spicy combo. It gives them a nice glaze and balances the heat.
They’re easy to make in big batches, which is great for parties. I’ll serve them in bowls or pack them in little bags as favors.
If someone isn’t into spicy food, I just cut back on the cayenne. Customizing the heat is super simple.
I always end up making extra because these disappear fast. People of all ages seem to love the crunch and flavor.
They’re great on their own or sprinkled over salads. I like having them alongside other Halloween finger foods, too.
11) Raspberry Vampire Truffles
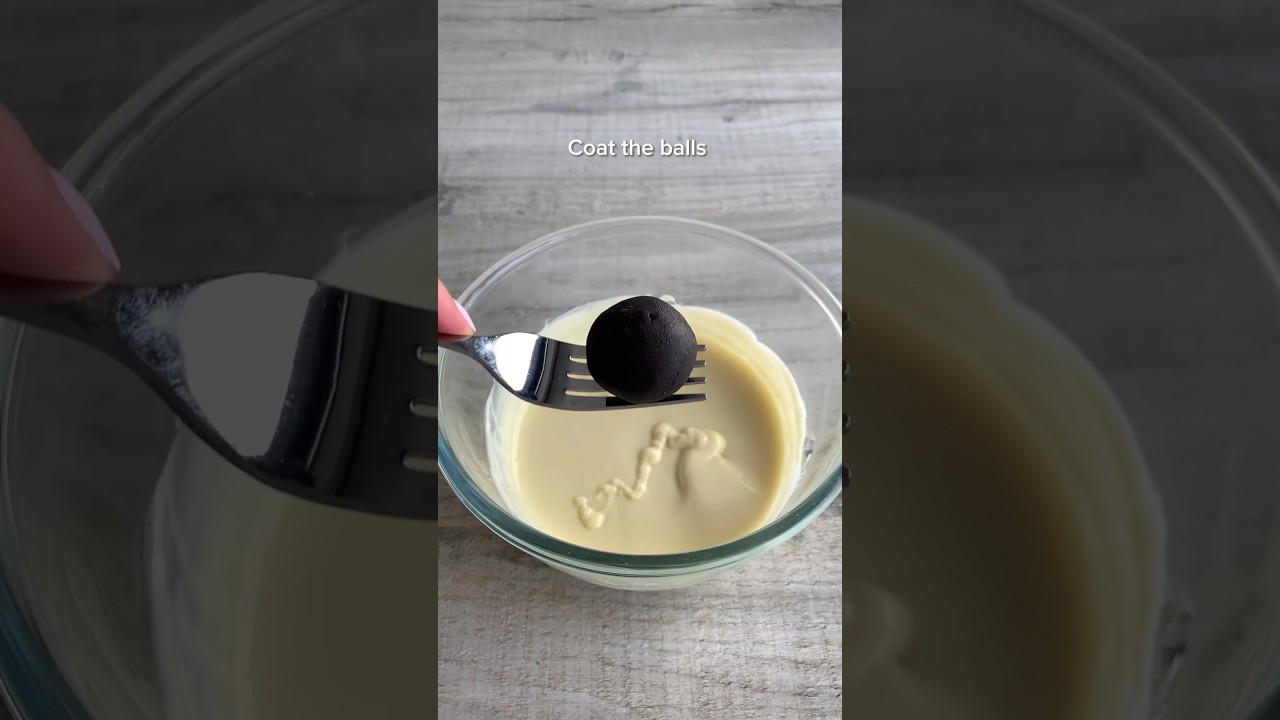
Raspberry Vampire Truffles are one of my favorite spooky treats for Halloween. They look a little creepy with that bright red filling, but the taste is all sweet and fruity.
To make these, I melt dark chocolate for the shell. Inside, I spoon in raspberry jam or puree—it’s what gives them that bold red “vampire” look.
Biting into one, the raspberry center almost oozes out. It’s kind of dramatic, honestly, but in a fun way.
The “vampire” name totally fits, since the red filling looks like it’s dripping when you take a bite. Sometimes I use fresh or frozen raspberries for a stronger flavor.
A bit of cream cheese in the filling makes it extra smooth. If I want them super red, I’ll sneak in a drop of food coloring.
For parties, I put the truffles on a black plate or in mini cupcake liners. The red really stands out that way.
Kids usually love the surprise inside. If I’m pressed for time, I’ll use store-bought chocolate truffle shells and just fill them up with raspberry jam.
It’s a solid shortcut. For a quick homemade treat that’s both tasty and a little spooky, these truffles are always a hit.
12) Red Velvet Monster Brownies
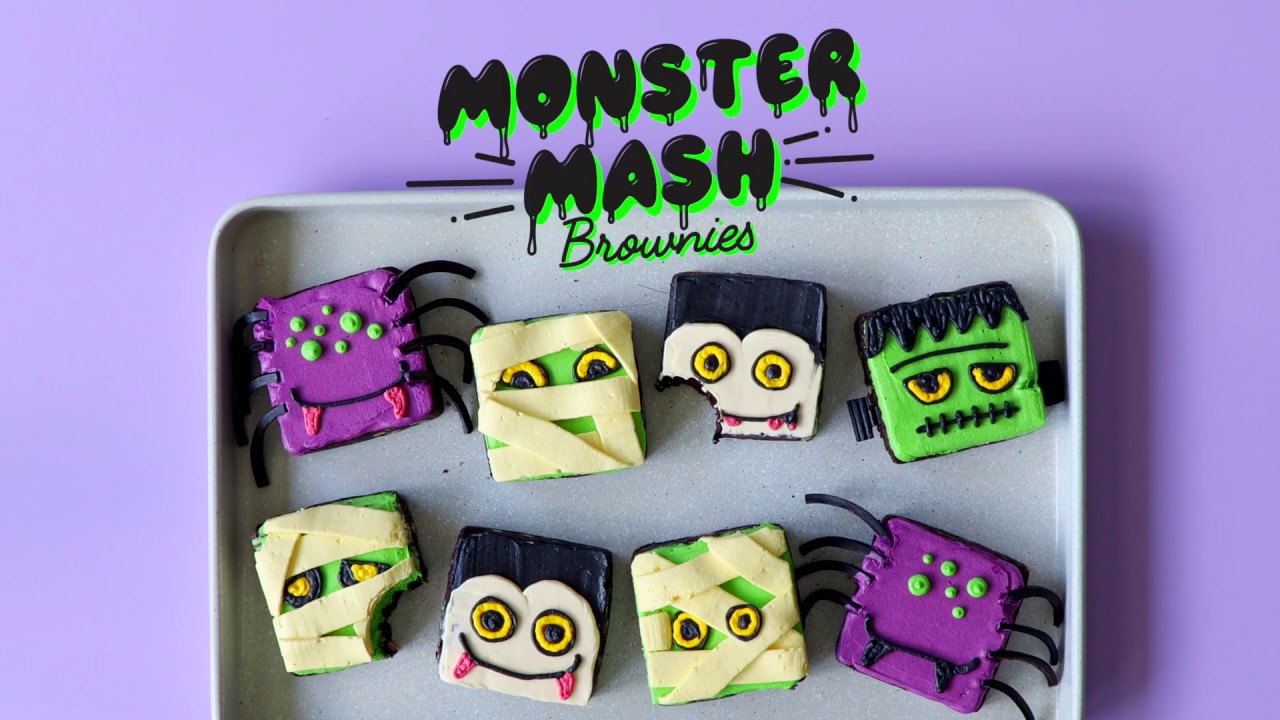
I love making Red Velvet Monster Brownies for Halloween. They look spooky but taste soft and sweet.
The deep red color is perfect for the season. I start with a red velvet brownie batter—sometimes from a box, sometimes homemade—and add a few drops of extra food coloring if I want them really vibrant.
Before baking, I sprinkle white chocolate chips or chunks on top. It’s a nice contrast to all that red.
Once baked, I let them cool off completely. Then comes my favorite part: decorating!
Candy eyes turn these into goofy little monsters. I just press a few onto each square.
Sometimes I go all out with black gel icing for mouths, scars, or fangs. Each brownie ends up looking a bit different—some silly, some kind of creepy.
Kids love helping with this step. It’s a fun way to get everyone in the Halloween spirit.
The brownies are soft and chewy, with a nice mix of white chocolate and red velvet. They’re a hit at parties and family get-togethers.
If I’m feeling extra, I’ll drizzle red icing on top. It makes the brownies look even more monstrous and adds a sweet touch.
Honestly, these are so easy to make. No fancy baking skills needed—just your favorite red velvet recipe or mix, and a little imagination.
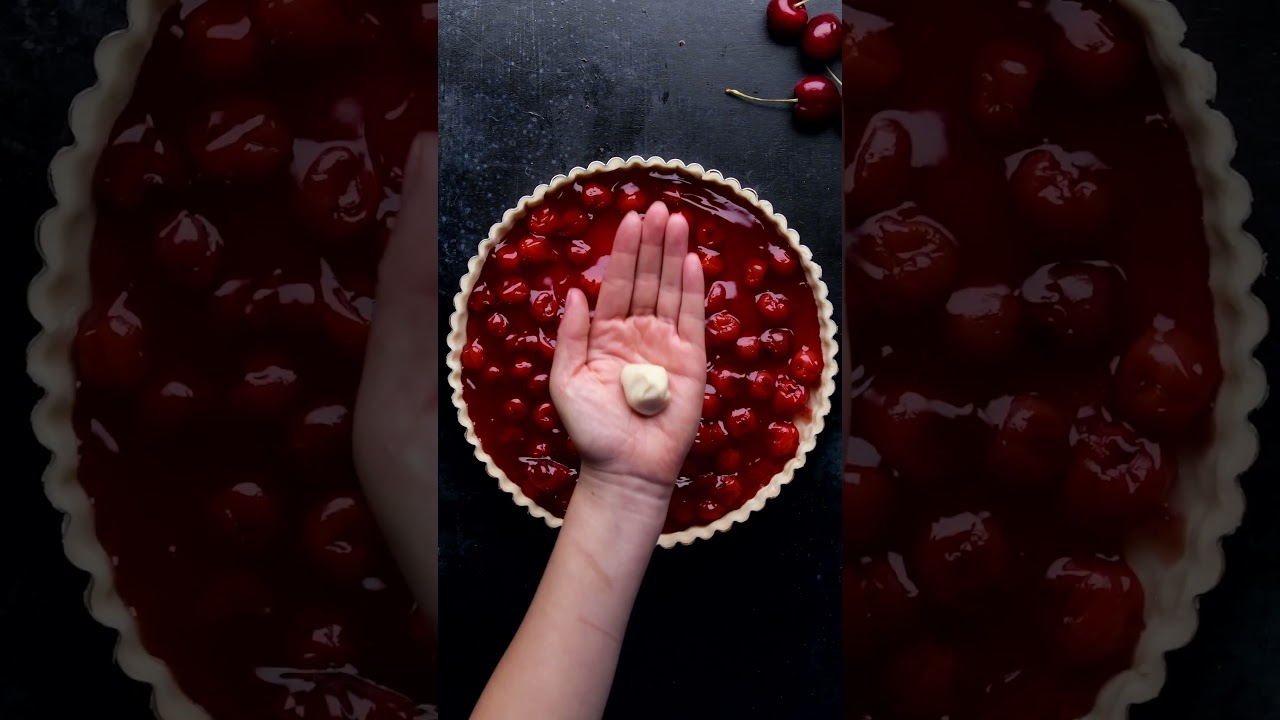
13) Sour Cherry Brain Cupcake
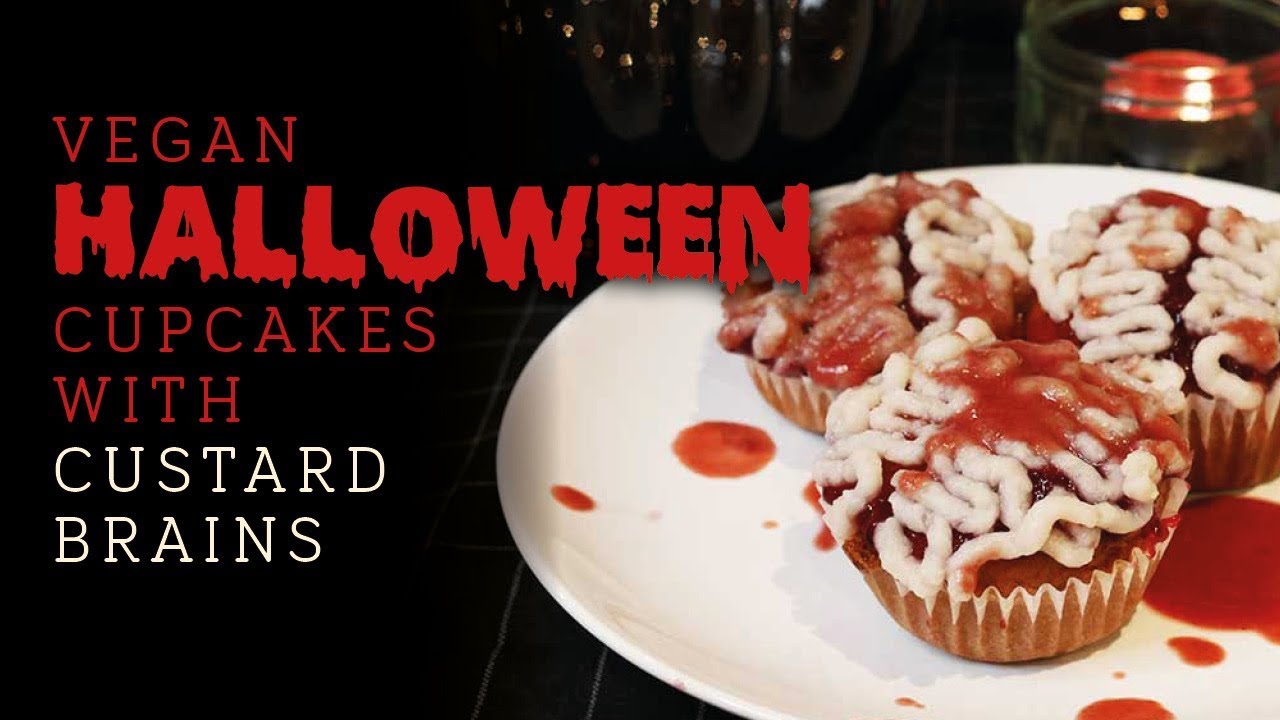
When I want a creepy but playful treat, I like to make Sour Cherry Brain Cupcakes. These cupcakes don’t just look cool—they taste great, too.
For the base, I go with red velvet or a simple chocolate cupcake. The red color totally fits the Halloween vibe and makes them look right at home on a spooky table.
The real fun is in the topping. I pipe gray or pink buttercream on top using a round tip.
Moving my hand back and forth, I shape the frosting into a wiggly brain. It’s honestly easier than it looks and only takes a few extra minutes.
To make it look even more real, I drizzle a bit of red gel or cherry sauce over the “brain.” Sour cherry sauce gives it a messy, juicy look and adds a tart kick.
Sometimes I’ll sneak a spoonful of sour cherry jam inside before baking. Biting in and hitting that gooey center? It’s such a fun surprise.
I keep the cupcakes on the smaller side so people can just grab one. Halloween-patterned liners add a pop of color, too.
Kids usually love the look and the sweet-sour taste. Adults seem to get a kick out of the brain design, but nobody finds them too gross.
No sour cherry sauce? Raspberry or strawberry jam works fine. I’ve even tinted store-bought frosting with food coloring when I was in a rush.
It’s a quick way to turn any cupcake into a Halloween centerpiece. People always ask how I made them look so realistic.
14) Watermelon Jack-o’-Lanterns
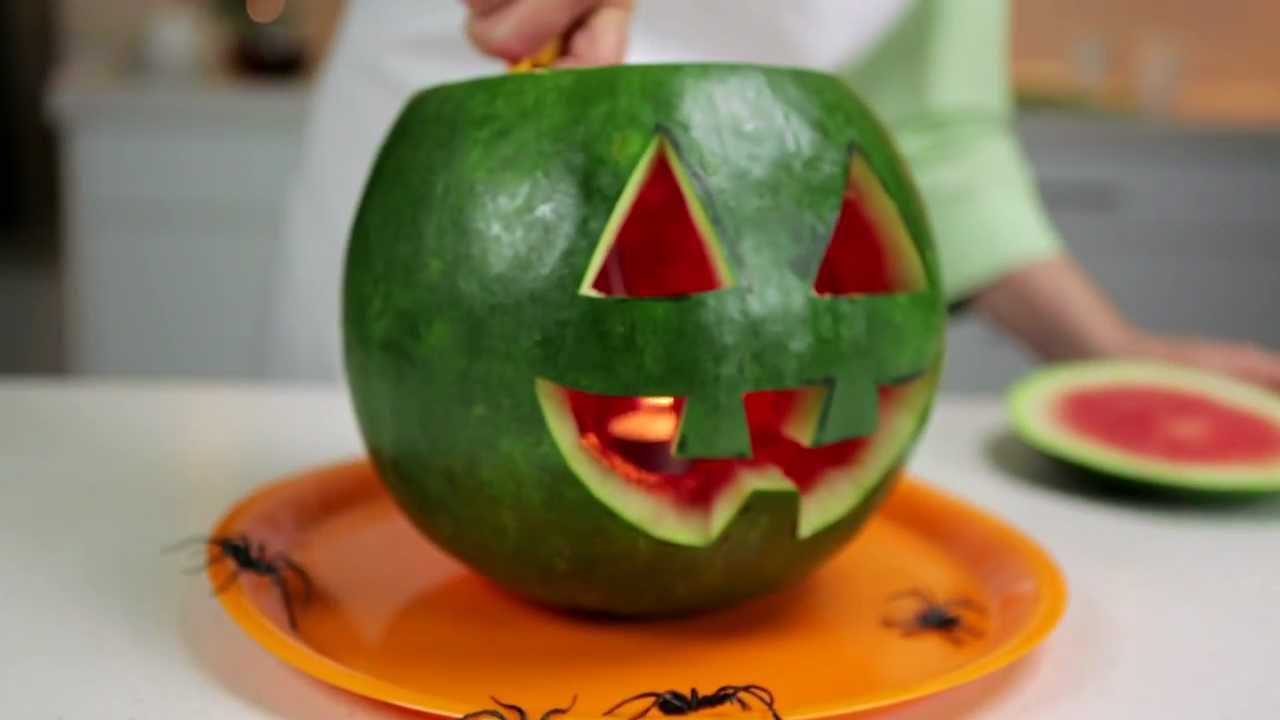
I love making Watermelon Jack-o’-Lanterns for Halloween. They’re such a fun twist on the classic pumpkin.
Instead of orange, I use a big red watermelon. First, I carefully cut off the top to make a lid, just like with a pumpkin.
Then I scoop out the sweet red fruit inside. I snack on it while I work, which is half the fun.
Next, I carve a face or design on the front. Watermelon skin is way softer than pumpkin, so it’s easier to work with.
I use a small knife or sometimes little carving tools. The bright red inside looks cool and spooky, especially with a candle or light inside.
It glows through the holes, just like a regular jack-o’-lantern. I usually go with battery-powered tea lights—no risk of melted watermelon or fire.
After carving, I save the watermelon pieces. I eat them as a healthy treat or toss them into a fruit salad.
Kids and adults both seem to love these Watermelon Jack-o’-Lanterns at parties. I think it’s a great allergy-friendly option, too.
Not everyone likes pumpkin, but watermelon? Hard to go wrong. It’s a refreshing change from the usual Halloween snacks.
These jack-o’-lanterns can be made ahead and kept cool in the fridge. If I want them to last, I wait until the day of the party to carve.
Sometimes I fill the hollow watermelon with other fruits, like grapes or berries. It turns into a fun snack bowl.
Watermelon Jack-o’-Lanterns are simple, safe, and sure to get a smile. They add a splash of color to the table and just make Halloween feel a bit more special.
15) Beetroot Deviled Eggs
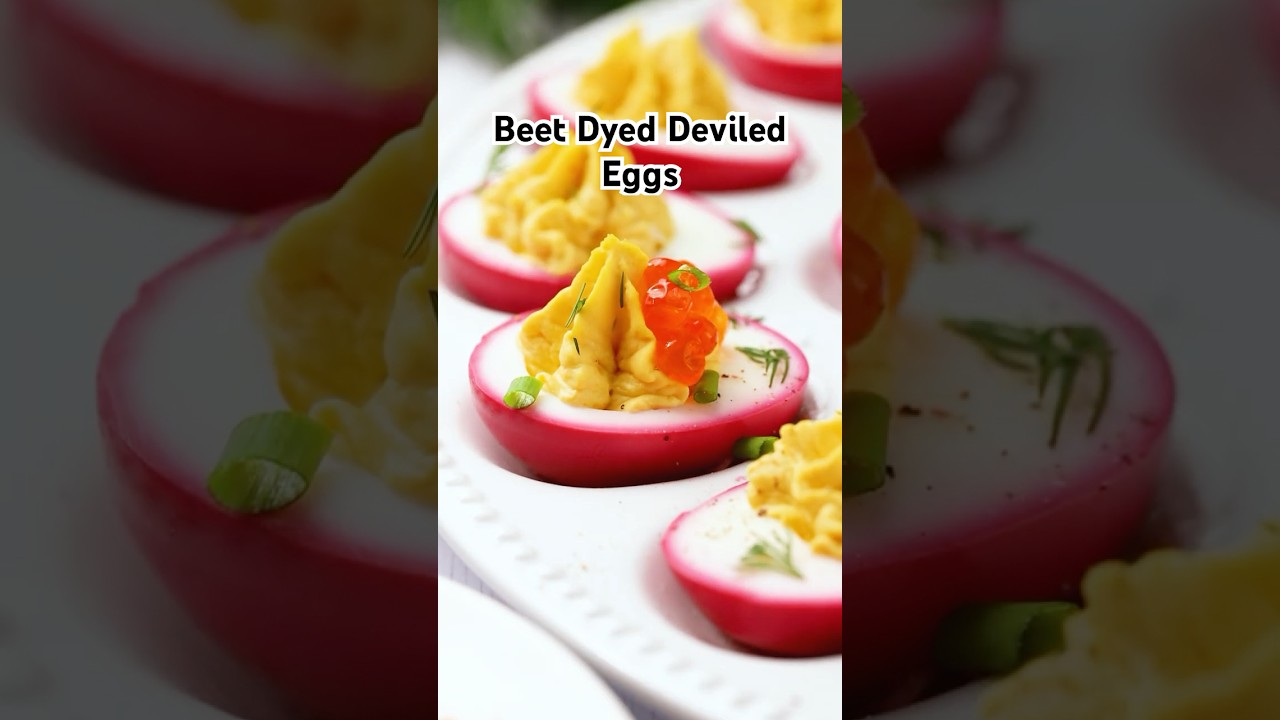
I love using beetroot to give classic deviled eggs a spooky twist for Halloween. The beetroot turns the egg whites a deep red, so they look creepy but still taste great.
The color comes from soaking hard-boiled egg whites in beet juice. First, I boil the eggs until they’re firm, then peel them and soak just the whites in beet juice for about 30 minutes.
This step gives the outside a bold, reddish-pink shade. How long I soak them depends on how dramatic I want the color.
For the filling, I mash the yolks with mayo, a little mustard, and some salt and pepper. Sometimes I’ll add a tiny spoonful of beet juice for extra color and a subtle flavor boost.
It’s fun to watch the filling turn a light pink. When I pipe the filling in, the eggs look wild on a plate.
They fit right in with other Halloween treats because of the bold colors. I like to sprinkle a bit of paprika on top for more red and a hint of smokiness.
If I’m feeling creative, I use a toothpick to drag little lines through the red layer. This gives them a veined look, almost like monster eyes.
My guests always think they look cool. Beetroot doesn’t make the eggs taste weird—it just adds a hint of earthiness.
These eggs are a good option if you want something different from all the sweets. I serve them on a black plate for extra contrast. The color really pops.
Usually, they disappear fast at parties. Beetroot deviled eggs are easy to make ahead.
I store them in the fridge until serving time, which saves me a headache on Halloween night. Mixing simple ingredients with a bit of imagination really turns plain deviled eggs into a holiday highlight.
Tips For Creating Red-Themed Halloween Treats
Making red Halloween food can be both creative and fun. I like to play around with different ingredients and color sources to make my treats look bright and tasty.
Using Natural Versus Artificial Food Coloring
I’m always deciding between natural and artificial food coloring. Natural options like beet juice, pomegranate juice, or even pureed strawberries give a softer red and don’t add any weird stuff to the food.
Artificial food coloring, like classic red dye, makes the color pop and is more predictable. It’s super easy, but it can stain your hands and sometimes leaves a taste if you overdo it.
Pros and Cons Table:
| Coloring Type | Pros | Cons |
|---|---|---|
| Natural | Healthier, mild taste | Softer color, less vibrant |
| Artificial | Bright, strong color | Stains, may taste odd |
For kids or anyone sensitive to dyes, I stick with natural sources. If I want a really bright red, especially for icing or drinks, I might mix both.
Food Pairings That Enhance Red Colors
Pairing red ingredients with the right foods makes the color stand out. I like to use white or really light bases—vanilla cake, cream cheese, or whipped cream—so the red “pops.”
Dark colors like chocolate or black licorice make red feel bolder by contrast. Sometimes I’ll add fresh cherries or strawberries on top for more color.
Some foods, like tomato sauce or red velvet cake, already have that red color. Combining naturally red foods with just a hint of coloring makes snacks look vibrant without much effort.
I always double-check that flavors actually work together, so the treat tastes as good as it looks.
Safety And Allergy Considerations
When I make red Halloween foods, I want them to be safe for everyone. I always keep allergies and food safety in mind. These steps help prevent any health risks and make my party fun for all.
Creative Ways To Avoid Common Allergens
I like to ask my guests about their allergies before I start planning. Some people can’t eat peanuts, tree nuts, eggs, dairy, or gluten, so I check food labels for these ingredients.
If I use food coloring, I pick natural ones or brands labeled allergen-free. Here’s a quick list of swaps I use:
- Nut-free: Use seeds like sunflower, or skip nuts completely.
- Gluten-free: Choose corn chips or rice cakes instead of wheat crackers.
- Dairy-free: Use coconut or almond milk (if there’s no nut allergy).
If I make something with a common allergen, I always label it clearly. I keep allergen-free dishes on a separate table to avoid mix-ups.
Making easy and clear choices helps keep everyone safe at my party.
Presentation Tips For Safe Serving
I always keep my food at the right temperature. Bacteria love things like meatballs or deviled eggs if you’re not careful.
Hot foods stay hot and cold foods stay cold. I’ll grab insulated dishes or tuck some ice under the trays—whatever works to keep things safe.
To avoid cross-contact, I use separate serving utensils for each dish. There’s usually a fresh spoon for allergen-free foods, just to be sure.
Placing name cards near dishes—with allergen info—makes a big difference. Guests can check what’s safe for them without any awkward guessing.
I also remind my guests to use clean hands or tongs, not fingers. It might sound obvious, but it really cuts down on germs and keeps the food safer for everyone.