30 No Bake Halloween Treats Kids Can Make For Halloween
Halloween’s honestly one of my favorite excuses to get creative in the kitchen with my kids.
Finding treats we can whip up together—without even turning on the oven—just makes it all less stressful and a lot more fun.
I’m always on the lookout for simple, no bake Halloween treats that kids can actually help with.
It’s a sweet way to spend time together, spark their imagination, and, of course, enjoy some tasty snacks.
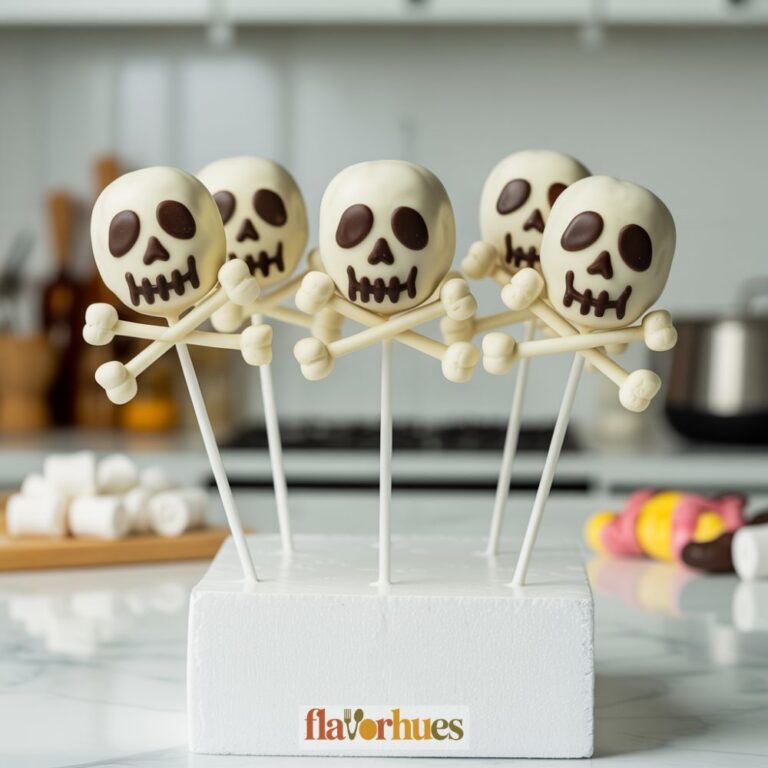
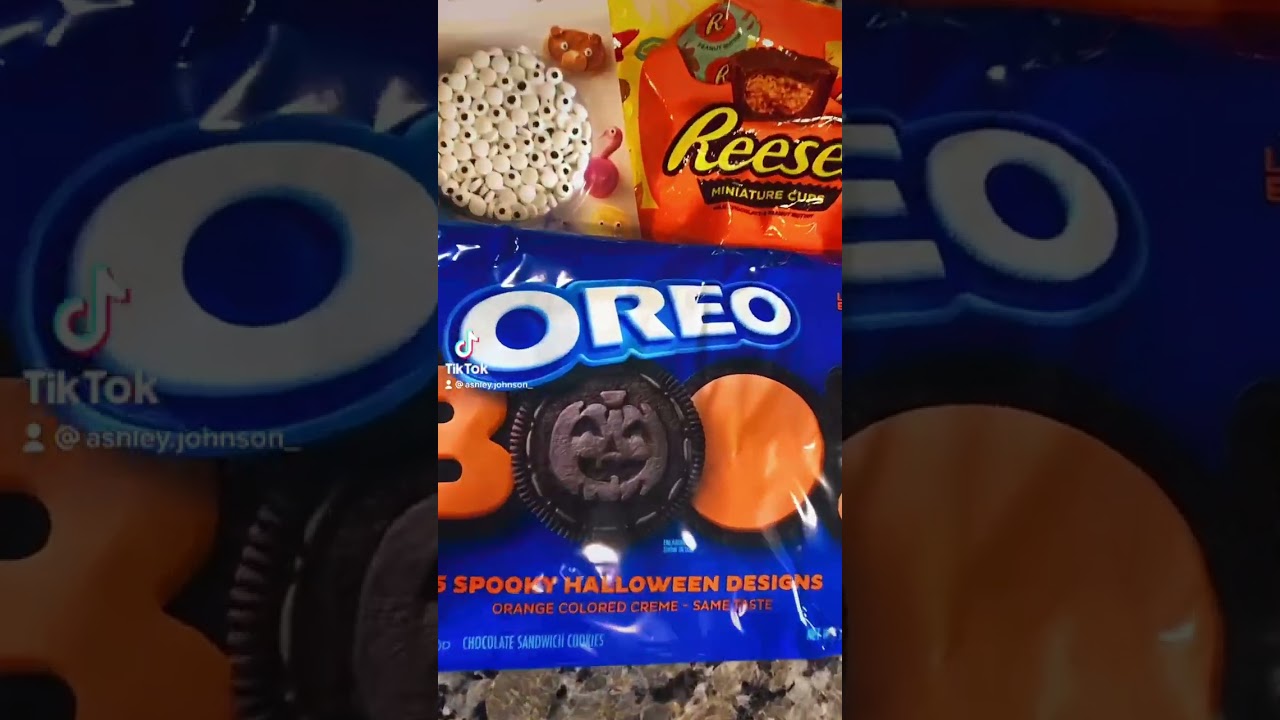
1) Ghost Oreo Pops
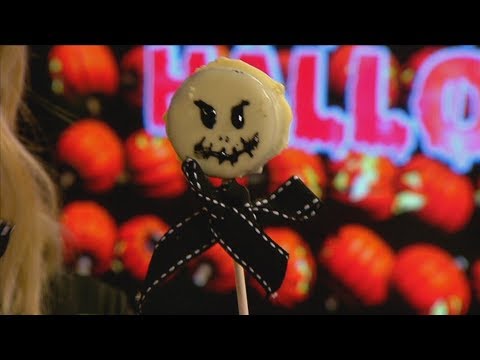
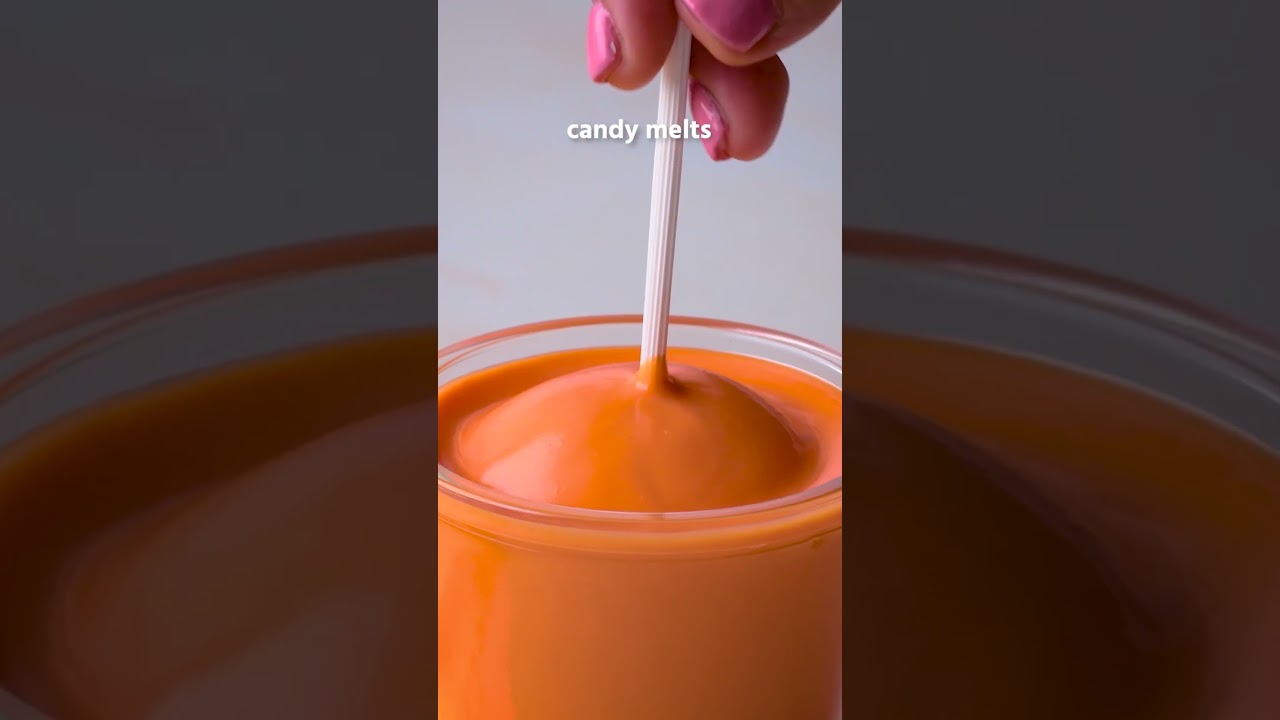
I love making Ghost Oreo Pops because they’re so easy—no oven, no hassle. All you need are Oreo cookies, white chocolate or candy melts, lollipop sticks, and mini chocolate chips.
This treat only takes a few minutes to put together. First, I melt the white candy coating until it’s smooth.
Then, I gently push a stick into the cream center of each Oreo. Twisting the stick in helps keep the cookie from breaking, though sometimes I mess up and eat the broken ones—oops.
Once the Oreos are on sticks, I dip each one into the melted white chocolate, making sure it’s covered. Letting the extra coating drip off keeps things from getting too messy.
I place them on wax paper so they don’t stick. While the coating is still soft, I press two mini chocolate chips at the top for eyes.
If I want to add a mouth, I use a mini chocolate chip or just draw it with melted chocolate. Suddenly, the pops look just like little ghosts, which cracks me up every time.
I let them sit until the coating is firm. If I’m impatient, I’ll pop them in the fridge and they set up fast.
Kids can help by dipping the cookies, adding the sticks, or sticking on the eyes. If I’m making them for a group, I’ll stand the pops up in a jar or foam block so they’re easy to grab.
Sometimes I wrap them in plastic and tie them with string to hand out to friends. They’re great for parties or just as a silly Halloween snack at home.
Making Ghost Oreo Pops is always fun, especially when decorating them with goofy faces. Sometimes I use black gel icing for extra-scary eyes or weird expressions.
There are so many ways to make them unique, so I can get creative with each one. Since there’s no baking, I don’t have to wait long before eating them (which is honestly a huge plus).
I like that they’re quick, need barely any supplies, and taste delicious every time. It’s a sweet, simple treat any kid can help make for Halloween.
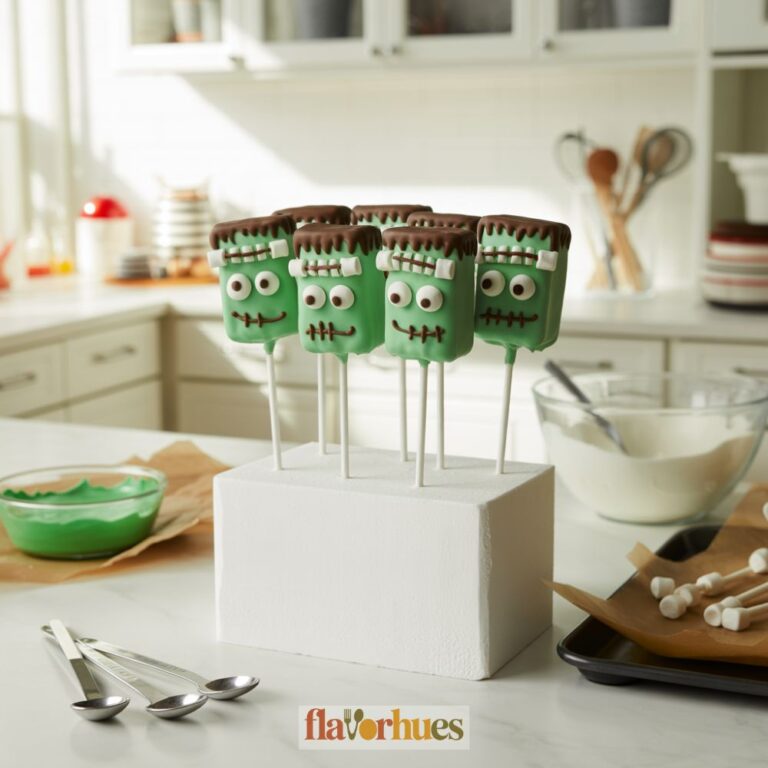
2) Monster Rice Krispies Treats
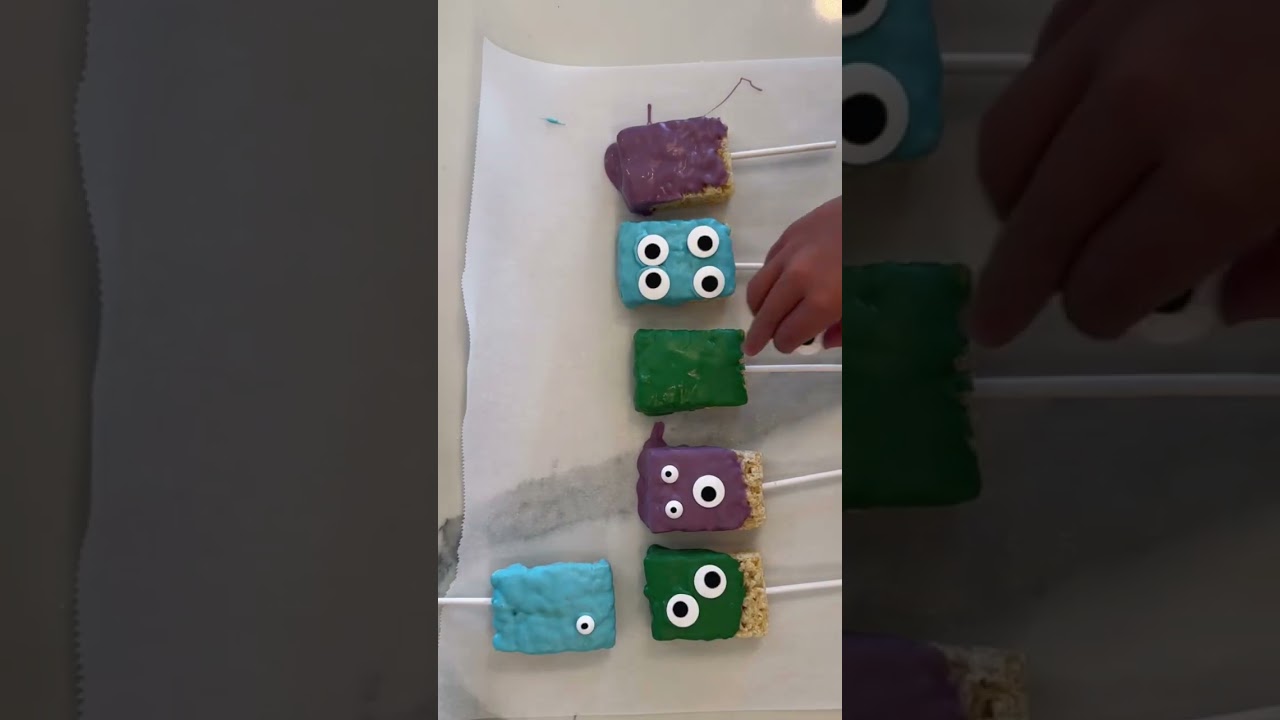
I love making Monster Rice Krispies Treats because they’re so easy and don’t need an oven. All you need are cereal treats, colored candy melts, and candy eyes.
I usually grab some store-bought Rice Krispies Treats or make my own and let them cool. Then I melt bright candy melts—green, orange, purple—in the microwave, stirring until smooth.
I dip each treat halfway into the melted chocolate. Sometimes I need a spoon to help cover the treats.
Before the chocolate sets, I press on candy eyes and sprinkles. Sometimes I’ll add mini chocolate chips for goofy monster mouths.
For extra fun, I’ll press colorful sprinkles or a bit of edible glitter onto the treats. Let the chocolate harden at room temp or in the fridge.
The treats are ready in about 20 minutes, which is perfect for impatient kids (or adults). I like to use popsicle sticks to make them easy to hold.
After the chocolate dries, the kids can draw monster faces with food markers. You can make each treat look totally different—one big eye, three little ones, whatever you want.
The best part? There’s no wrong way to decorate them. These are sweet, crispy, and a little bit messy, but that’s half the fun.
I love seeing all the silly monster faces everyone creates. It’s a hands-on project that works for both kids and adults who want to play with their food.
Cleanup is a breeze if you set the treats on wax paper. Any extra chocolate or sprinkles? Save them for next time.
Monster Rice Krispies Treats are awesome for parties or school snacks. I usually pop each treat in a little plastic bag, tie it with a ribbon, and give them away as party favors.
3) Pumpkin Apple Bites
Pumpkin Apple Bites are a fun, simple treat I love to make for Halloween. They look like tiny pumpkins but are sweet and crunchy.
I usually use green or red apples for this snack. I cut the apples into thick slices so they hold up.
Next, I grab some orange-colored candy melts or white chocolate. I melt the candy in the microwave until smooth.
I dip each apple slice halfway into the orange candy. This makes the apples look like pumpkin shapes.
I place the slices on wax paper to harden. While the candy is still soft, I add a tiny pretzel stick at the top of each apple slice.
This looks just like a pumpkin stem. Sometimes I use a little green candy or a leaf-shaped sprinkle for a “leaf”—it’s a cute touch.
Kids can help dip the apple slices and add the stems. I always remind them to be careful with the melted candy since it can get hot.
Spreading the candy around with a spoon works if dipping is tricky. I let the apple bites cool for about 15 minutes.
After the coating hardens, they’re ready to eat. These treats are fun for Halloween parties or just as a snack at home.
Pumpkin Apple Bites don’t take long to make, which is great when you want something quick. Plus, you only need a few ingredients—usually stuff I already have.
My favorite part is seeing the finished treats that look like real mini pumpkins. Making these with friends or family is a blast, especially with kids who like to help.
They’re best eaten fresh, but if I need to save them, I pop them in the fridge for a bit. Eating Pumpkin Apple Bites gives a nice mix of crispy apple and sweet candy.
They look bright and festive on any snack table. I honestly wish I could make these year-round.
4) Mummy Pretzel Rods

I like making mummy pretzel rods because they’re so simple and look super cool. Kids can help with every step since there’s no oven at all.
I just grab some pretzel rods, white chocolate, and small candy eyes to start. First, I melt white chocolate in the microwave.
When it’s smooth, I dip each pretzel rod about two-thirds of the way in. I try to shake off extra chocolate so it doesn’t drip everywhere, but sometimes it’s a little messy.
Then, I lay the coated rods on wax paper. Before the chocolate sets, I press two tiny candy eyes near the top of each rod.
Placing the eyes is my favorite part—it gives each mummy a silly look! I let the chocolate cool for a few minutes.
For the mummy “wraps,” I use a spoon or a sandwich bag with a tiny corner snipped off. I drizzle more melted white chocolate back and forth, making lines to look like bandages.
It doesn’t have to be perfect—messy wraps make the mummies even more fun. After the chocolate fully hardens, the mummy pretzel rods are ready to eat.
They taste sweet and salty (which I’m obsessed with). Sometimes I add colored sprinkles or a bit of dark chocolate for flair.
I can put the finished pretzels in a cup or lay them on a tray. They look great at a Halloween party or as a homemade treat for friends.
What I like most is how easy it is for kids to make these and get creative with the faces and wraps.
5) Witch Hat Chocolate Cones

I like to make Witch Hat Chocolate Cones because they’re easy and look adorable. All you need are some ice cream cones, chocolate, and a few colorful candies.
This treat doesn’t need any baking, so it’s perfect for kids like me who just want to get busy in the kitchen fast. First, I melt some chocolate in the microwave.
Then, I dip the open end of each cone into the chocolate. This is the base for the witch hat.
Once the cone is covered, I place it onto a cookie or round cracker to make the brim. While the chocolate’s still wet, I add candy decorations.
I like using small candies for the belt and maybe a bigger candy for the buckle. Sometimes I’ll add orange and green sprinkles just for fun.
I let my witch hats sit until the chocolate is firm. If I’m impatient, I shove them in the fridge and they set up fast.
It’s fun to watch the chocolate harden and get all shiny. These cones are crunchy and sweet, and I love biting through the cookie and cone together.
It’s simple enough that I can make them by myself or with a friend. Another thing I like is decorating each hat differently.
I use all sorts of colored candies, or sometimes draw on the hats with edible gel pens. It makes every treat feel special and unique.
Cleanup isn’t bad since there’s no oven or stove. If I keep everything on parchment paper, I can just toss it out when I’m done.
Witch Hat Chocolate Cones are a tasty, creative treat for Halloween.
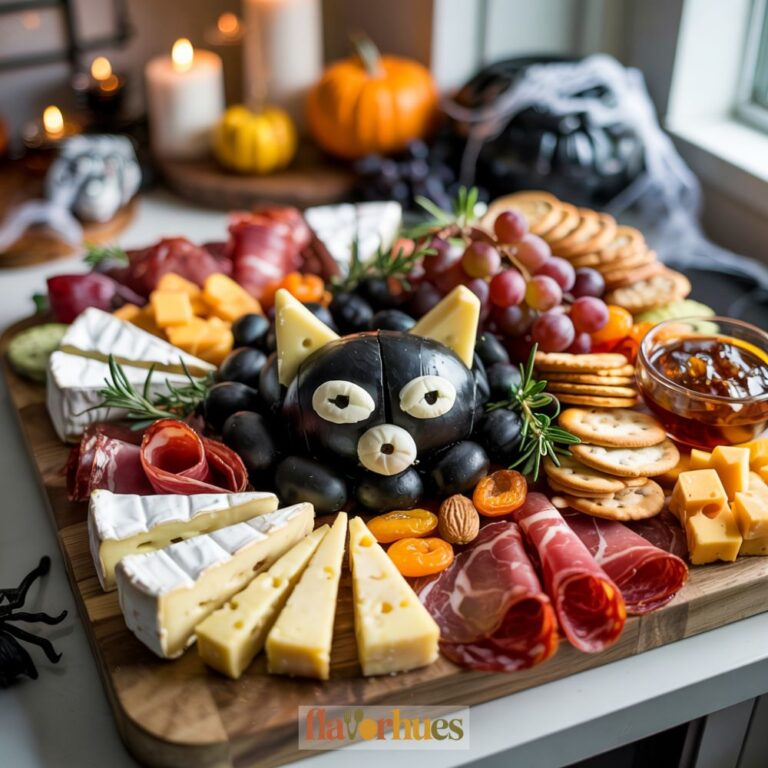
6) Spiderweb Dip with Chips
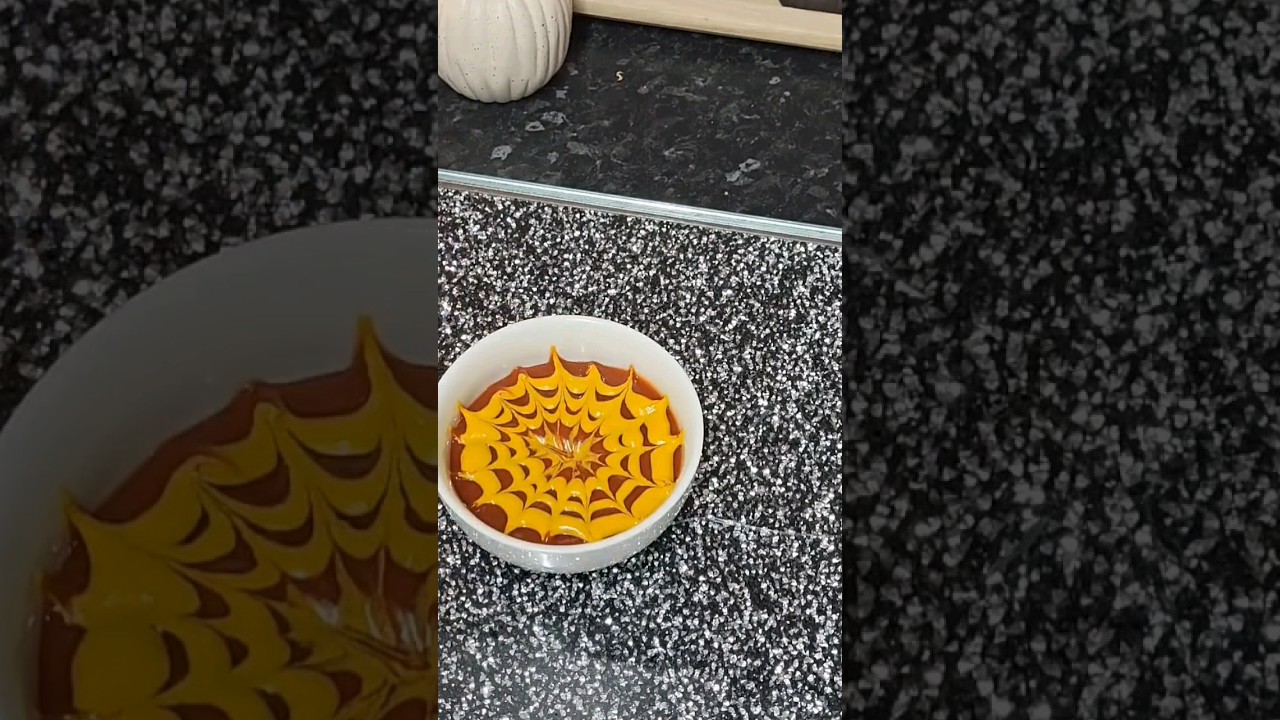
I like making Spiderweb Dip with Chips because it looks funny and spooky, but honestly, it’s easy. No baking or cooking—just a simple Halloween snack that comes together fast.
First, I grab a plate or shallow dish and spread out refried beans for the base. Then I add a smooth layer of sour cream.
Guacamole or salsa sometimes gets tossed on if I’m in the mood for extra flavor. To make the web, I put sour cream in a sandwich bag, snip a tiny corner, and pipe circles on top.
Next, I drag a toothpick from the center outward. That’s what makes the web, and it always gets a laugh.
Tortilla chips go all around the dip so everyone can scoop it up. If I’m feeling silly, I’ll add a plastic spider on top—just for looks, and I always remind the kids not to eat it.
Sometimes, tiny olive pieces become little edible spiders. Kids love pulling apart olives and making the spider’s body and legs.
I keep this dip in the fridge until snack time. It’s a hit for parties or just a spooky movie night at home.
7) Pumpkin Cream Cheese Fruit Dip
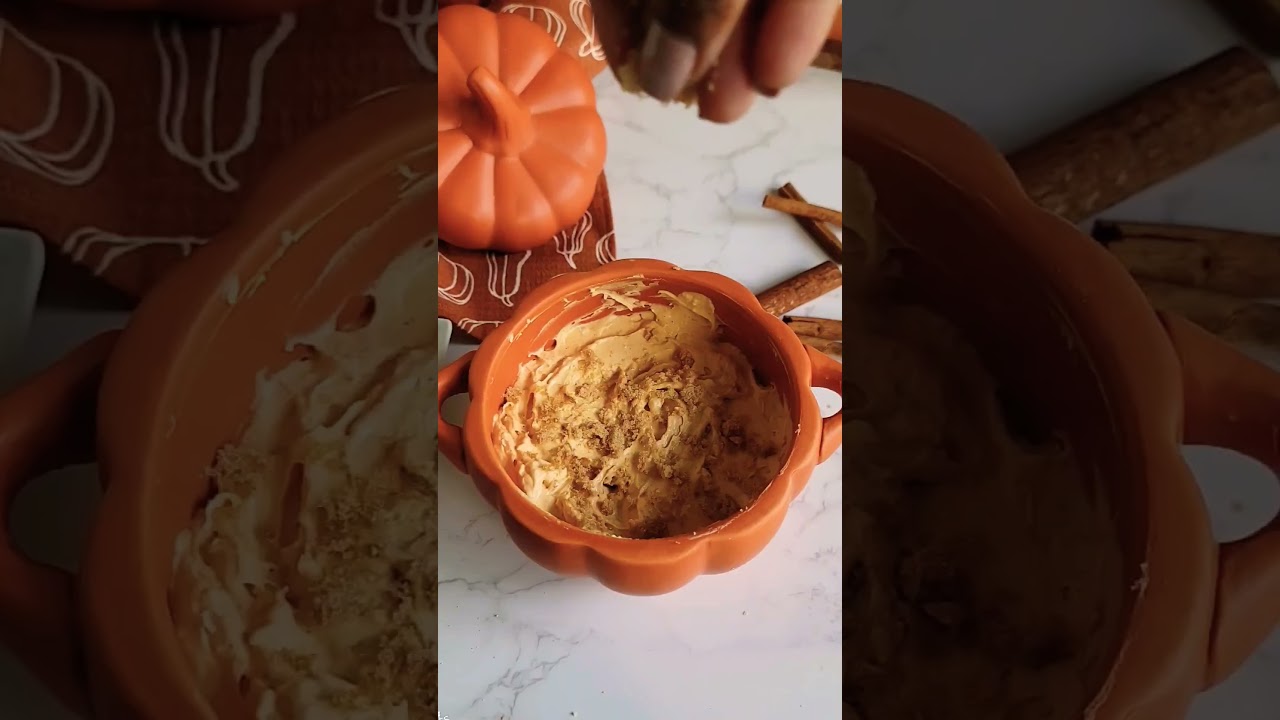
I love how easy this Pumpkin Cream Cheese Fruit Dip is. It only takes a few minutes to mix together, and there’s no baking at all.
That makes it perfect for kids to help. I just mix softened cream cheese, pumpkin puree, a bit of powdered sugar, and some pumpkin pie spice in a bowl.
I stir until it’s all smooth and creamy. Sometimes I use a handheld mixer if I want it extra fluffy, but a spoon works too.
When I serve the dip, I put it in a small bowl and sprinkle orange sprinkles for a festive look. Kids really enjoy dipping fruit like apples, strawberries, or grapes into it.
It also goes great with graham crackers and vanilla wafers. If I want it sweeter, I just add a touch more powdered sugar.
For a fun touch, I’ll sometimes add mini chocolate chips or candy eyes on top. It’s a cute, spooky treat, and the kids like decorating their own bowls.
Need more? I just double or triple the ingredients. After making the dip, I keep it chilled in the fridge until it’s time to eat.
This pumpkin fruit dip is soft and easy to scoop, which makes it safe for younger kids. I always keep fresh fruit and cookies nearby so everyone can grab what they want.
Making and eating Pumpkin Cream Cheese Fruit Dip feels like a little Halloween activity every time. I like seeing everyone’s different ideas for decorating and dipping.
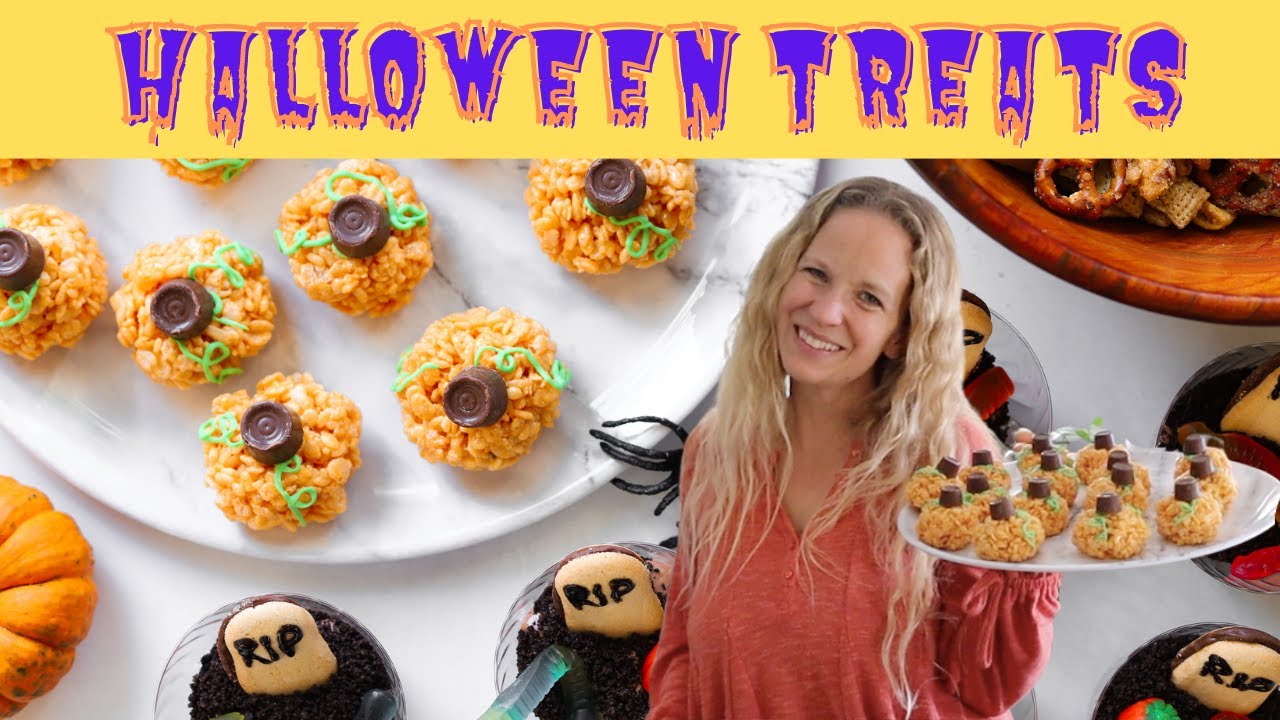
8) No-Bake Graveyard Dirt Cups
I like making No-Bake Graveyard Dirt Cups because they’re fun and easy for kids. No baking or cooking—just some chocolate pudding cups, crushed cookies, and a few candies.
I start by opening pudding cups and stirring them up, sometimes scooping into clear cups for those cool layers. Then I crush chocolate sandwich cookies in a bag and sprinkle them on top—it really does look like dirt.
For the graveyard decorations, I use gummy worms and rectangle-shaped cookies. Writing “RIP” with black gel icing on each cookie and sticking them in the pudding makes them look like little grave markers.
A couple of gummy worms on top adds a spooky touch. Sometimes I sprinkle green shredded coconut for grass—why not?
All the ingredients are easy to find at the store and I can swap out candies depending on what’s in the pantry. Kids love decorating their own cups and getting creative.
These are great for parties or classroom treats. Just a few simple steps, so clean-up is quick. I keep everything chilled in the fridge until it’s time to eat.
9) Candy Corn Parfait
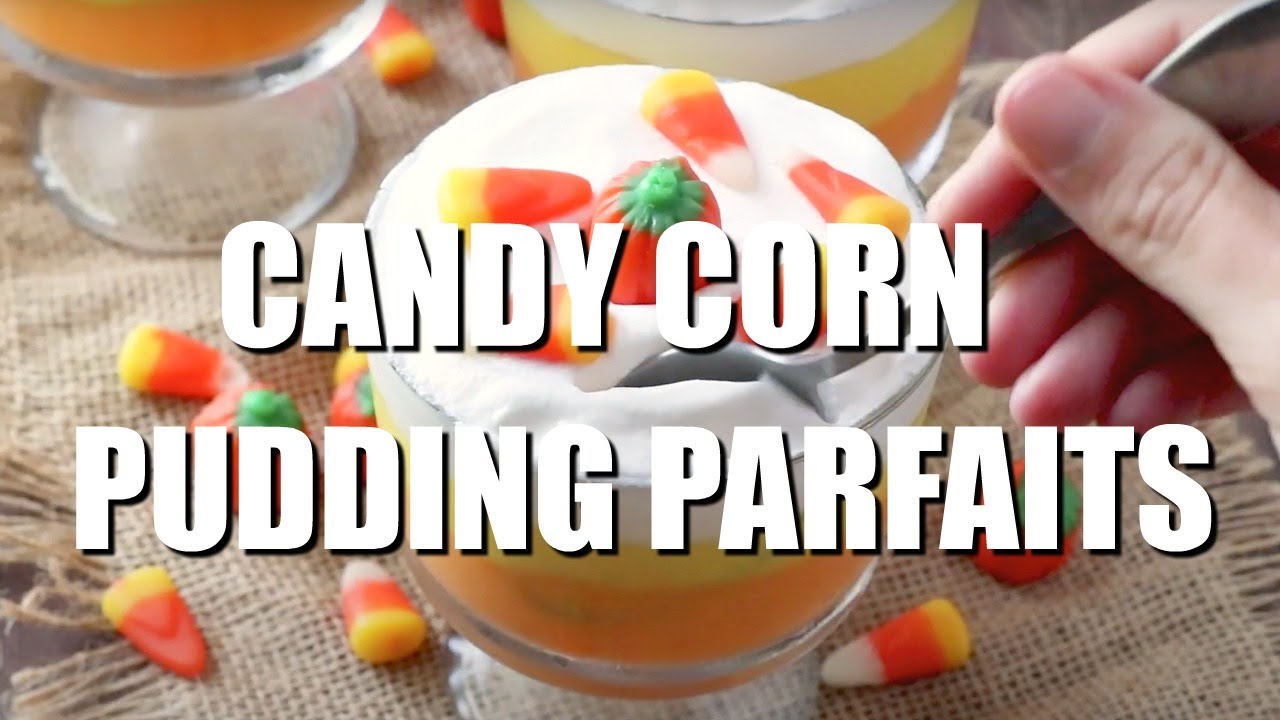
I love making Candy Corn Parfait because it’s so bright and easy. These parfaits look like candy corn, but there’s no baking—just simple ingredients and clear cups.
First, I start with a layer of pineapple tidbits. The yellow layer is sweet and juicy. I always drain the pineapple so the parfait doesn’t get soggy.
Next comes a layer of mandarin orange slices. The orange fruit gives the parfait its middle color. I like using canned oranges—they’re soft and easy to scoop.
For the top, I use whipped cream. This fluffy white layer finishes the candy corn look. Spray whipped cream works, or I’ll spoon out some from a tub.
If I’m feeling festive, I top each parfait with a candy corn piece. One small candy makes it look extra fun. Sometimes I toss on a few orange or yellow sprinkles too.
These parfaits are sweet, cool, and refreshing. They come together in almost no time. I usually set up the cups and let everyone build their own layers.
Kids find it easy and fun to help. Peeling oranges or squirting whipped cream gives them a job. Plus, cleanup is a breeze.
I like making these treats for parties or as a quick snack. The colors look great on a Halloween table. People usually smile when they spot these parfaits.
I store leftovers in the fridge, covered. They’re still tasty the next day. Non-dairy whipped topping seems to hold up best, in my experience.
Making Candy Corn Parfaits is a simple, colorful way to enjoy Halloween with the kids. No oven needed—just a few ingredients and some happy helpers.
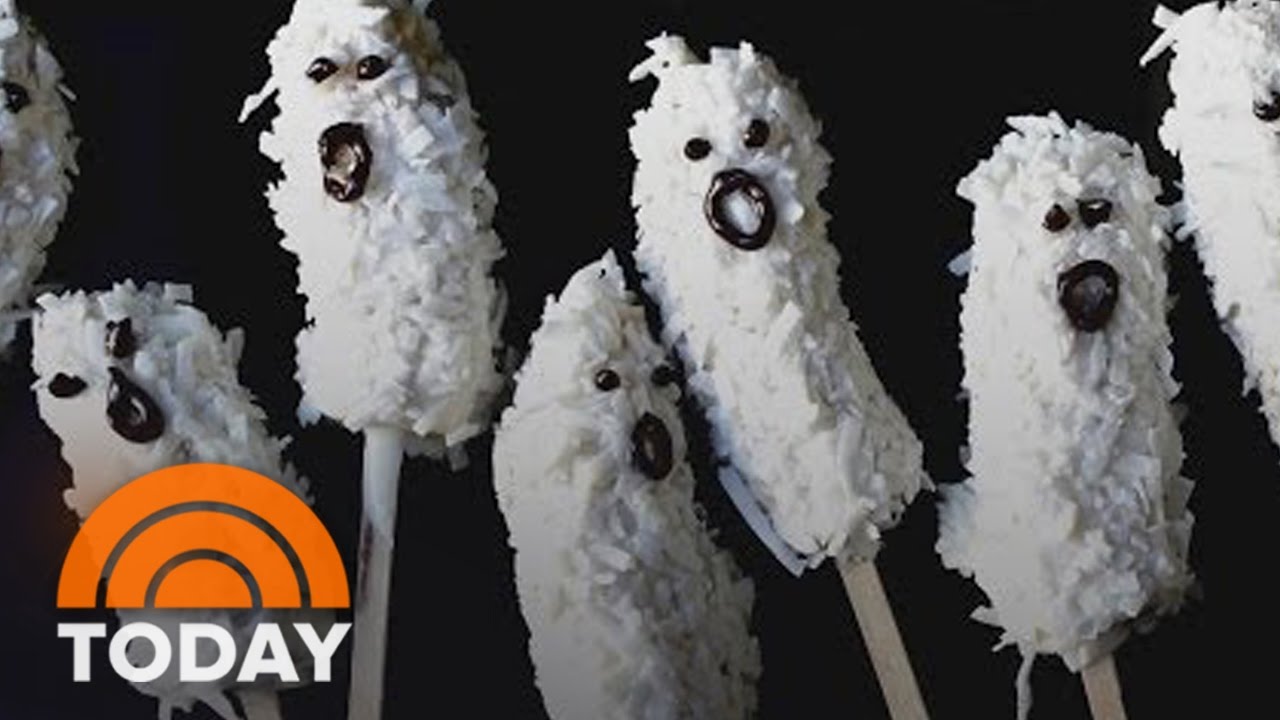
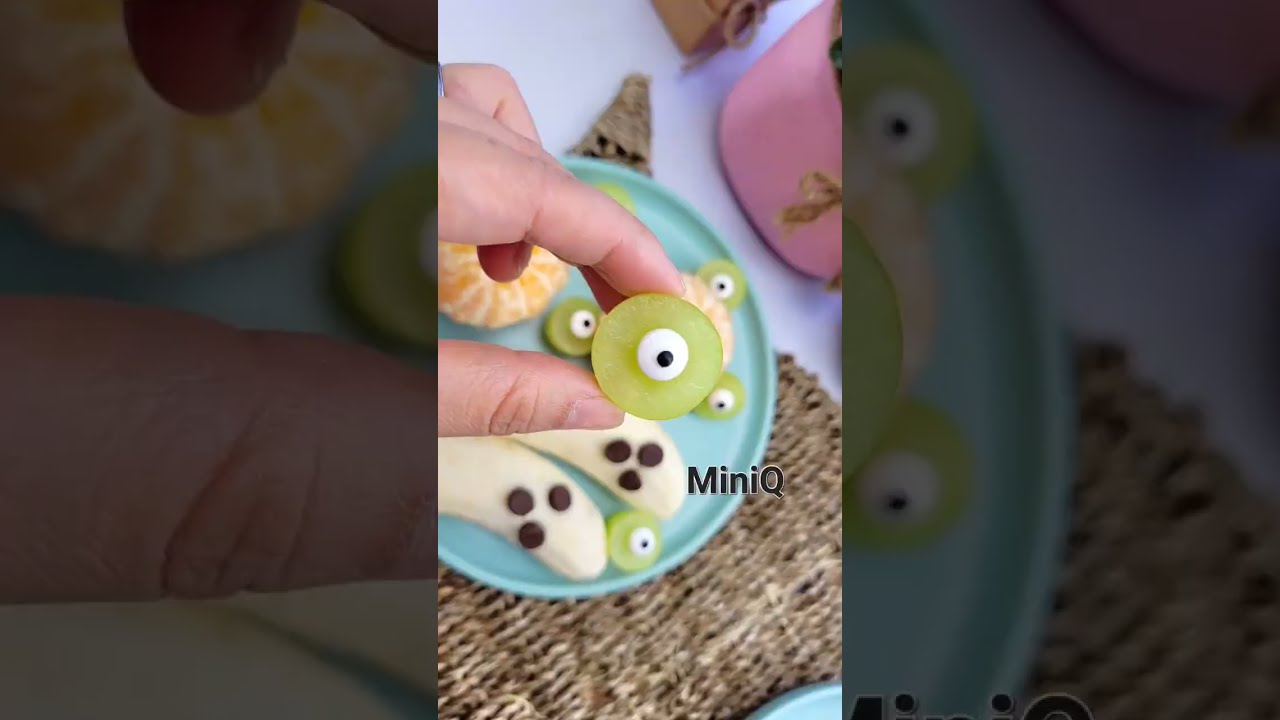
10) Banana Ghosts with Chocolate Chips
This treat is super simple and always brings smiles during Halloween. I love how easy it is to turn bananas into spooky ghosts. All you need are bananas and some chocolate chips.
First, I peel a banana and cut it in half. The flat end stands up on the plate, and the rounded part becomes the ghost’s head.
For the ghost’s face, I gently press two mini chocolate chips into the banana for eyes. Then I add another chocolate chip for the mouth—sometimes regular-sized for a bigger mouth, but minis work too.
I help kids place the eyes and mouth if the chips roll around. You can use raisins or small candies if you’re out of chocolate chips. The faces can be silly or spooky—whatever feels right.
These banana ghosts are ready to eat right away. I like that there’s no baking or waiting. They’re also healthier than most candy treats, and kids seem to love eating something fun that’s actually good for them.
For extra fun, I’ll sometimes stick the banana ghosts on popsicle sticks. They’re easier to hold that way, but I try not to push too hard so the banana doesn’t split.
Banana ghosts look cute on a plate with other Halloween snacks. The white and brown colors add a nice touch to the table. If I want them to stay fresh, I cover and pop them in the fridge until snack time.
Kids can get creative with candy faces or chocolate syrup mouths. There’s a lot of room to make each ghost look a little different.
Making banana ghosts is a favorite at my house for Halloween. It just takes a few minutes and barely any cleanup.
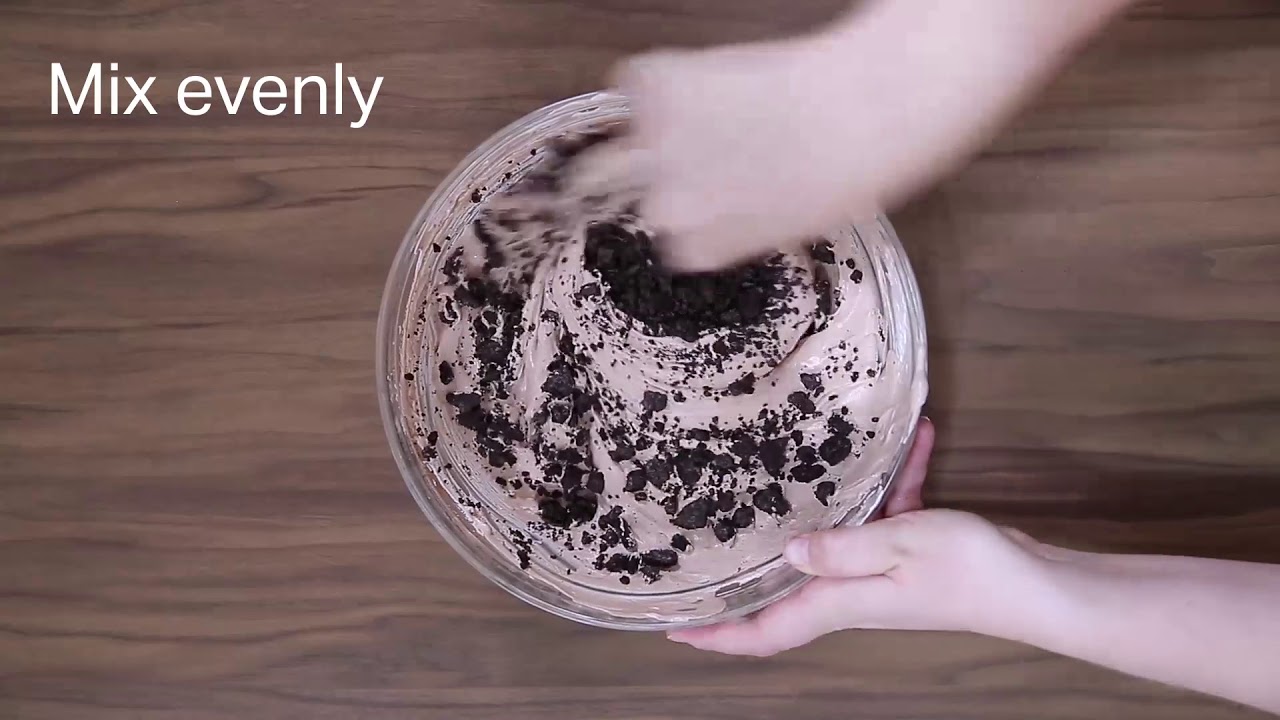
11) Eyeball Truffles
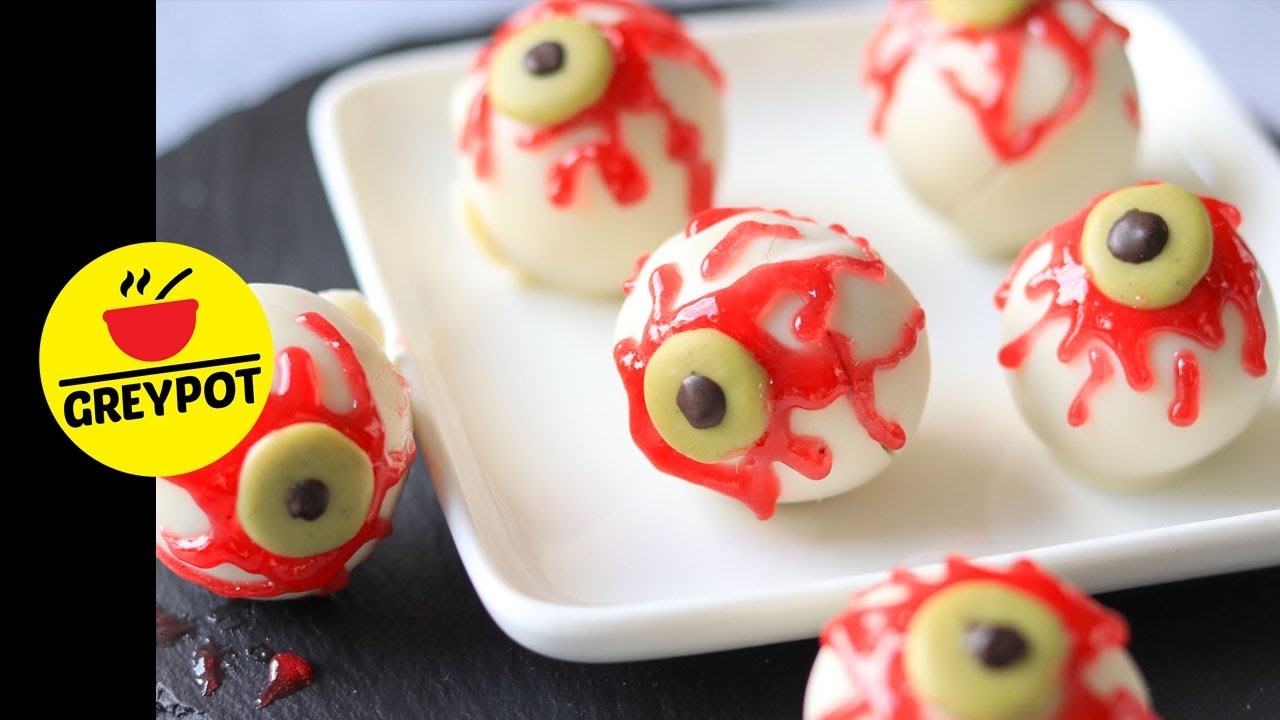
Eyeball truffles are fun to make and look just the right amount of creepy for Halloween. I like how easy it is to get creative with these treats. Kids can help with most steps, so it’s a good family recipe.
I start with store-bought sandwich cookies and cream cheese for the truffle mix. I crush the cookies and blend them with cream cheese until smooth. Then I roll the mixture into balls with my hands.
Once I’ve got my balls, I set them on a tray and chill them in the fridge for about 30 minutes. This helps them get firm and easier to dip.
I melt white chocolate chips in the microwave to cover each truffle. Using a spoon or fork, I dip each ball into the melted chocolate, shaking off the extra so it doesn’t pool.
Next, I put the truffles on wax paper or a baking sheet to set. For the eyeball look, I use candy melts or icing in bright colors for the iris.
For the center, I stick a mini chocolate chip or use black decorating gel for the pupil. Sometimes I use a red food marker or gel to draw little bloodshot lines for extra spookiness.
Let everything set for a few minutes before serving. No fancy skills needed—just simple ingredients and tools you probably already have.
It’s a great way to let kids be creative in the kitchen. I keep leftovers in an airtight container in the fridge, and they last a couple of days.
They’re soft, sweet, and have that perfect mix of chocolate and cookie.
12) Pumpkin Patch Dirt Cups

Pumpkin Patch Dirt Cups might be my favorite easy Halloween treat, honestly. They just look so cute, and the best part? They’re ridiculously simple to throw together.
All I need are a handful of basic ingredients and a bit of creativity. I start by crushing up chocolate sandwich cookies—nothing fancy, just smash ’em up.
Then I scoop chocolate pudding into clear cups. The cookie crumbs go on top to look like soil.
For the pumpkins, I grab orange candy—maybe candy pumpkins, maybe orange chocolate balls if I have them. I plop them onto the “dirt” so it looks like a mini pumpkin patch.
Sometimes I’ll toss on green candy sprinkles or a little swipe of green icing for the stems and vines. It’s a tiny detail, but it makes them pop.
No baking needed, which is a huge win. Kids can totally help—smashing cookies, spooning pudding, decorating with candy. It’s messy, but in a good way.
Everyone gets to decorate their own cup. Some kids go wild and add gummy worms or even plastic spiders for that extra spooky vibe.
I make these for Halloween parties or just for fun after school. They’re chocolatey, creamy, and the cookie crunch is pretty satisfying.
Cleanup’s a breeze—just a couple bowls and spoons, and everything goes into the cups. No hot pans, no stress.
These come together fast, so even if I’m running late, I can whip up a batch. And if I want to plan ahead, I just pop them in the fridge till it’s time to eat.
Decorating is honestly the most fun part. I love seeing what everyone comes up with for their own little patch.
For littler kids, I make sure the candies are easy to handle and safe. I’ll help with the layers if they need it, but I try to let them do the fun stuff.
Pumpkin Patch Dirt Cups always get a good reaction. They look adorable on the table and taste even better. Making them together? That’s half the fun, if you ask me.
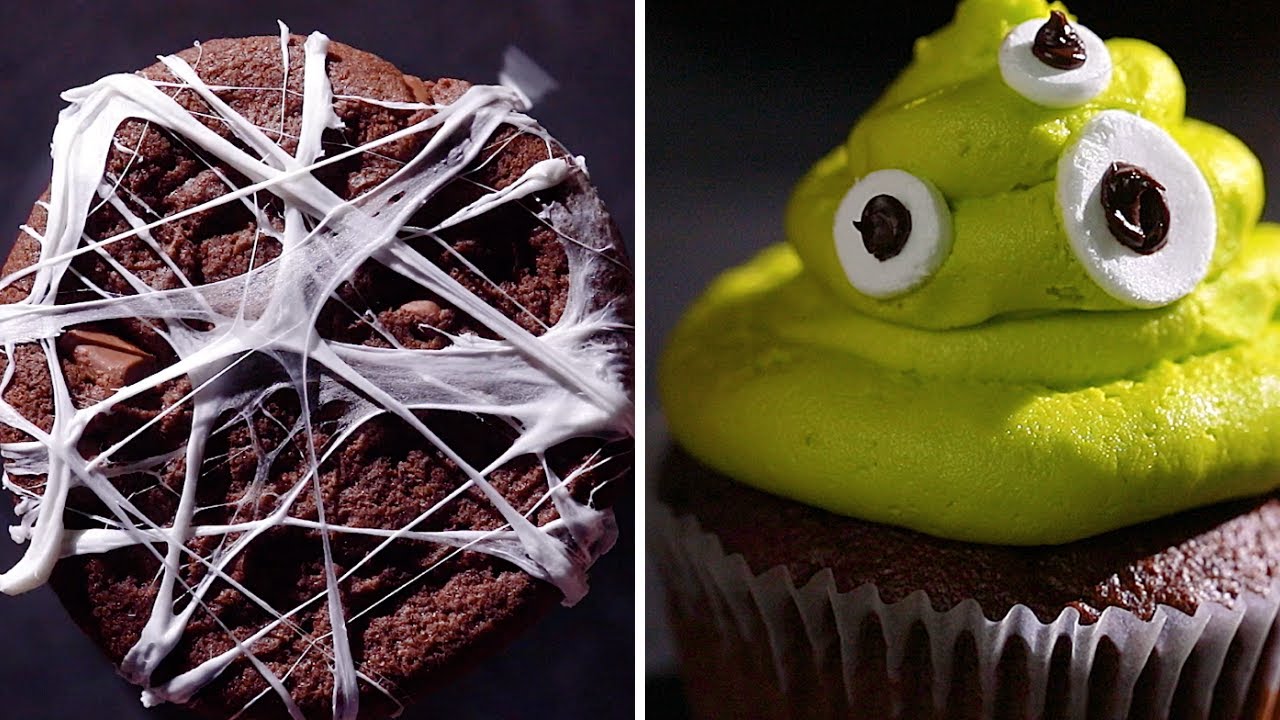
13) No-Bake Spider Cookies
No-bake spider cookies are just classic Halloween fun with kids. Not much required—no oven, barely any time, and a short list of ingredients.
I usually start by crushing chocolate cookies or crispy rice cereal for the base. Then I zap some chocolate chips in the microwave until they’re all melty.
Mixing the chocolate into the crushed stuff helps everything stick. Rolling the mix into small balls forms the spider bodies.
I just use a spoon or my hands—no need to be too precise. Pretzel sticks go on the sides for legs, broken in half so you get eight legs per spider.
For eyes, I’ll use candy eyes if I have them, but sometimes I improvise with little candies or even white chocolate drops with mini chocolate chips. If I can’t find candy eyes, I get creative using whatever tiny candies I have at home.
Pressing the eyes in gently usually keeps them in place. I set the spiders on wax paper and let them chill in the fridge for about 20 minutes. Waiting isn’t my strong suit, but it’s worth it.
Kids love rolling the mixture, sticking on the legs, and placing the eyes. It gets a bit messy, but honestly, that’s part of the whole experience.
These cookies are perfect for Halloween parties or just a quick after-school treat. I’ll even pack a couple in lunchboxes.
They’re chocolatey, with a nice crunch from the pretzels. Every batch turns out a little different, which I kind of love—no two spiders ever look exactly the same.
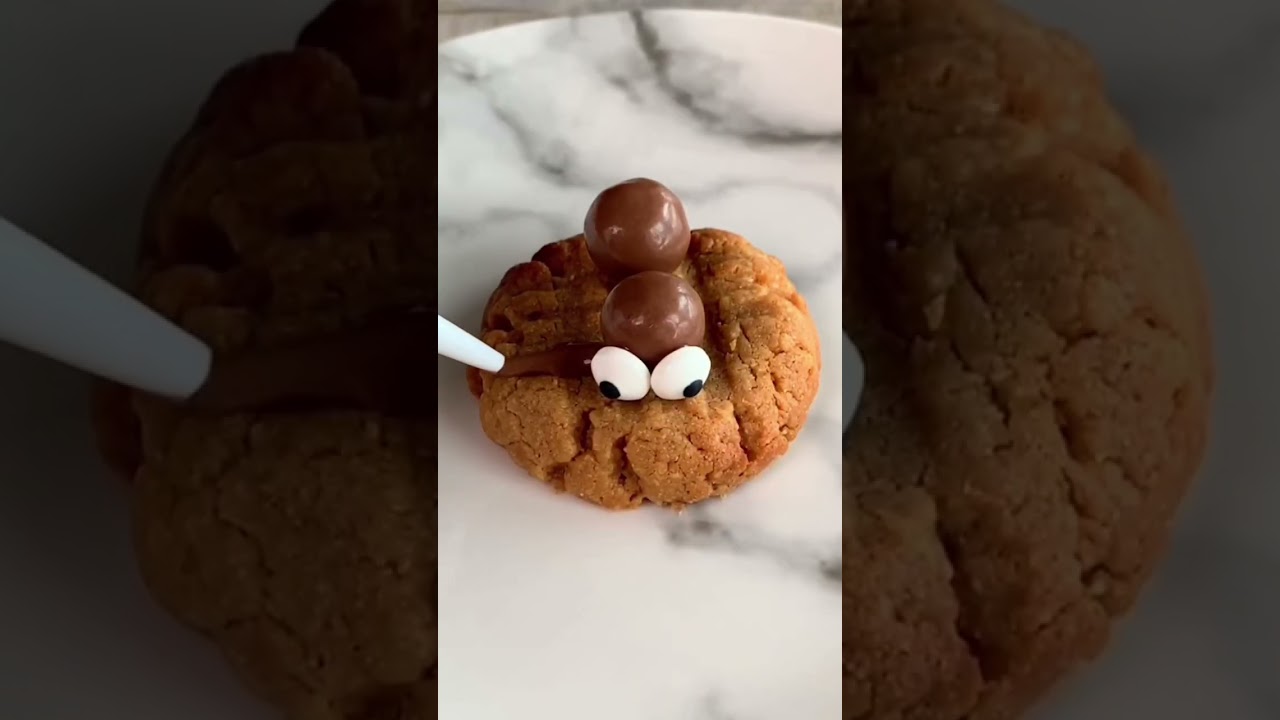
14) Pumpkin Peanut Butter Balls
I love making these Pumpkin Peanut Butter Balls—they’re so easy and honestly just fun to make. No oven, no fuss, just quick Halloween snacks.
I mix peanut butter with powdered sugar and a bit of softened butter. That’s the base—sweet, soft, and if you use creamy peanut butter, it’s super easy to roll.
Roll the mixture into balls, about walnut-sized. Then I use a toothpick or fork to press lines down the sides so they look like tiny pumpkins. This step makes them look just like tiny pumpkins.
After shaping, I melt orange candy melts or white chocolate with orange food coloring. I dip each ball in the melted coating for that pop of pumpkin color. If you don’t have candy melts, you can use orange icing.
For stems, I stick a little piece of pretzel or a green candy on top. Sometimes I’ll add a bit of green icing for leaves if I’m feeling fancy.
They need about 20 minutes in the fridge to set up. When they are set, they are ready to eat. The inside stays soft and sweet, and the shell gives a nice snap.
My friends always want to help with these. Decorating is half the fun—sometimes we make silly faces or mix up the designs. This is a treat that kids can make without much help from grownups.
Peanut butter balls keep best in an airtight container in the fridge. They’re good for a few days, so making them ahead for a party or school thing is no problem.
If someone can’t have peanuts, I just swap in a different nut or seed butter. The recipe works with almost any spread, as long as it’s creamy.
Making these lets me get creative, and they’re honestly delicious. Sometimes I’ll add sprinkles, colored sugar, or chocolate chips for more flair.
Each pumpkin ball is a bite-sized bit of fall. They’re cute, easy to eat, and always go fast.
15) Candy Apple Slices
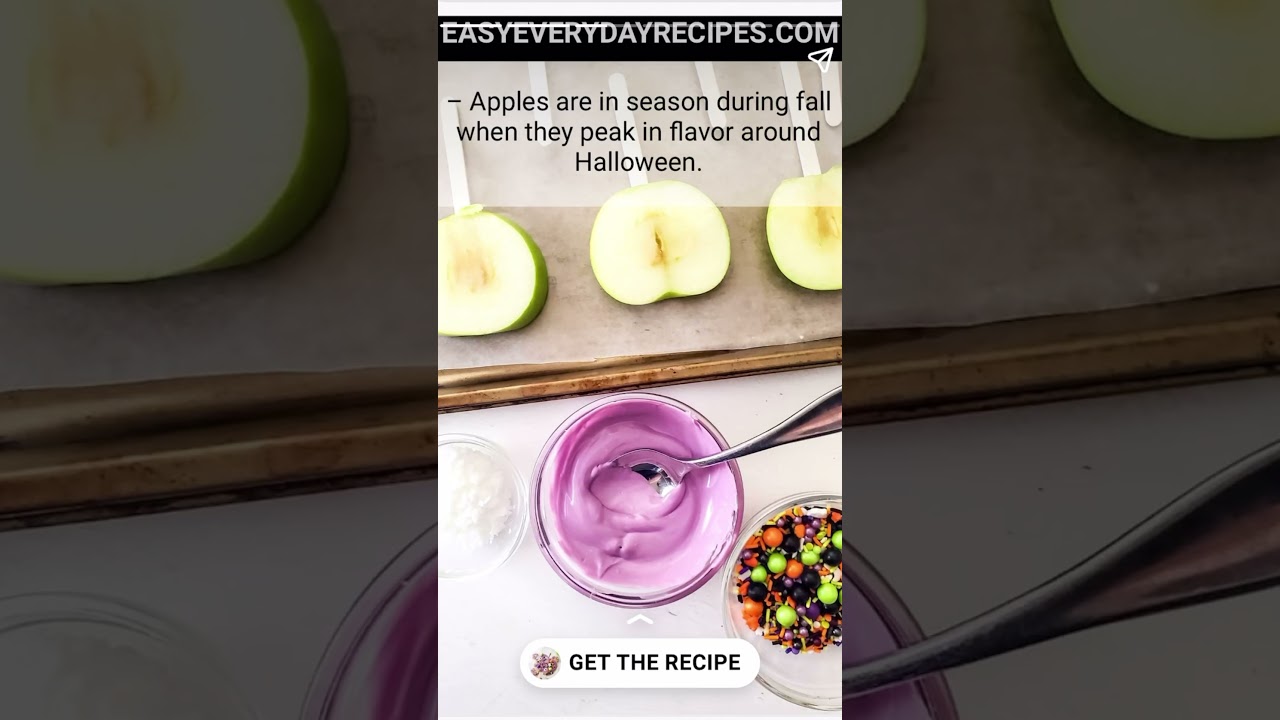
Candy apple slices are one of those treats I keep coming back to. They’re quick, no baking, and honestly, way less hassle than whole candy apples.
I start by washing and slicing apples into thick pieces, tossing the seeds. Then I stick a popsicle stick or lollipop stick in each slice—makes dipping way easier.
Next, I melt candy melts or chocolate in the microwave. I dip the apple slices in, just one side usually, and then set out bowls of toppings—crushed cookies, mini marshmallows, sprinkles, whatever’s around.
Letting kids decorate their own is the best part. Everyone picks their favorites, and the trays end up looking so colorful.
After dipping and decorating, I lay the slices on parchment paper to cool. The coating hardens up, but the apples stay crisp underneath.
These are smaller and a lot easier to eat than whole candy apples. Honestly, a whole apple can be a bit much, but a slice is just right.
If there are leftovers, I pop them in the fridge. The candy shell helps keep the apples from browning too fast, but I always check just in case.
I like that I can skip the mess of hot sugar and sticky pots. The slices are perfect for parties or just a fun snack. Kids always get a kick out of making and eating these.
I’ll use any apples I have—green, red, yellow—they all taste a little different. Sometimes I’ll drizzle white chocolate or colored candy melts for more Halloween vibes.
It’s easy to make a big batch with just a few apples and some candy. Most kids can help with every step. All you really need is a little imagination and a handful of supplies.
16) Witch Fingers with Almonds
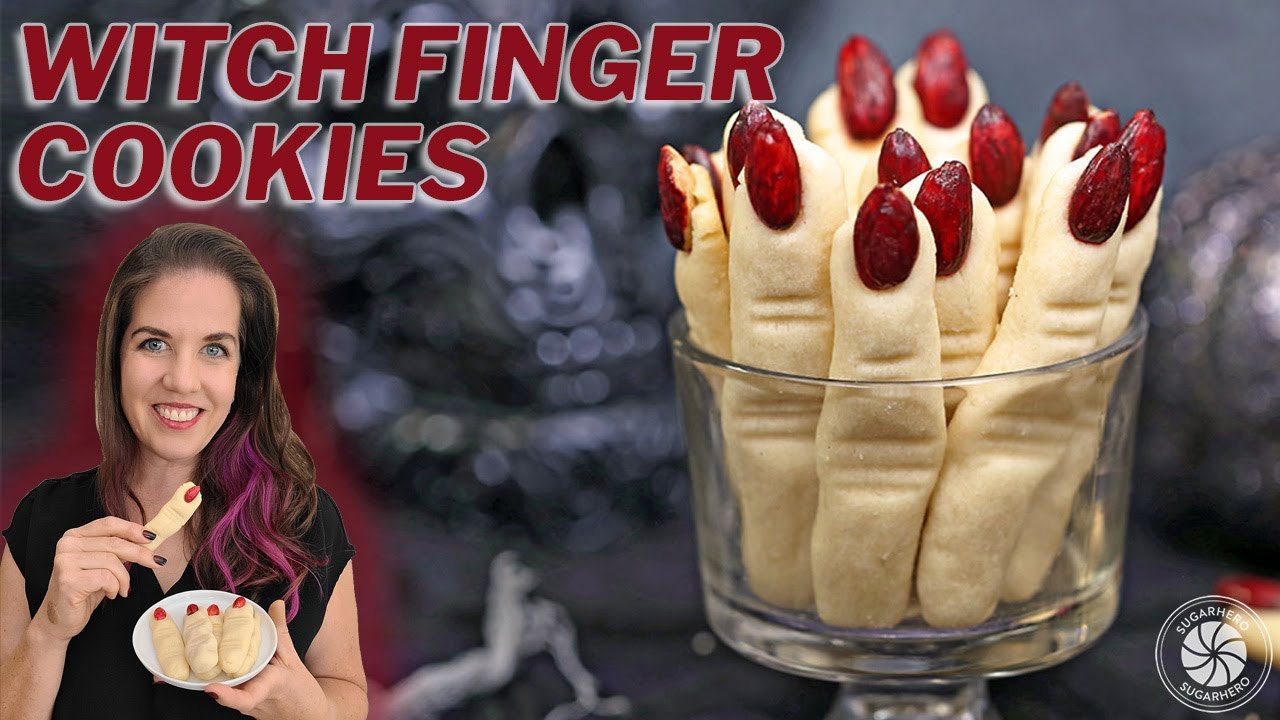
I love making these witch finger treats—they look spooky but are actually super simple. All it takes is some cookie dough, almond slices, and a bit of food coloring. No oven needed for these, which is always a plus.
I start by rolling little pieces of sugar cookie dough into finger shapes. Store-bought dough is my go-to, so there’s no mess or waiting around.
If I want extra creepy fingers, I’ll knead in a little green food coloring. Then I use a butter knife to add lines for knuckles along each finger, so they look more realistic.
An almond slice pressed onto the tip makes a perfect witch’s fingernail. Sometimes I’ll use red icing gel under the almond for that “bloody” look—kids think it’s hilarious and a little gross.
Once I’ve shaped all the fingers, I chill them in the fridge for about 30 minutes. That helps them hold their shape and makes them easy to pick up.
The cookie dough stays soft, so they’re safe for little kids. Witch Fingers with Almonds are a great activity for parties or just a fun snack with friends.
Everyone gets to make their own weird or scary witch finger. It’s a fun way to let kids get creative and hands-on with their snacks.
No baking, barely any cleanup, and just a few steps. Every time I make these, it feels like a little Halloween magic in the kitchen.
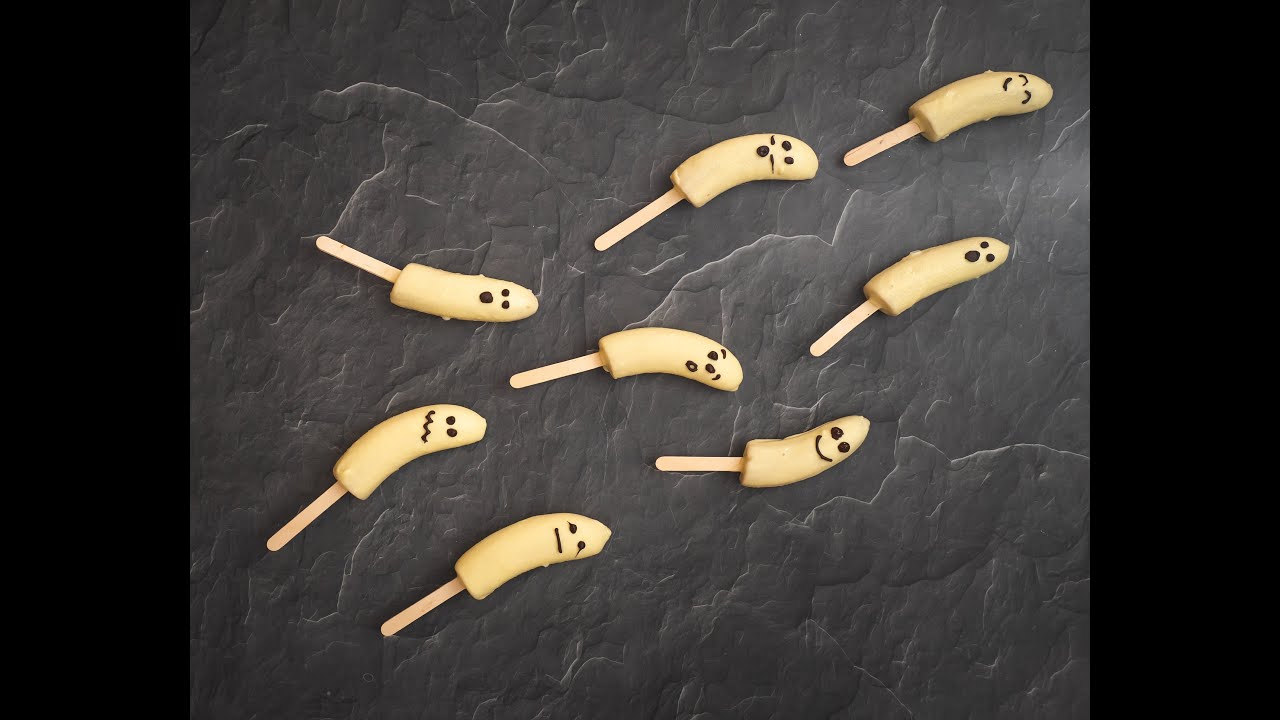
17) Ghost Banana Popsicles
When I make Ghost Banana Popsicles, I’m always surprised by how simple and fun these are. All you really need are bananas, white chocolate, and some mini chocolate chips.
This treat comes together fast and honestly, it just looks adorable. First, I peel a banana and cut it in half.
I stick a popsicle stick or straw into the flat end of each half. Then, I melt white chocolate chips in the microwave—usually in short bursts so I don’t scorch it.
Once the chocolate is smooth, I dip the banana halves until they’re totally coated. For the ghost faces, I use mini chocolate chips.
Two chips for eyes, one for a mouth—sometimes I swap in chocolate sprinkles if I’m feeling creative. The faces crack me up because each banana ghost ends up with its own goofy personality.
I set the popsicles on a tray lined with wax paper and pop them in the freezer for about an hour. Once they’re firm, they’re ready to eat—sweet, creamy, and just the right amount of spooky.
These are a blast to make with friends or family, especially since they’re a little healthier than most Halloween candy. Kids love dipping the bananas and decorating the silly faces.
If I want a lighter version, I’ll use yogurt instead of chocolate. Rolling them in sprinkles adds a pop of color, too.
They’re cold, tasty, and perfect for a Halloween party. Every time I make them, I end up laughing at the silly faces.
Ghost Banana Popsicles are quick, easy, and festive—no oven required, and barely any mess. I love sharing them when I want a snack that looks like I put in way more effort than I actually did.
18) Pumpkin Cheesecake Bites
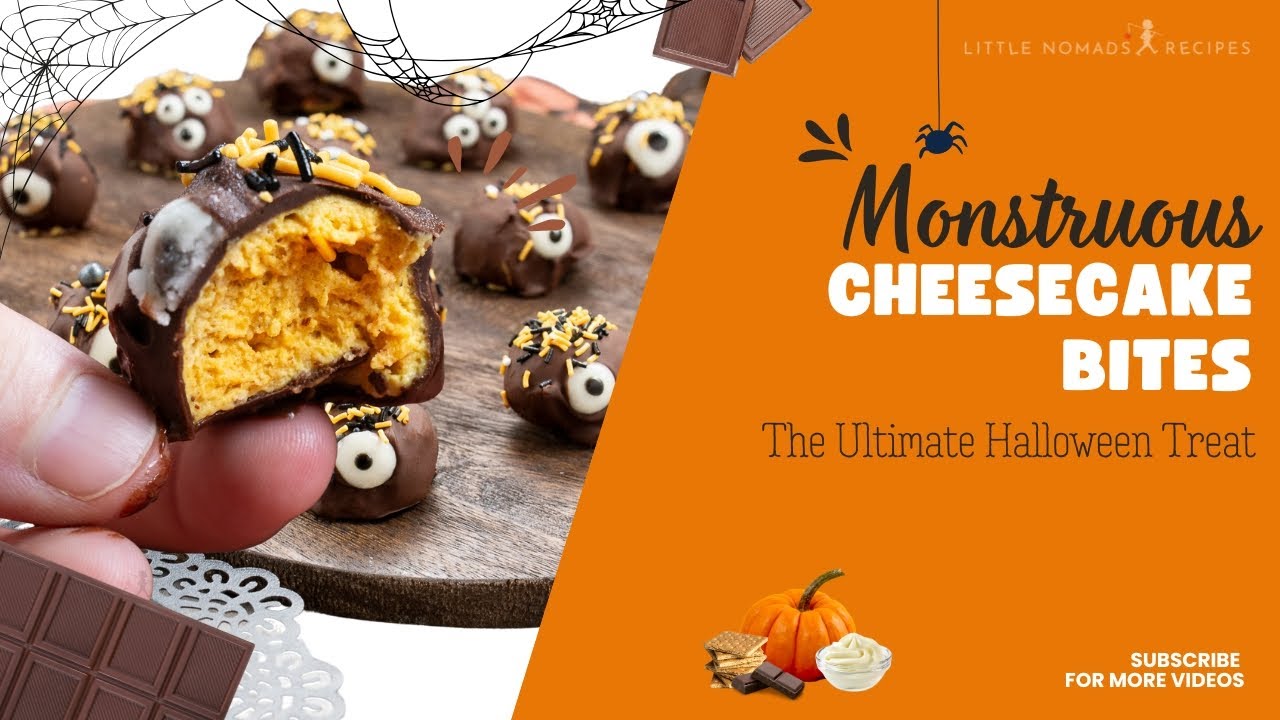
I love making Pumpkin Cheesecake Bites because they taste like fall and don’t need any baking. These little treats are easy for kids to help with—there’s really nothing tricky here.
First, I grab some cream cheese and mix it with a bit of canned pumpkin. I add a little sugar and pumpkin pie spice so it actually tastes like pumpkin pie.
Mixing until smooth is key; nobody wants lumps in their cheesecake bites. When it’s all blended, I scoop out small spoonfuls and roll them into balls.
Rolling the mixture in crushed graham crackers gives them a nice coating and a bit of crunch. Sometimes I’ll sprinkle a little cinnamon on top for extra flavor.
I pop them in the fridge for about 30 minutes to firm up. They’re basically the perfect grab-and-go snack once they’re chilled.
Kids love helping with the rolling and dipping—no oven, no stress. If I’m feeling festive, I’ll stick a couple mini chocolate chips on top for eyes and call them mini pumpkins.
The ingredients are easy to find, and you don’t need any fancy tools. Just a bowl, a spoon, and a plate for rolling—nothing complicated.
I stash any extras in the fridge, and they’re even better when cold. They keep for a couple days, but honestly, they never last that long at my place.
Pumpkin Cheesecake Bites are fast to make and remind me of pumpkin pie, but without all the hassle. Less mess, more fun.
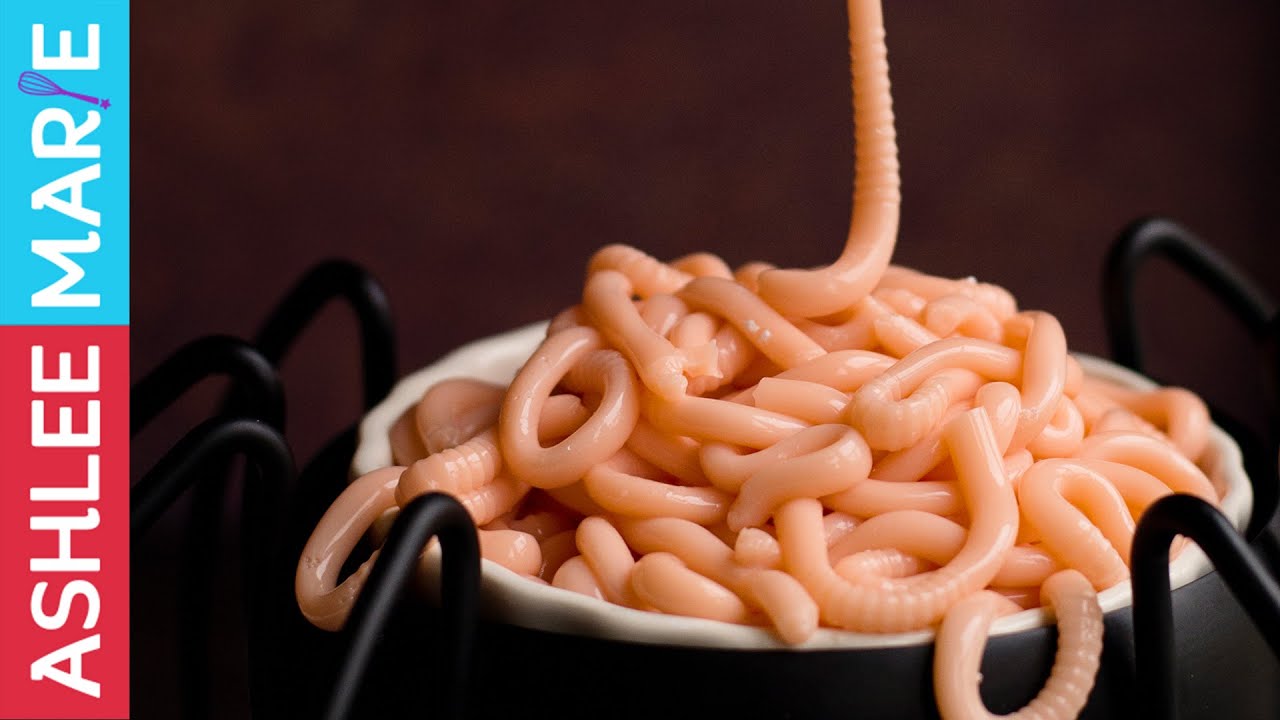
19) Creepy Crawly Jello Cups
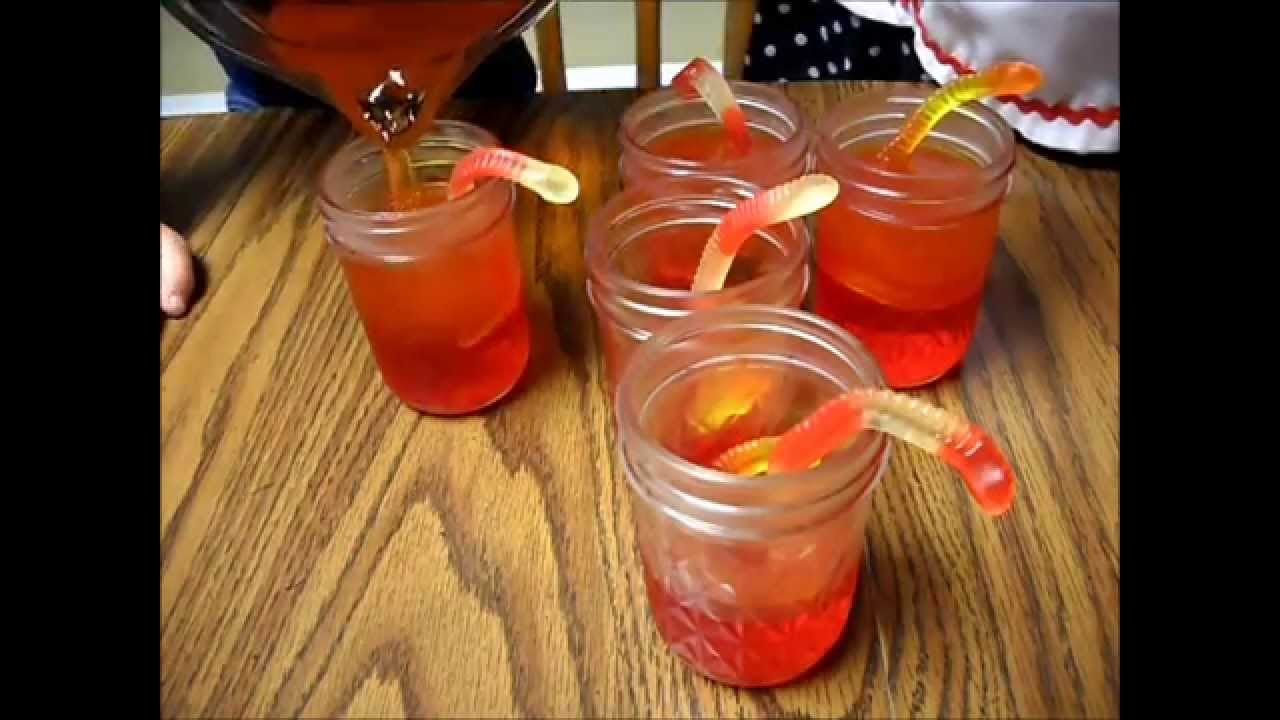
I love making Creepy Crawly Jello Cups for Halloween—honestly, they couldn’t be easier. You just need flavored gelatin mix, gummy worms, and some clear cups.
I make the gelatin according to the box, then let it cool a bit so it’s not boiling hot. I pour it into the cups, filling each about halfway.
While the gelatin is still a little wobbly but not set, I poke a few gummy worms into each cup. I always let some worms hang over the edge—makes them look extra gross (in a good way).
Sometimes I go all out and add gummy spiders or snakes. If I have chocolate cookies, I’ll crush a few on top to look like dirt.
The cups go into the fridge until the gelatin sets, which takes a couple hours. Once they’re ready, I hand them out for a spooky snack.
Kids can totally help with this, though I usually handle the hot liquid part. The best thing is you can use any color gelatin—green and purple are my favorites for Halloween.
Each bite is wiggly, sweet, and has a surprise worm or two. Making these gets everyone in the Halloween spirit—plus, who doesn’t like playing with their food sometimes?
20) Pumpkin Rice Krispies Treats
Pumpkin Rice Krispies Treats are such a fun Halloween snack. You really only need Rice Krispies cereal, marshmallows, butter, and some orange food coloring.
I melt butter and marshmallows together—usually in the microwave because it’s just easier. Once it’s all gooey, I add the orange food coloring and stir until it’s the color I like.
Then I dump in the cereal and mix it up. The mixture gets sticky, so I butter my hands before shaping it into little balls—makes them look like mini pumpkins.
For the “stem,” I stick a bit of pretzel on top. Sometimes I add a green candy or a dab of frosting for a leaf, just for fun.
I let them cool on parchment paper so they stay crisp. In about half an hour, they’re ready to eat—sweet, crunchy, and totally festive.
I like that each pumpkin can look a little different. Kids love decorating them with their own twist—maybe some candy eyes, maybe a silly face.
There’s no baking, so it’s safe for little helpers. Most of the work is just mixing and rolling.
Pumpkin Rice Krispies Treats are great for parties or just a random snack. They’re small, so nobody gets overloaded with sugar.
I keep them in an airtight container for a couple of days, and sometimes I make them the night before an event. They definitely bring the Halloween vibes.
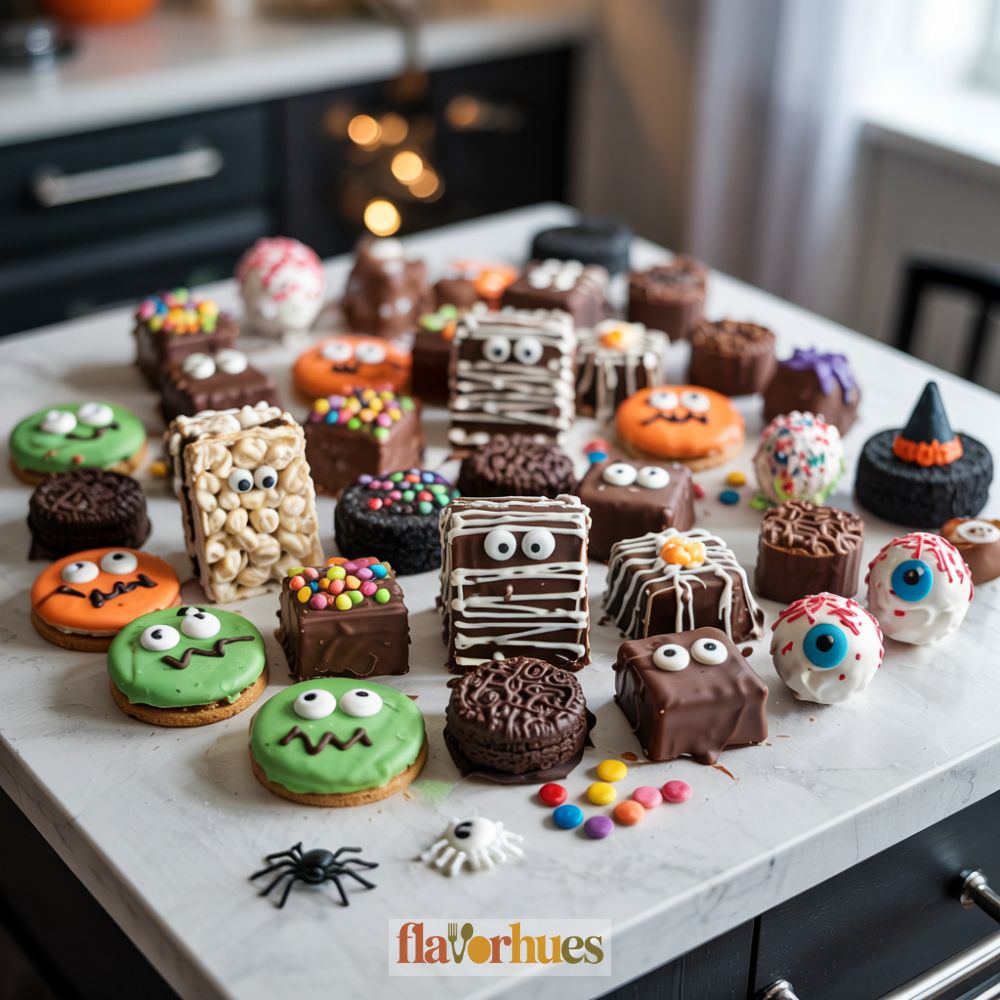
21) No-Bake Monster Bark
No-Bake Monster Bark is honestly one of my favorite Halloween treats. It’s colorful, quick, and kids love decorating their own piece.
I start with a bag of melting chocolate or candy melts—white or milk chocolate both work. I melt it in the microwave, stirring every 30 seconds so it doesn’t burn.
Then I pour the chocolate onto a baking sheet lined with parchment and spread it out into a rectangle. I try to keep it about pencil-thick, but I don’t stress if it’s not perfect.
While the chocolate’s still soft, I go wild with toppings. Candy eyeballs, marshmallows, sprinkles, candy corn, gummy worms—whatever I have on hand.
This part is the most fun for kids. They get to make their own monster bark designs, and honestly, the messier the better.
I press the toppings in gently and let the bark set. Sometimes I just leave it on the counter, but if I’m impatient, I stick it in the fridge for 10 or 20 minutes.
Once it’s hard, I break it into pieces. Each one looks different and a little ridiculous, but that’s the charm.
No-Bake Monster Bark is perfect for parties, snack tables, or just a fun afternoon at home. Clean-up is a breeze, too—parchment paper is a lifesaver.
22) Jack-o’-Lantern Oranges
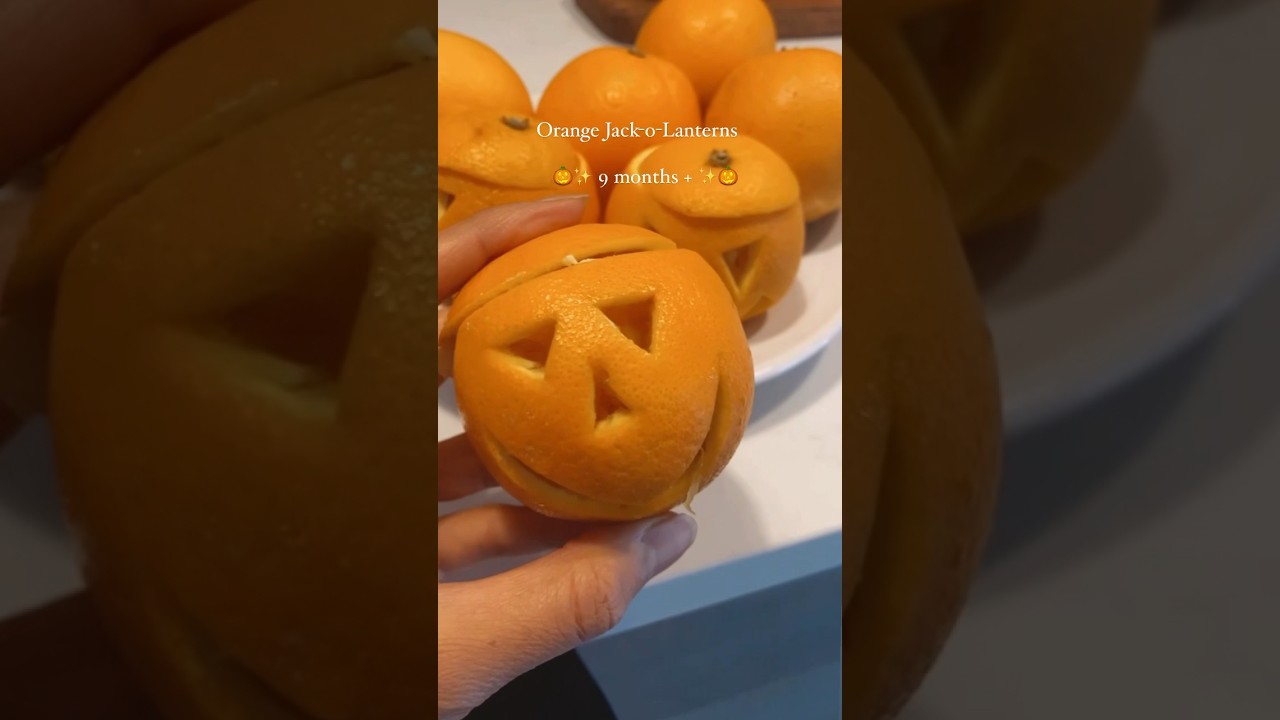
I love making Jack-o’-Lantern Oranges. They look just like tiny pumpkins but taste fresh and sweet.
You only need oranges and a marker—can’t get much easier than that. First, I wipe the orange clean and use a black marker to draw a jack-o’-lantern face right on the peel.
Triangles for eyes and nose, zigzag for the mouth—classic. Sometimes I get fancy and slice off the top, then scoop out the inside with a spoon.
I save the orange bits for fruit salad or juice. The empty shell becomes my little snack “pumpkin.”
If I want to get creative, I fill the hollow orange with grapes, apple cubes, or berries. Suddenly, I’ve got a mini fruit bowl that’s actually fun to eat.
Perfect for parties or school snacks. I can make a bunch at once and they don’t have to be perfect—each goofy face just adds to the Halloween vibe.
Kids can decorate the peels with markers, so there’s no knife involved if you skip the scooping. That means even little ones can join in.
Sometimes I line them up on a platter with a few green licorice sticks for stems. It gives them a playful, fall look.
Making these always puts me in a good mood. They’re quick, mess-free, and honestly, just a cute way to sneak in some fruit during all the Halloween candy chaos.
23) Monster Eyeball Brownie Bites
I love making these Monster Eyeball Brownie Bites for Halloween. They look silly, but honestly, they’re super easy.
Kids can help with every step. It only takes a few ingredients, which is always a win for me.
First, I usually grab store-bought brownie bites to save time. You can find them in the bakery section at most grocery stores.
If you want, you could swap in mini chocolate muffins instead. Either way works, no stress.
Next, I squeeze a little colored frosting or melted white chocolate on top of each brownie bite. I tend to go for green, purple, or orange—something about those colors just screams Halloween, right?
Then I stick a big candy eyeball right in the middle. Candy eyes are easy to find in the baking aisle.
Sometimes I use different sizes to make each monster look a little goofy. Why not?
For extra fun, I toss on some sprinkles or dots of colored gel around the eye. Some kids like to draw red squiggly lines for “bloodshot” eyes—totally up to you.
These treats don’t need any baking or sharp tools, so they’re safe for kids. I usually help little ones with the frosting and candy eyes, but older kids can handle it solo.
I keep them in an airtight container so the brownies stay soft and fresh. They’re always a hit at my house, and I never have to worry about making a mess or waiting for the oven.
24) Spooky Pretzel Worms
When I want something easy for Halloween, I go with Spooky Pretzel Worms. They’re quick, fun, and I usually have everything I need on hand.
I melt some milk chocolate chips in the microwave, then dip the pretzel sticks so most of each stick gets coated. Leaving a bit uncoated makes them easier to hold—trust me, it’s less messy.
Once dipped, I lay them on wax paper. While the chocolate’s still wet, I sprinkle on colored sugar or candy eyes.
Adding candy eyes makes them look like little crawling creatures. Sometimes I use white chocolate or green candy melts for a twist.
Every “worm” ends up looking a bit different, which I think is half the fun. My friends always guess which color I’ll use next.
If I’m in the mood, I’ll add mini chocolate chips for “bumps” or “spots.” It makes them look even weirder.
I let them chill in the fridge for about 10 minutes. Once they’re firm, they peel right off the paper.
It’s easy to make a big batch, which is perfect for parties or classroom treats. Kids love dipping and decorating, even if it gets a bit sticky.
Pretzel worms are salty, sweet, and crunchy—kind of addictive, honestly. We usually eat them right away, but they last a few days in a container if you have leftovers.
25) No-Bake Candy Corn Bars
I love how simple these No-Bake Candy Corn Bars are. No oven, barely any cleanup—what’s not to like?
To start, I grab candy corn, peanut butter, and white chocolate chips. I melt the peanut butter and chocolate chips together in the microwave, which takes maybe a minute or two.
Once it’s all smooth, I stir in the candy corn and a handful of crispy rice cereal. The cereal adds a nice crunch.
I pour the mix into a lined baking pan and press it down with a spatula. Before it sets, I scatter extra candy corn on top for a pop of color.
The pan goes in the fridge for about 30 minutes. Once firm, I cut it into bars—rectangles or squares, whatever I feel like.
The bars come out chewy and sweet, and the cereal really does make each bite better. Kids can help pour and mix, which is always good for keeping them busy.
There’s no baking, so it’s safe for little hands. Just remind them the melted mix can be hot at first.
These work well for classroom parties or quick snacks at home. I like to wrap each bar so they’re easy to hand out.
Sometimes I mix in mini chocolate chips or pretzel pieces for a change. The main thing I love is how fast and easy these are—less than an hour, even if I’m distracted.
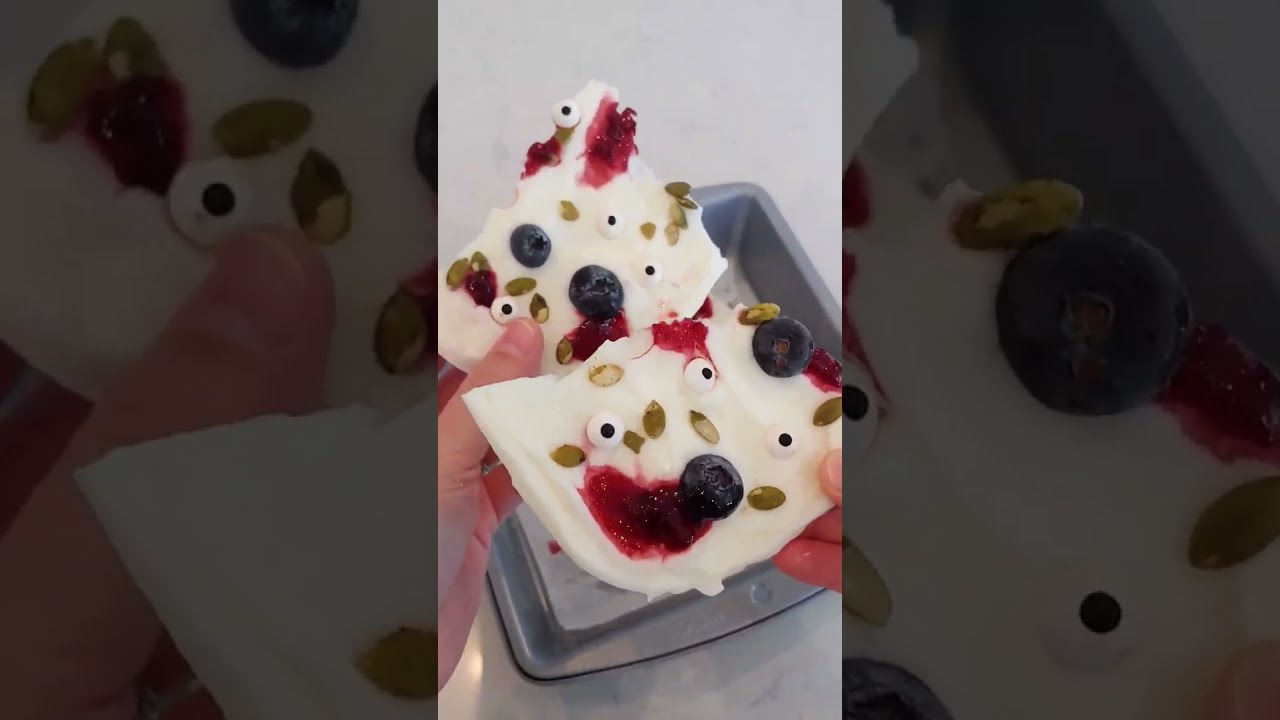
26) Ghostly Yogurt Parfaits
I love making Ghostly Yogurt Parfaits because they’re simple, tasty, and look like tiny ghosts in a cup. Great for kids who want something healthy for Halloween.
No oven, just what’s in the fridge. I use clear cups so you can see all the layers.
I start with a layer of vanilla yogurt at the bottom. The white yogurt gives that ghostly vibe right away.
Next, I add crushed chocolate cookies or granola for crunch. The contrast in color is nice, and it tastes even better.
Another layer of yogurt goes on top. For the faces, I use mini chocolate chips or raisins as eyes and a mouth.
Letting the kids help with ghost faces is the best part—everyone gets creative. Sometimes I toss in fruit like blueberries or strawberries for a pop of color.
You can add a bit of whipped cream on top if you’re feeling fancy. I keep the servings small, so it’s just enough for a treat.
These parfaits are a healthier option than candy but still festive. If I’m serving a group, I set up a little parfait station so everyone can make their own.
It keeps the kids busy and makes snack time feel special. I always prep them right before serving so the cookies and toppings stay fresh.
Simple, fast, and cute—these parfaits are one of my must-make treats every Halloween.
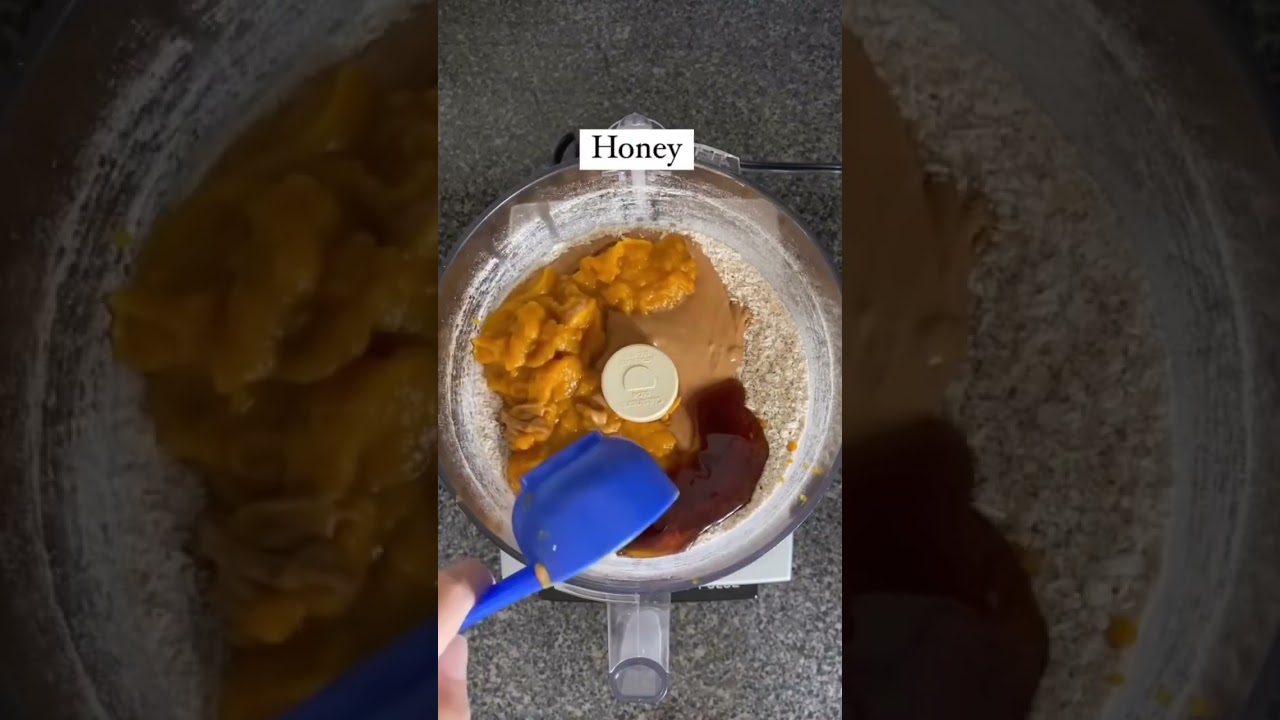
27) Pumpkin Pie Energy Bites

I love making Pumpkin Pie Energy Bites because they taste just like fall. These little treats are perfect for Halloween.
No baking needed, so kids can help from start to finish. I use oats, canned pumpkin, a bit of nut butter, and honey.
I throw in a pinch of pumpkin pie spice for that classic flavor. Mixing everything together only takes a few minutes.
Once it’s all mixed, I scoop out small portions and roll them into balls. The dough can get sticky, so I keep my hands a bit wet to help.
Kids love rolling the balls—it’s messy but fun. If I want them sweeter, I add mini chocolate chips.
Other times, I roll them in crushed graham crackers for crunch. Both ways work and add something special.
They chill in the fridge for about half an hour to firm up. Perfect for parties or a quick after-school snack.
I keep leftovers in the fridge for up to a week. They’re grab-and-go, not messy, and don’t melt—super easy to pack.
Pumpkin Pie Energy Bites give me that pumpkin pie flavor without baking. Simple, festive, and honestly, kids love making them themselves.
28) Bat-Shaped No-Bake Cookies
I love making bat-shaped no-bake cookies for Halloween. They’re easy, and I don’t have to bother with the oven.
I start with crushed chocolate cookies and a bit of cream cheese. Mix them up until you get a sticky dough.
Then I shape the dough into small ovals for the bat bodies. For the bat wings, I use chocolate sandwich cookies like Oreos.
I separate the cookies, break the halves, and stick them on each side for wings. Adding eyes is quick—I just press in two small candy eyes per bat.
If I’m out of candy eyes, I use white chocolate chips with a little dot of melted chocolate. These bats set up fast in the fridge.
Kids can help with every step, from mixing to decorating. The bats look cute and spooky, and the ingredients are easy to find.
Cleanup is a breeze—just a bowl and spoon. If I’m feeling extra, I’ll use icing to add fangs or smiles.
When I serve these, kids get a kick out of the look and taste. It’s a fun way for kids to get creative in the kitchen without any baking.
29) Witch Hat Marshmallow Pops
I really enjoy making Witch Hat Marshmallow Pops. They’re just adorable and honestly, they couldn’t be much easier.
You only need a few things—big marshmallows, chocolate chips, fudge cookies, and some colorful candy. Most of this stuff is at any grocery store, so there’s no wild goose chase.
First, I melt chocolate chips in a bowl. Once it’s melted, I poke a lollipop stick into each marshmallow.
Then I dip the top of every marshmallow in the melted chocolate, making a nice little cap. After dipping, I press a fudge cookie onto the chocolatey end for the hat’s brim.
I let them sit for a minute or two so the chocolate can set up. I like to stick a colorful candy—M&M, candy dot, whatever—right where the marshmallow meets the cookie.
Sometimes I go wild with colored icing to decorate the hats even more. Every witch hat ends up looking a little different, which I think is part of the fun.
Making these is a good indoor activity, especially if the weather’s gloomy. Once the chocolate is firm, the pops are ready to eat.
I usually pile them on a plate or stand them up in a cup. They’re sweet and honestly, they look so cute on a Halloween table.
Kids can totally help out by dipping marshmallows or adding candies. This is one of those treats everyone can make together, even the really little ones.
If marshmallows aren’t someone’s thing, swapping in another soft candy works just fine. I like that these pops don’t need much time or effort, so even if I’m busy, I can still whip up a batch.
No oven, no fuss—just a fun snack to make with friends or at a class party.
30) Pumpkin Spice Granola Bars
I love making pumpkin spice granola bars in the fall. They’re no-bake, so it’s really easy for kids to help out.
You only need a handful of ingredients—oats, pumpkin puree, honey, and pumpkin pie spice. First, I toss the oats, pumpkin puree, and honey into a big bowl.
Then I sprinkle in the pumpkin pie spice and a pinch of salt. If you want a little extra sweetness, toss in some chocolate chips or raisins.
Sometimes I get fancy and add mini marshmallows or seeds for a little crunch. Once it’s all mixed, I press the mixture into a square pan lined with parchment paper.
Using the back of a spoon to press it down really helps the bars stick together. This way, they don’t fall apart when you cut them later.
I smooth out the top and pop the pan in the fridge for about two hours. That gives the bars time to set up.
When they’re ready, I cut them into rectangles or squares. I usually wrap each bar in plastic wrap or wax paper, so they’re easy to grab and go.
The bars are chewy, sweet, and have a mellow pumpkin spice flavor. Kids can help make them, and there’s barely any mess.
They’re perfect for Halloween parties, lunchboxes, or just an after-school snack. If allergies are a concern, sunflower seed butter or a different sweetener works fine.
I usually keep leftovers in an airtight container in the fridge. They stay fresh for several days and honestly, they taste just as good the next afternoon.
Kids can even decorate the bars with mini chocolate chips or icing for a Halloween vibe. I think it makes snack time a whole lot more fun.
Tips for Making No Bake Halloween Treats with Kids
Making no bake Halloween treats with kids can be simple and safe with just a few tweaks. I think the most fun happens when I focus on safety but also let them get creative.
Safety Guidelines for Little Chefs
Keeping kids safe in the kitchen is always my top priority. Even without an oven, there’s stuff to watch out for.
I always make sure kids wash their hands before we start. It keeps germs off the food, which is just basic good sense.
Sharp tools and hot things stay out of reach. If knives or scissors are needed, I handle that part myself.
For mixing or pouring, we stick to plastic, kid-friendly utensils. When the microwave comes into play, only the older kids help, and I’m always right there.
I remind kids not to run or put their fingers in their mouths while we’re making treats. Aprons save their clothes, and I clean up spills fast so no one slips.
A safe kitchen means everyone can relax and have fun.
Encouraging Creativity and Fun
Letting kids get creative is honestly my favorite part. I set out all kinds of toppings—sprinkles, gummy worms, marshmallows, colored icing—so they can pick whatever they like.
Sometimes I toss out a suggestion, but mostly I let their ideas lead. Simple challenges like “Can you make a monster face?” or “Who’s got the spookiest treat?” always get laughs.
I let every treat look different, because that’s what makes it special for each kid. Praise goes a long way.
I cheer them on for trying new things and remind them it’s about fun, not perfection. Snapping a picture of their crazy creations makes a great memory, too.
How to Store and Transport No Bake Halloween Treats
I want my Halloween treats to stay tasty and look great. Keeping them fresh—and getting them to a party in one piece—doesn’t have to be tricky.
Best Storage Containers for Freshness
Airtight containers are my go-to for most no bake snacks. They keep things from getting stale and block out weird smells or moisture.
I use plastic or glass containers with tight lids for cookies, cereal bars, or energy bites. For gooey or sticky treats, I line the container with parchment paper or wax paper.
That way, nothing ends up glued together. If I’m stacking layers, I throw in more paper between each row so nothing gets squished.
Resealable plastic bags are super handy for smaller treats like candies or snack mix. If I want to keep flavors or colors separate, I use individual bags and scribble a label on each one.
I stash everything in a cool, dry spot—definitely away from the sun. That way, the treats stay fresh and look just as cute as when I made them.
Transporting Treats to Parties and Events
When I’m taking treats to school or a party, I grab containers that stack easily and are leak-proof. Boxes with snap lids or handled carriers usually keep everything in place, though I’ll admit, there’s always a tiny bit of anxiety about a rogue cookie escaping.
If the treats are soft or delicate, I’ll stick a piece of cardboard or a flat tray at the bottom. That way, things stay steady and don’t squish together during the drive.
For extra decoration or special shapes, I use shallow bakery boxes or cupcake holders. This keeps each treat separate—and honestly, it just looks better when you finally open the box.
I like to carry a small roll of tape to seal boxes. Let’s be real, nobody wants a surprise cupcake avalanche in the back seat.
When it’s hot outside, I’ll pack an insulated bag with a cold pack. That usually saves chocolate from melting and marshmallows from turning into a sticky mess.