21 Halloween Cake Pops for Your Spooky Party!
Halloween is honestly one of my favorite times to get creative in the kitchen. Making cake pops for Halloween is such a fun way to add some spooky treats to any party or gathering.
I love how easy it is to decorate cake pops in all sorts of shapes, colors, and designs. With just a handful of simple ingredients, I can whip up tasty snacks that look as good as they taste.
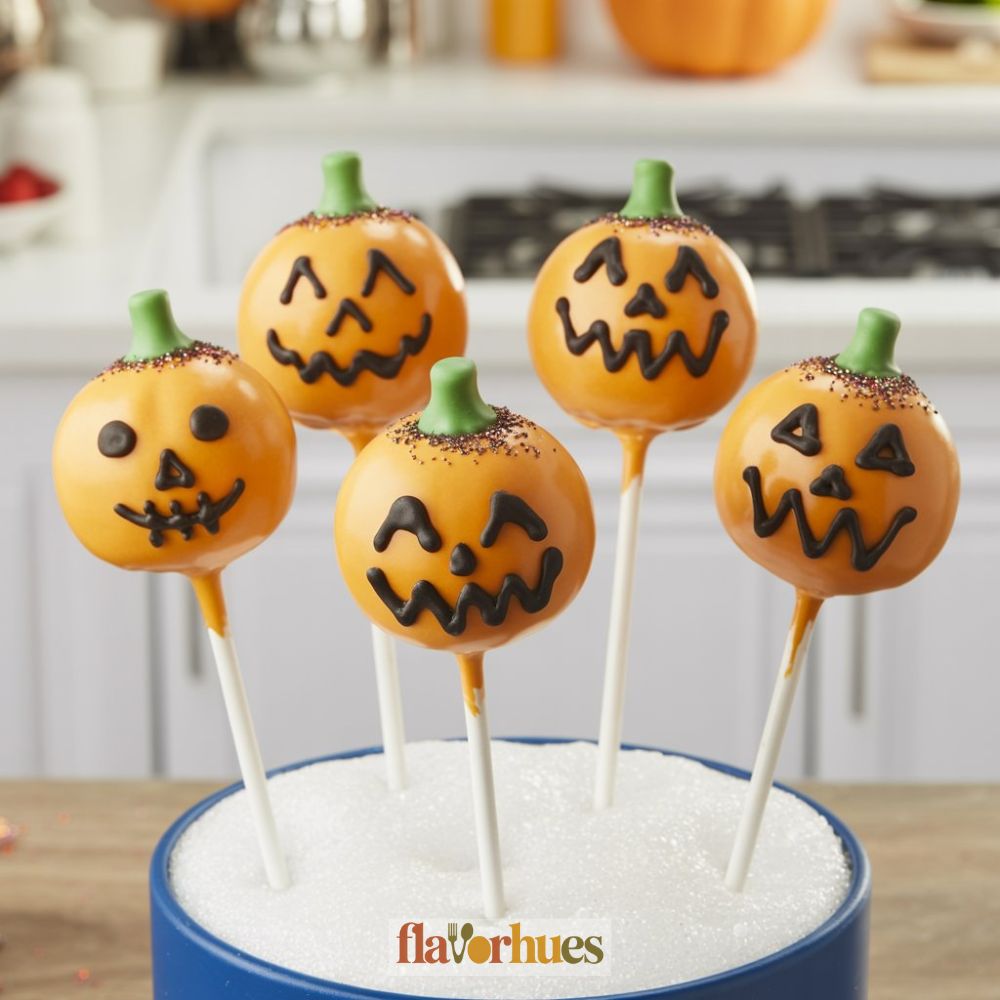
1) Classic Pumpkin Cake Pops
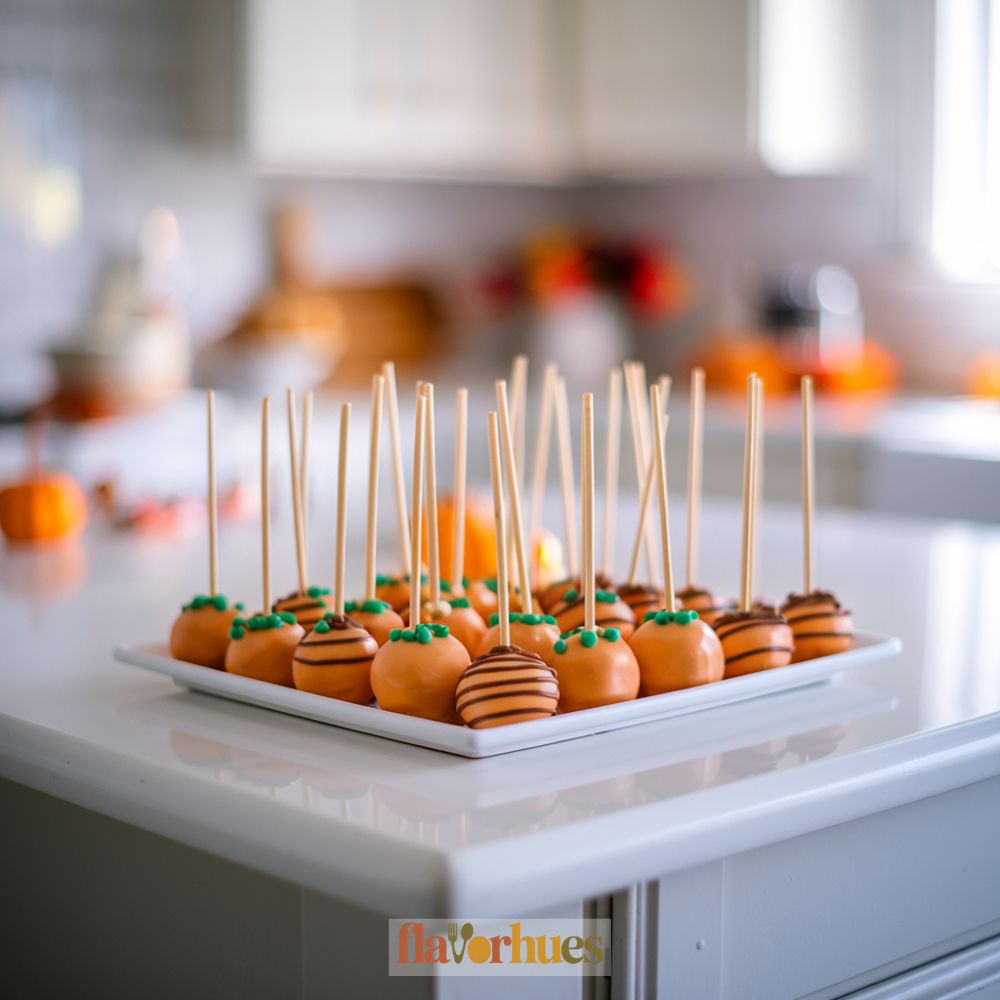
When I think of Halloween treats, pumpkin cake pops just pop into my mind. These little desserts are shaped and decorated to look like tiny pumpkins.
I like to start with orange candy melts for the coating. The bright color really makes each pop stand out on a party table. After dipping the cake balls, I use a toothpick to add a few lines for that real pumpkin look.
For the stem, I usually break off a small piece of pretzel stick. Sometimes, I’ll add a green candy leaf or use gel icing to draw a little vine. These cake pops are simple, but they always make everyone smile.
If I’m in the mood, I use a black edible marker to give them faces and turn them into pumpkin jack-o’-lanterns. Serving these at my Halloween party always gets people excited.
2) Spider Web Chocolate Cake Pops
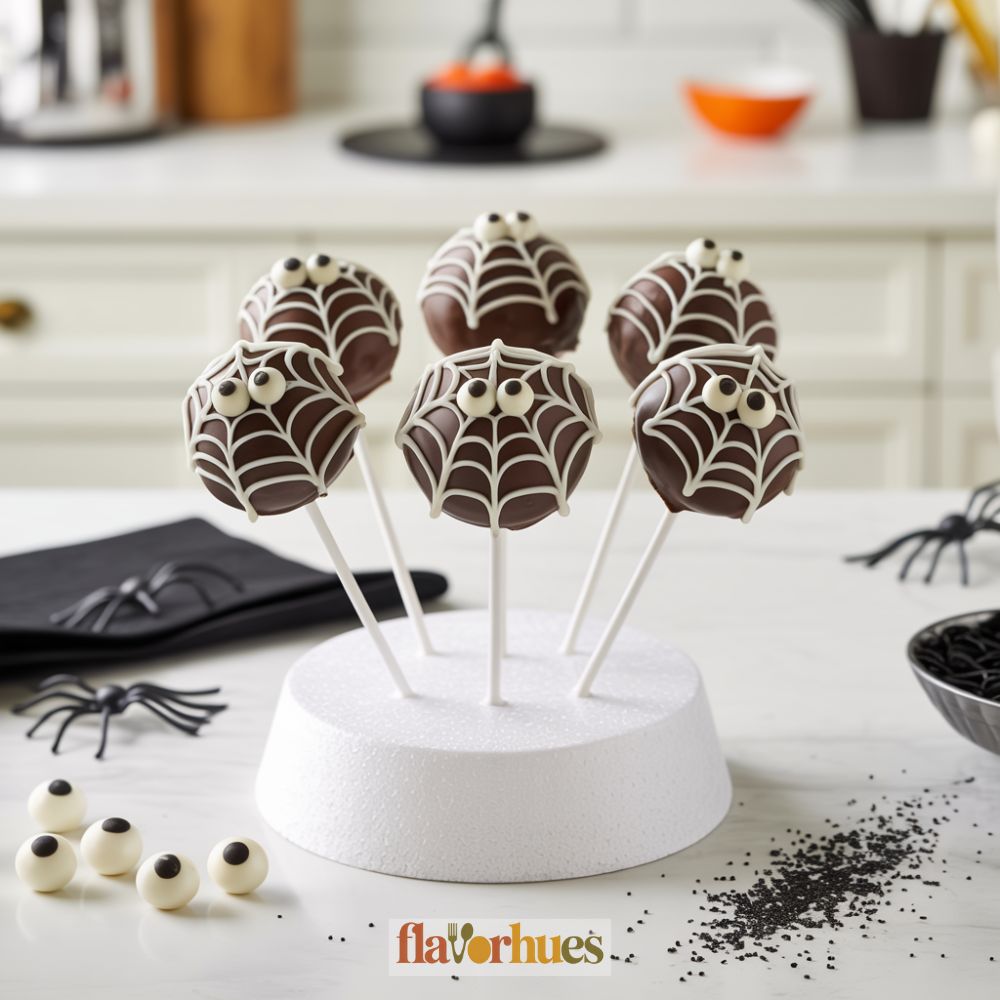
I like making Spider Web Chocolate Cake Pops because they look fun and, honestly, a little spooky. First, I crumble chocolate cake and mix it up with a little frosting. I roll the mixture into small balls and stick them on lollipop sticks.
Once the cake balls are set, I dip each one into melted chocolate. While the chocolate is still wet, I use white candy melts or icing to draw spider web designs. Drawing the webs can be tricky, so I just go slow and try not to overthink it.
Sometimes I’ll add tiny candy spiders on top for more detail. These pops are always a hit at Halloween parties. Kids and adults both seem to love how they look and taste.
3) Witch Hat Cake Pops
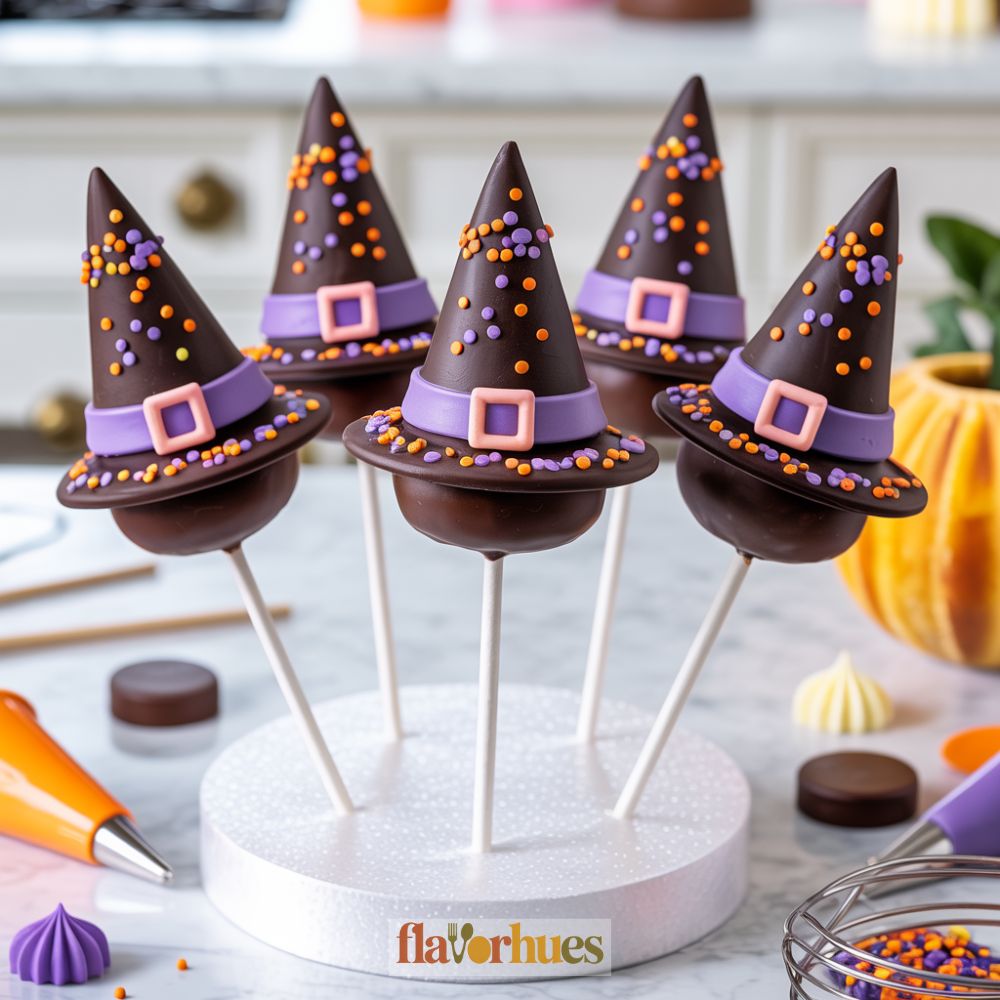
I love making witch hat cake pops for Halloween. They look cute and a little spooky at the same time. These cake pops are shaped like small hats and are great for parties.
To make them, I roll the cake mixture into cones. Then I attach a small chocolate cookie to the bottom for the hat’s brim. After that, I dip everything in dark purple or black candy coating.
I use a piping bag to add a stripe for the hatband. Sometimes, I put a tiny candy or sprinkle in the middle to look like a buckle.
These cake pops are easy to make and honestly fun to decorate. I can get creative with different colors and toppings. My friends always get a kick out of how unique these witch hats look at Halloween gatherings.
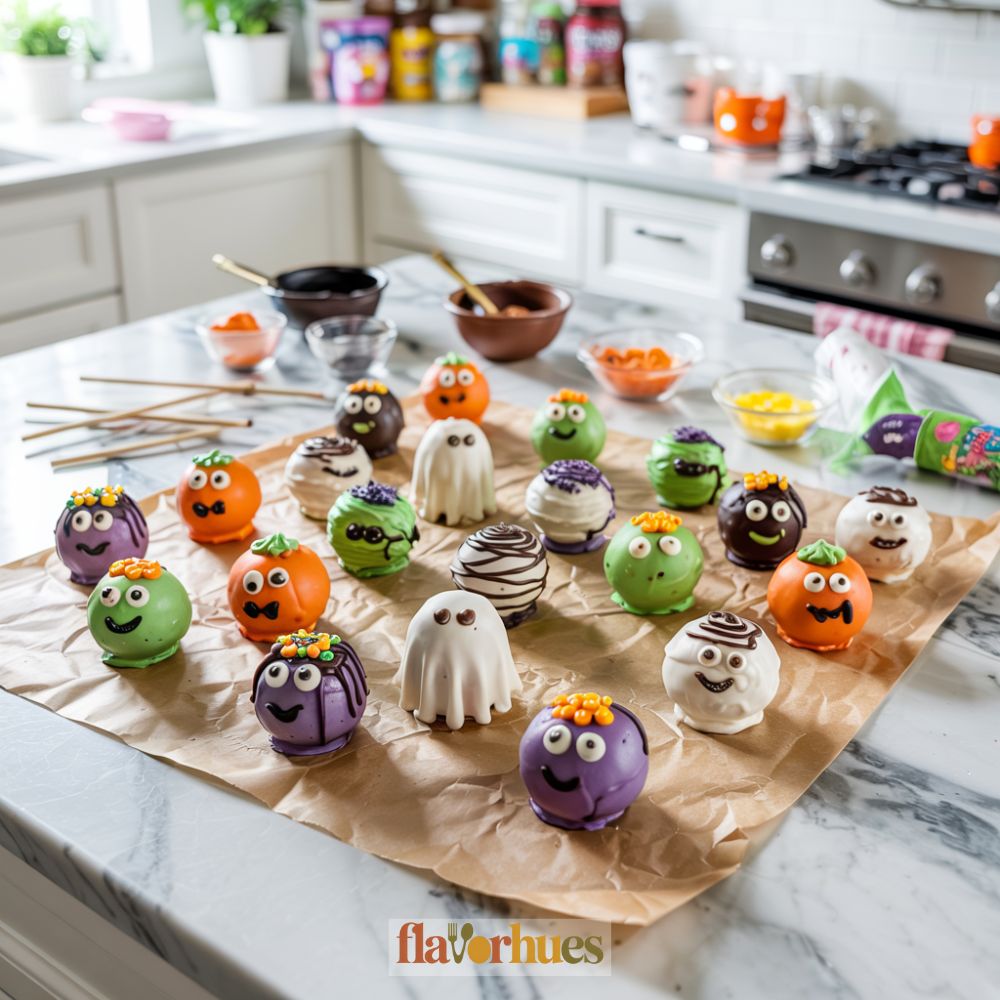
4) Ghost Shaped Cake Pops
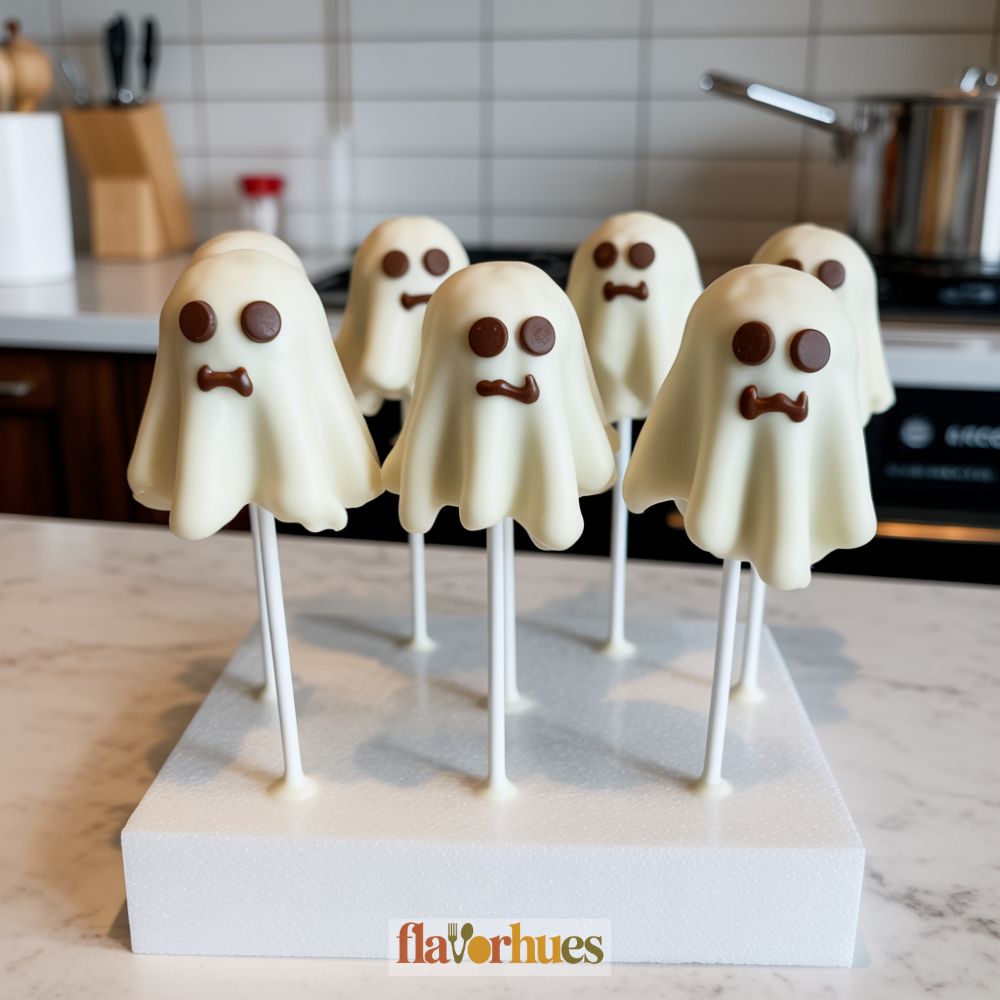
I love making ghost shaped cake pops—they’re easy and always get a smile. I start by rolling the cake mixture into balls after mixing it with frosting. Once I have the balls, I use a stick to create the base for each ghost.
After chilling them, I dip the cake pops in white candy melts. I let a bit of the coating drip at the bottom so the ghosts look like they’re floating.
I use mini chocolate chips or an edible marker to add eyes and a mouth. These little faces give each ghost its own personality. It’s fun to line them up and see all their different expressions.
Sometimes I wrap them in clear plastic and tie them with a ribbon. It’s a cute way to hand them out at parties or as special treats for friends. Kids and adults both enjoy these spooky, sweet pops.
5) Candy Corn Cake Pops
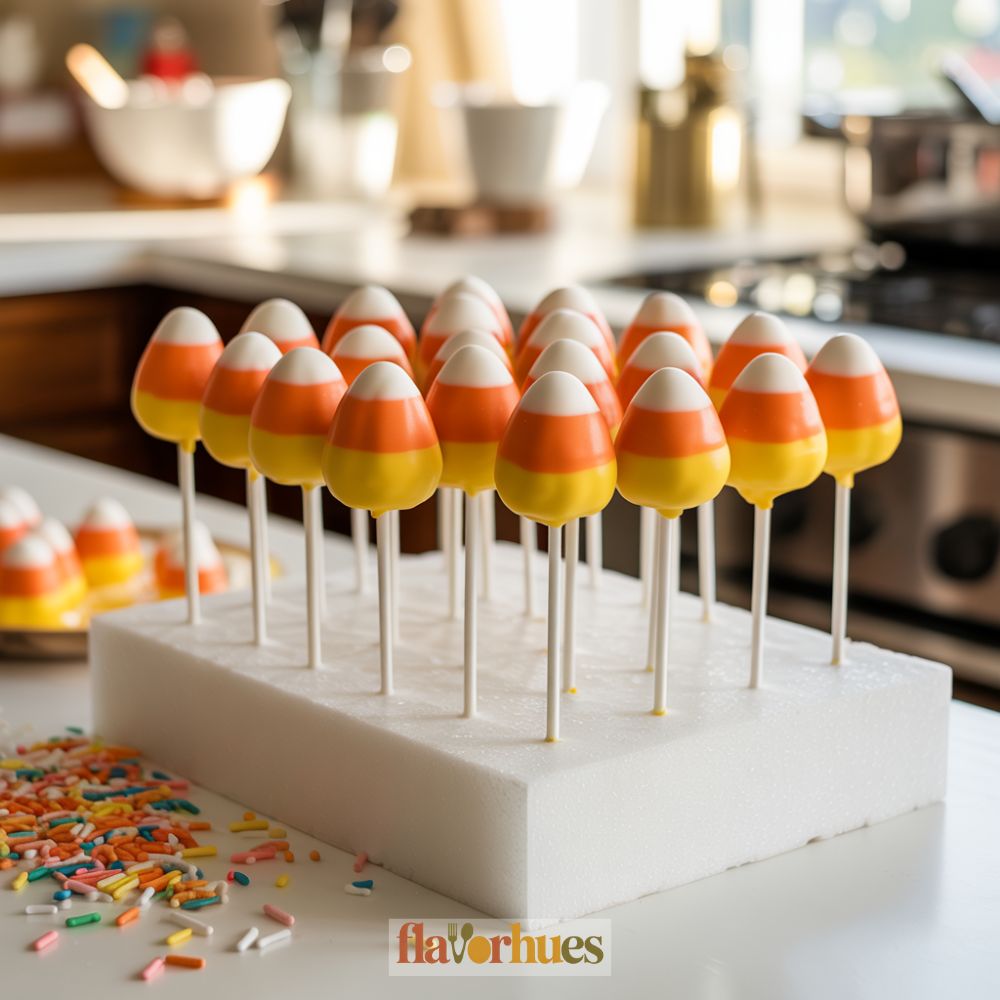
I love making candy corn cake pops because they’re so bright and simple. The colors are easy to layer, and they remind me of classic Halloween candy.
To start, I prep my cake pop mix and shape it into small balls. Then, I dip each one in melted white chocolate. Once that first layer sets, I dip the middle section into orange candy melts.
When the orange layer is dry, I dip just the top third into yellow candy melts. This makes each pop look like a piece of candy corn. Sometimes, I use a toothpick for touch-ups if the colors go a little wonky.
I let the cake pops chill until everything’s set. The final result is cute and fits perfectly with a Halloween theme. These treats are fun for parties or just as a sweet snack.
6) Black Cat Cake Pops

I always enjoy making black cat cake pops for Halloween. They look cute and a little bit spooky at the same time. For the base, I start with chocolate cake and crumble it into fine pieces.
After mixing in some frosting, I roll the mix into small balls. I chill the cake balls so they hold their shape. Once they’re firm, I dip them in melted black candy coating.
I use mini chocolate chips for the ears and tiny candy pieces for the eyes and nose. It’s fun to give each cat a different expression. Sometimes I use a toothpick to add whiskers with a little white icing.
These cake pops work for parties or just handing out to friends. They stand out on any dessert table and taste delicious, too. I love seeing the smiles they bring!
7) Frankenstein Monster Cake Pops
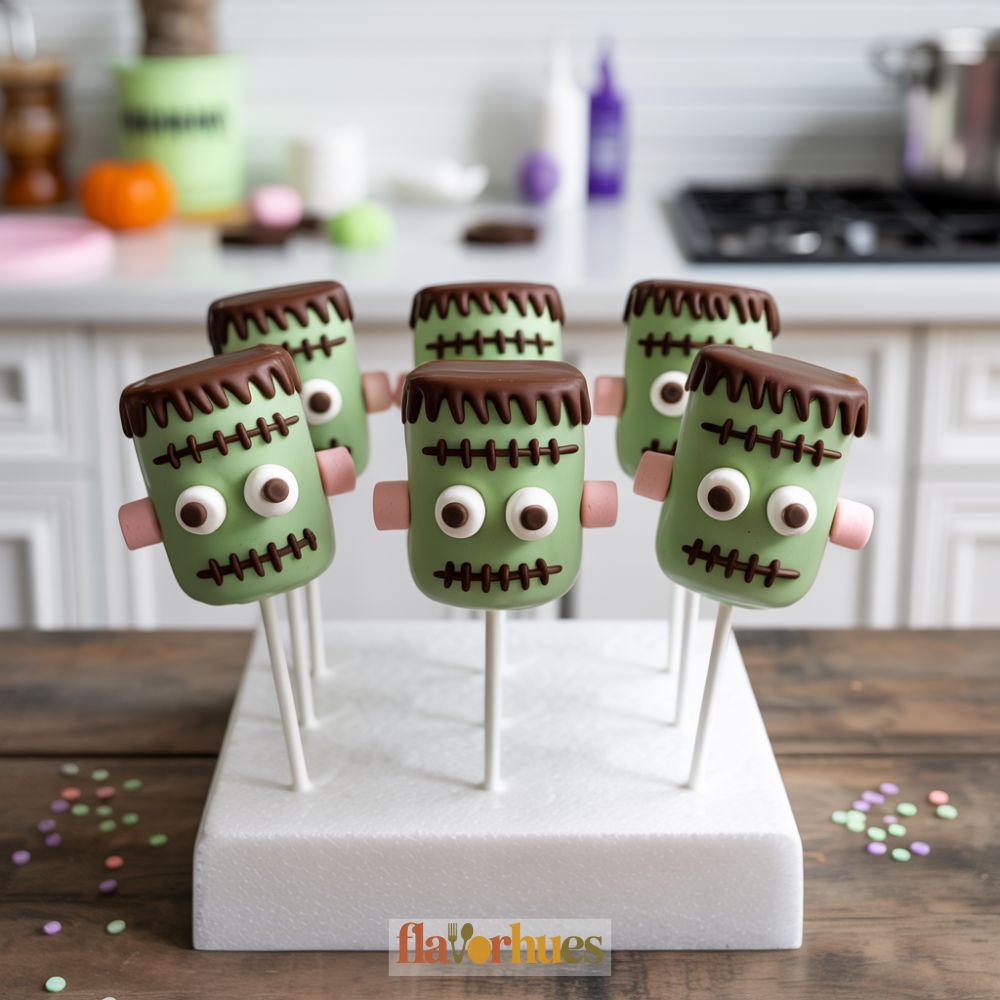
I love making Frankenstein monster cake pops for Halloween. They always make people grin with their silly faces.
To start, I shape the cake pop mixture into rectangles instead of balls. This way they look more like Frankenstein’s head.
I dip the pops in green candy melts. When they dry, I use melted chocolate to add Frankenstein’s hair. The chocolate also holds on the candy eyes.
For the face, I use black icing to draw a mouth and a little scar. Sometimes I add mini marshmallows to the sides for bolts.
These cake pops are a hit at any Halloween party. I like how simple they are, but they really stand out on the dessert table.
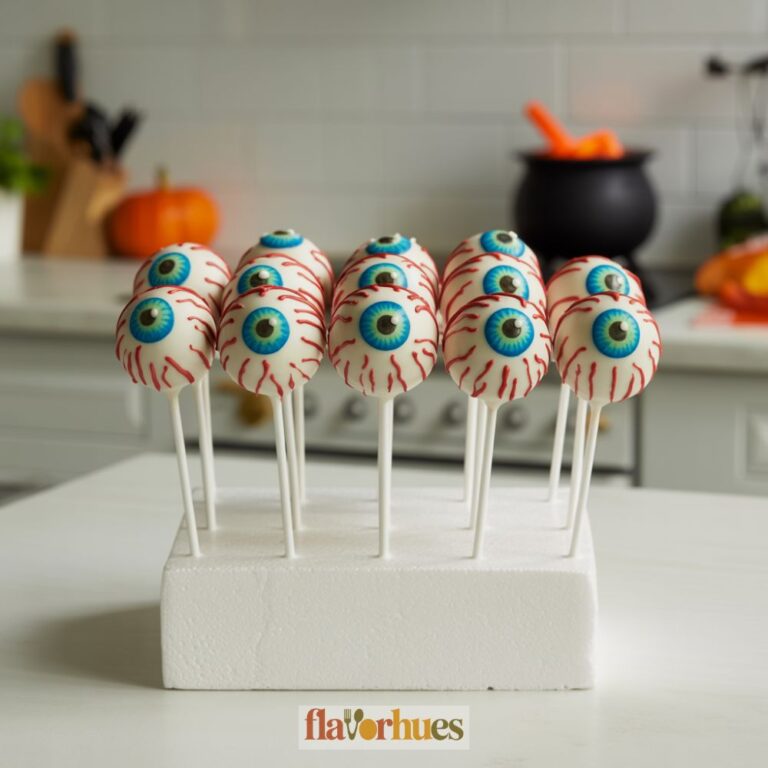
8) Eyeball Cake Pops with Red Veins

I love making eyeball cake pops for Halloween because they look creepy but taste great. First, I shape the cake pops into smooth balls. Then, I dip each one in white candy coating to make the base of the eyeball.
Once the coating dries, I use colored icing or melted chocolate to add a round iris and a small black dot for the pupil. Sometimes, I go with blue, green, or brown for the eye color. For the red veins, I draw thin lines using red icing, making the eyeballs look even spookier.
These cake pops are fun to decorate, and I like to mix up the eye colors for variety. The red lines don’t have to be perfect—messy veins just add to the creepy style.
Whenever I serve these at parties, they always catch people’s attention. Kids usually like the weird look, and the cake inside is a nice surprise after the creepy outside.
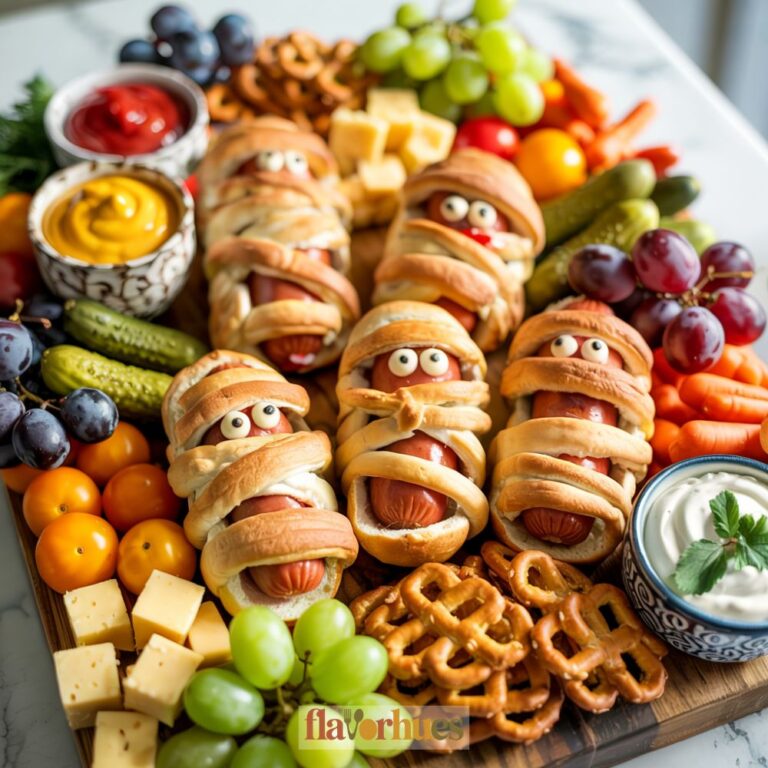
9) Mummy Wrapped Cake Pops
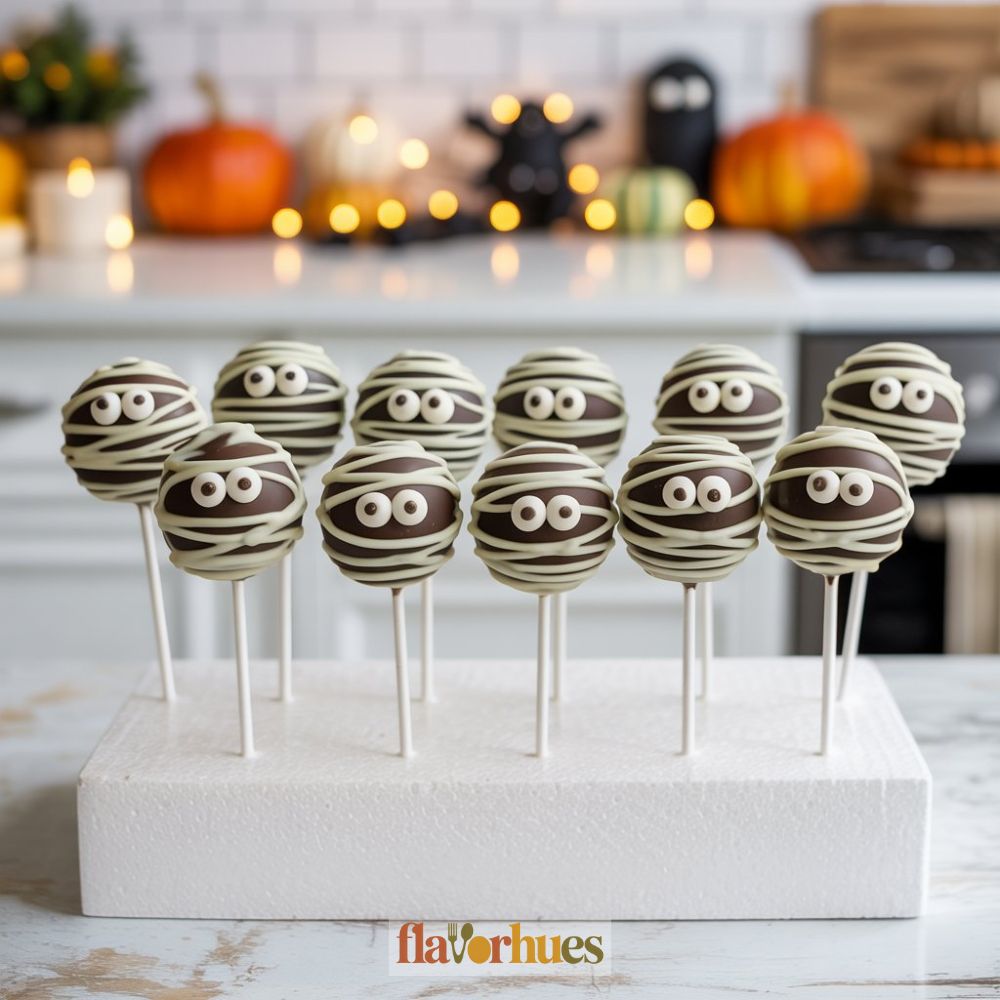
I love making mummy cake pops for Halloween. They look fun and add a spooky touch to any dessert table. I always start by dipping the cake pops in white chocolate and letting them cool.
Next, I use a piping bag or a zip-top bag to drizzle more white chocolate over the top. This makes the bandages that wrap around my little mummies.
For their eyes, I press on two small candy eyeballs before the chocolate sets. Sometimes I use a dab of melted chocolate to help the eyes stick better.
The lines don’t need to be perfect. In fact, a messy look makes them even more like real mummies. I keep my bandages uneven and crisscrossed.
These mummy cake pops are easy to customize. I can use different cake flavors inside or even try colored bandages by adding food coloring to the chocolate.
Whenever I serve these, kids and adults both smile. They’re just the right mix of cute and creepy for Halloween.
10) Graveyard Tombstone Cake Pops
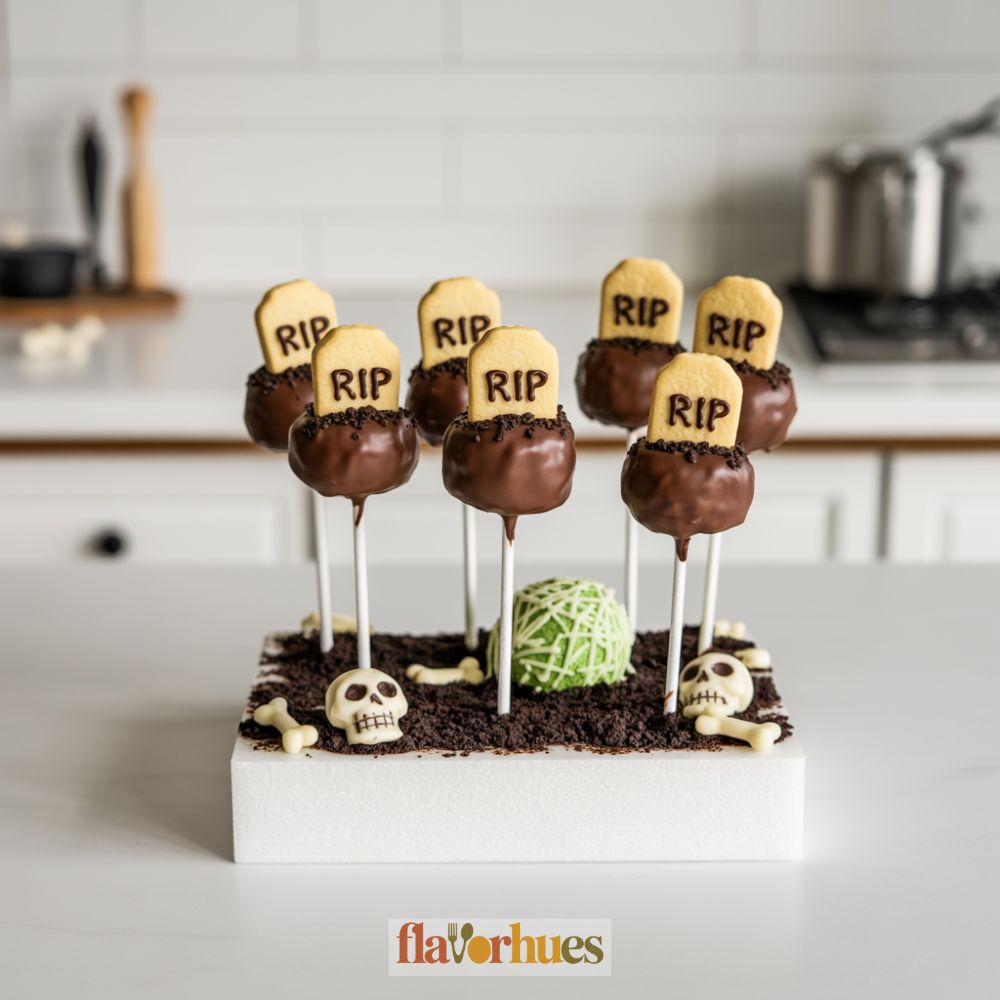
I like to make my graveyard tombstone cake pops look a little spooky but not too scary. For these, I use chocolate cake for the inside and dip them in gray-colored candy melts on the outside. To give them a stone look, I sometimes mix in a few darker candy melts for a marbled effect.
I shape the cake pops into little rectangles or rounded tombstone shapes before dipping. I think it helps if I flatten the tops a bit, so they really look like small headstones. While the coating is still wet, I use a toothpick to scratch on “RIP” or draw a simple cross.
I like to use crushed chocolate cookies as “dirt” at the base of each cake pop. Sometimes, I press the pop into the crumbs while the coating is still sticky. That way it holds better. For a fun touch, I add some bone-shaped sprinkles around the bottom.
Graveyard tombstone cake pops are always a favorite at my Halloween parties. I think they’re cute, simple, and fun to decorate.
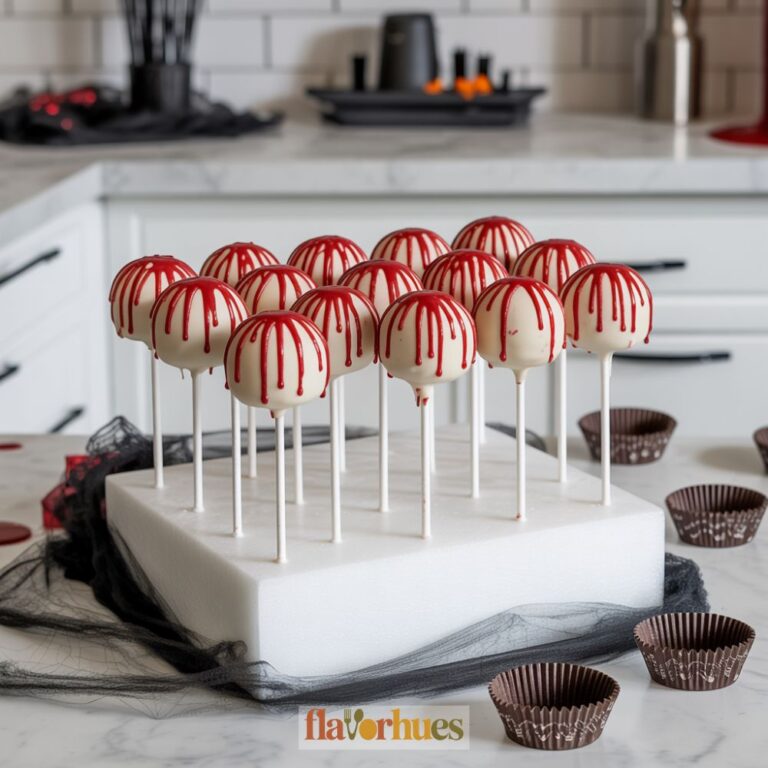
11) Bloody Drip Red Velvet Cake Pops

I love making these Bloody Drip Red Velvet Cake Pops for Halloween parties. They look just the right amount of spooky, but they’re still fun for everyone to eat.
To start, I bake my favorite red velvet cake recipe and crumble it up once it has cooled. I mix the crumbs with cream cheese frosting until I can shape the mixture into round balls.
After chilling the cake balls, I dip each one into white chocolate to coat the outside. The white shell really makes the red velvet inside pop when someone takes a bite.
For the “bloody” part, I make a simple red icing or use red candy melts. I let it drip down the sides so it looks like blood. Sometimes, I add candy knives or axes on top for extra effect.
These cake pops are always a hit. People are surprised when they see the bright red inside, and the sweet flavor is perfect for Halloween.
12) Bat Shaped Chocolate Cake Pops
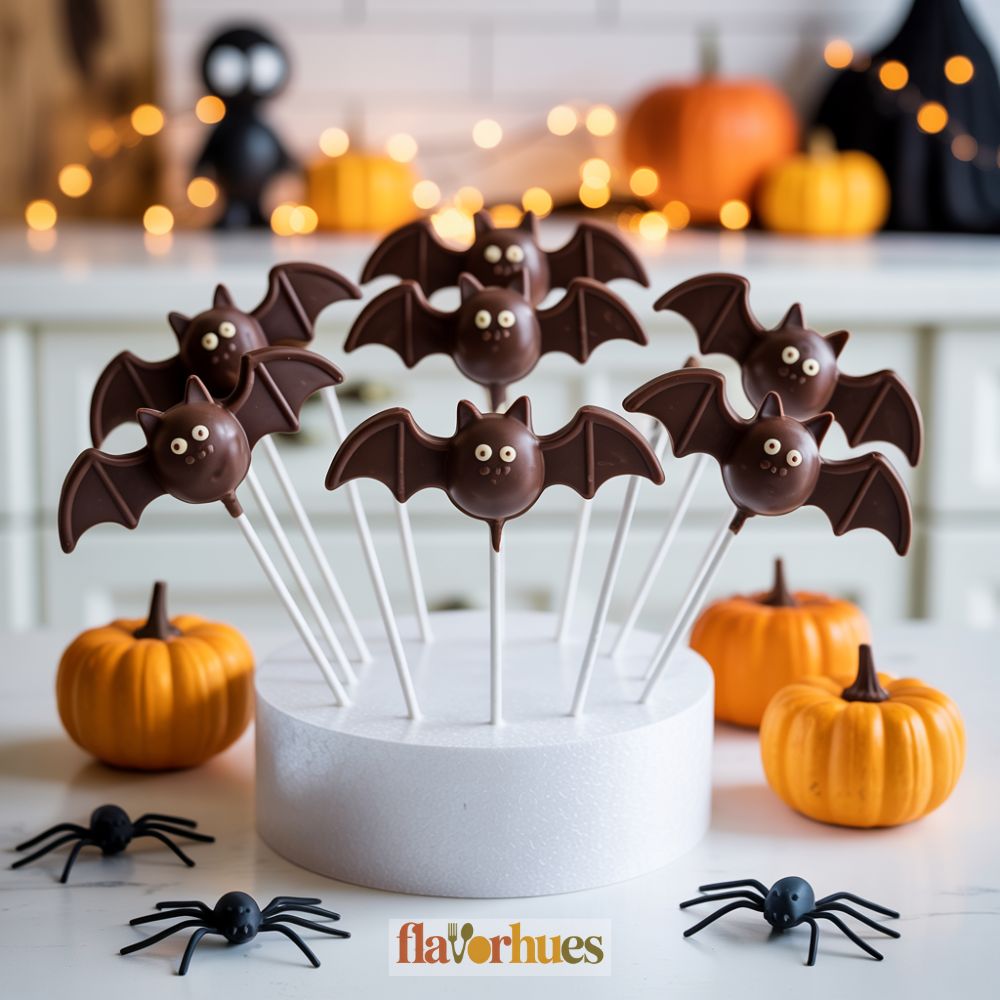
I love how cute and simple these bat shaped cake pops are. Chocolate cake works best for the base because it’s easy to shape and the dark color fits the bat theme. I crumble the cake, mix in some frosting, and roll the mixture into small balls.
To create bat wings, I use chocolate candy melts or cookies cut into wing shapes. I press a wing on each side of the cake ball while the coating is still soft. For eyes, I stick on small white candy eyes or use tiny dots of white icing.
Once the cake pops are ready, I keep them in the fridge so they stay firm. I use lollipop sticks to dip each pop in melted chocolate, then let them set on a tray. They look funny and a little spooky, making them great for Halloween parties.
These cake pops are easy to decorate. I sometimes add a smile or fangs with icing. Kids like helping with this step, too.
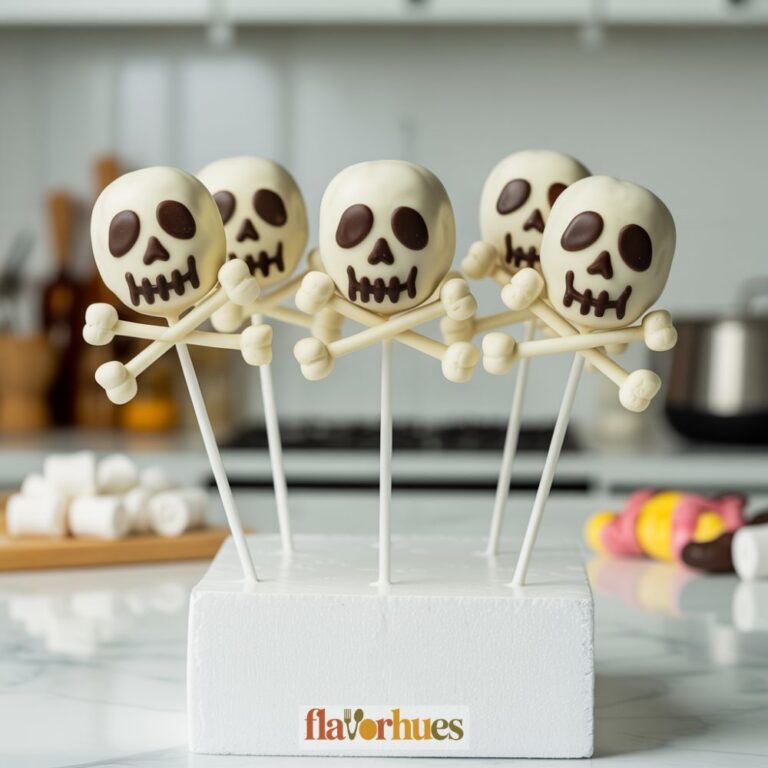
13) Skull and Crossbones Cake Pops
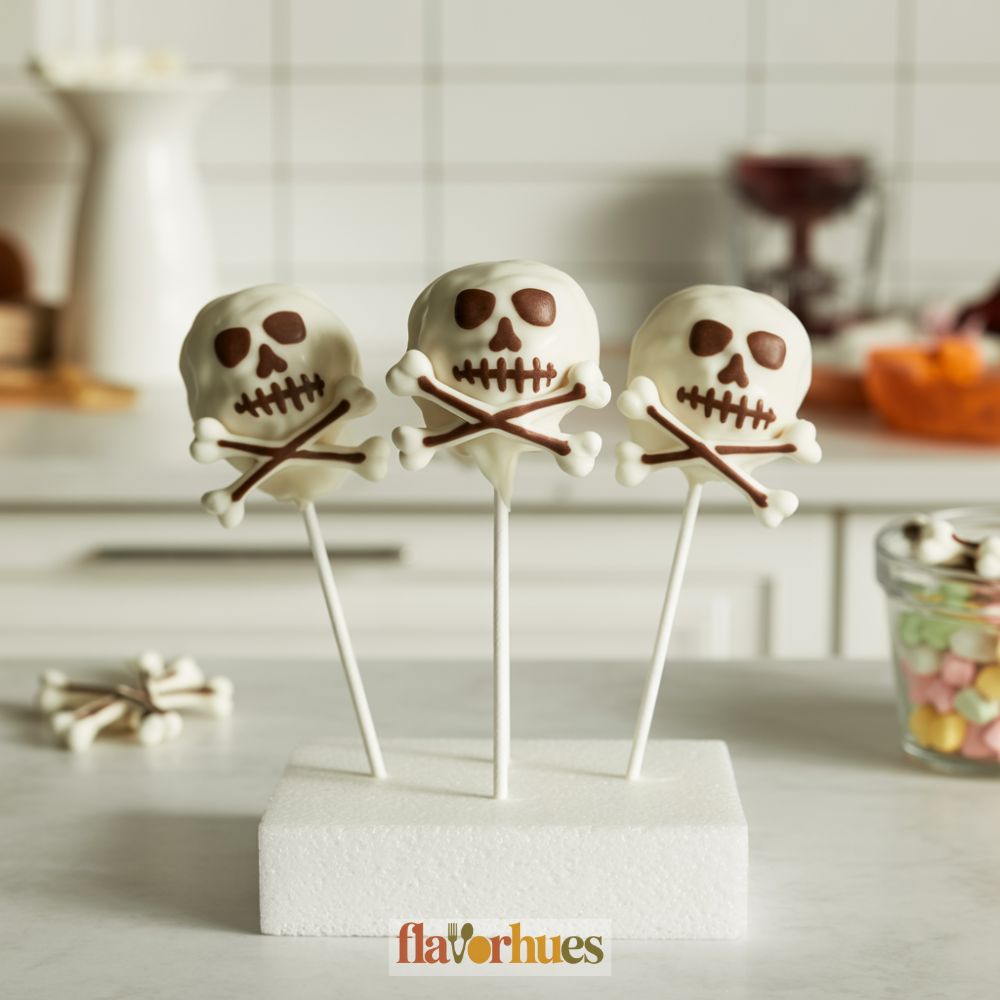
I love making Skull and Crossbones Cake Pops for Halloween. They look spooky but are actually simple to put together. I use white candy melts to coat the cake balls and let them cool until set.
To make the skull shape, I gently pinch one side of the cake ball. I press a small dent on each side to look like jaws. For the crossbones, I attach small round candies or icing bones near the base.
I draw the eyes and nose with black edible marker or melted chocolate. If I want extra detail, I add tiny dots for teeth with candy melts. These cake pops are fun for parties and easy to hold on sticks.
Kids always like the way they look. I enjoy handing them out because they get a lot of attention on the dessert table. Each pop combines a cool skeleton look with a sweet treat.
14) Autumn Leaf Decorated Cake Pops
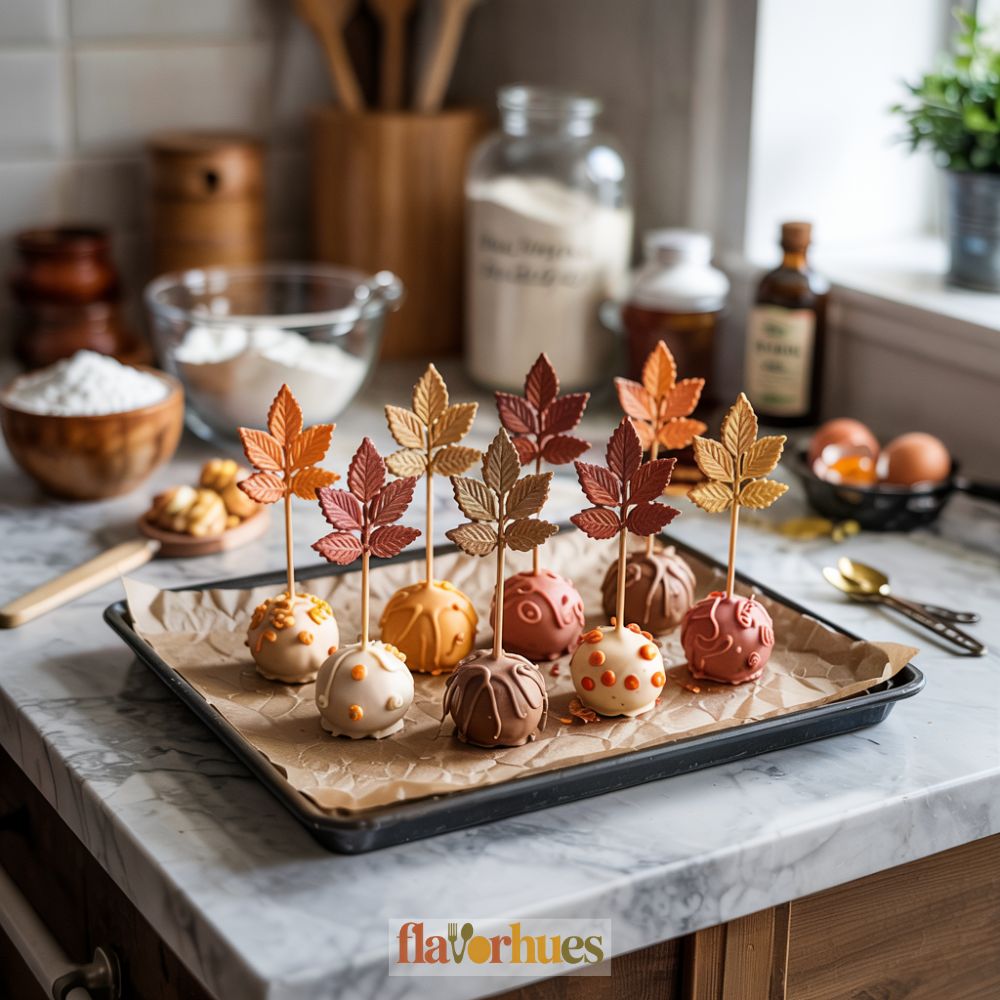
I love bringing the colors of fall to my Halloween treats. For these cake pops, I use orange, yellow, and red candy melts to match the look of autumn leaves. I sometimes swirl the colors together to make each pop unique.
When the candy coating is still soft, I press small edible leaf shapes into the sides. I find these leaf sprinkles at baking stores, but sometimes I make them myself from colored fondant. A few pops look nice with a single big leaf, while others look better with a group of tiny ones.
These cake pops work well for fall parties, not just Halloween. I like that they have a simple design, but still stand out on the dessert table. Making them is fun, and I enjoy experimenting with color patterns each time.
15) Creepy Crawly Spider Cake Pops
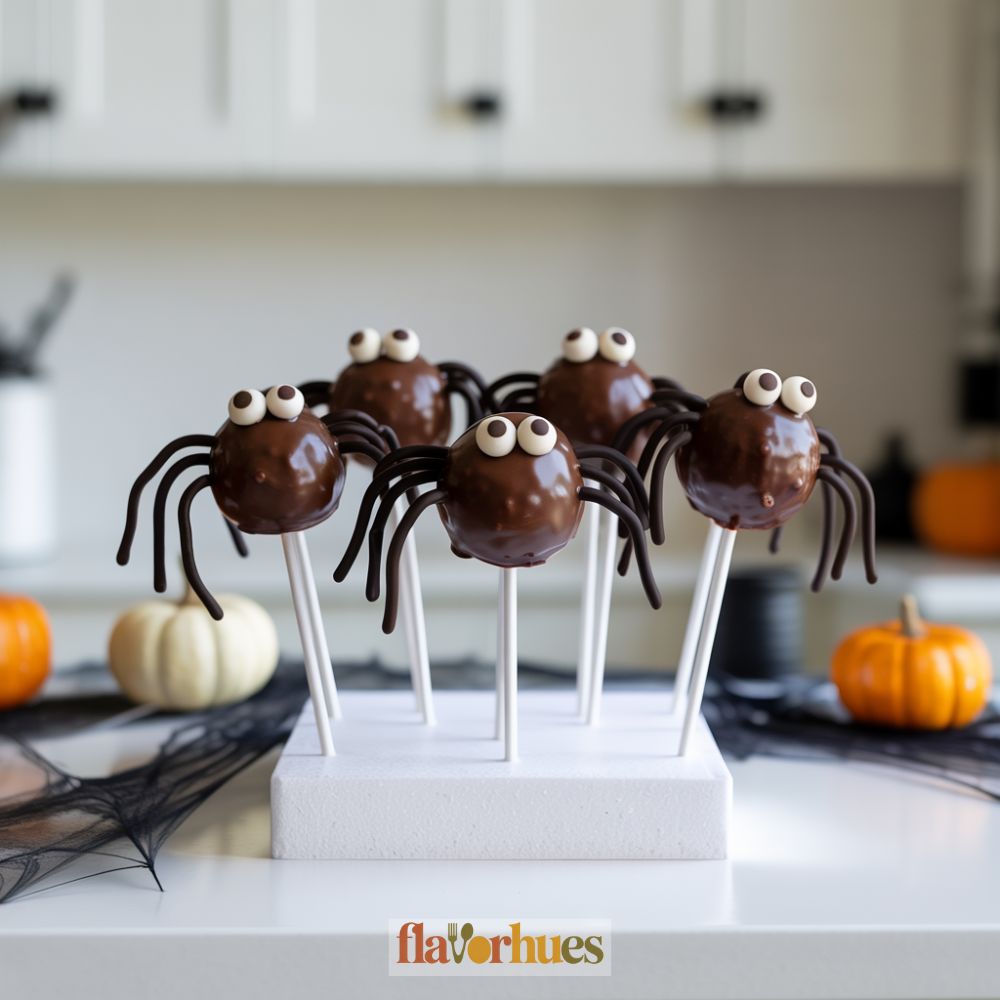
I love making these spider cake pops for Halloween. They look fun and just a little spooky.
I start by rolling cake and frosting into balls, then chill them so they hold their shape. Next, I dip each one in melted chocolate.
While the coating is still wet, I add candy eyes to give them a silly expression. For the legs, I use thin pretzel sticks or licorice, gently pressing them into the sides.
Sometimes I sprinkle a bit of colored sugar or add a tiny dot of red gel to make my spiders unique. I let the cake pops sit until the chocolate sets.
The legs make these pops easy to hold. Everyone gets a kick out of eating them.
16) Glowing Candy Pumpkin Cake Pops
I love decorating cake pops to make them look bright and festive. For these glowing candy pumpkin cake pops, I use orange candy melts for the pumpkin shape.
I roll and dip each cake pop to get an even, smooth coat. Once the orange coating sets, I use green icing to pipe on a small stem at the top.
For the glowing effect, I add some edible luster dust or a shimmery spray. This makes the pumpkins sparkle a bit under the light—almost magical, honestly.
To make them stand out even more, I sometimes add faces with black icing or edible markers. The eyes and mouth can be simple dots or little smiles.
These cake pops are great for parties. They’re fun to make with kids, too.
17) Potion Bottle Cake Pops with Sprinkles
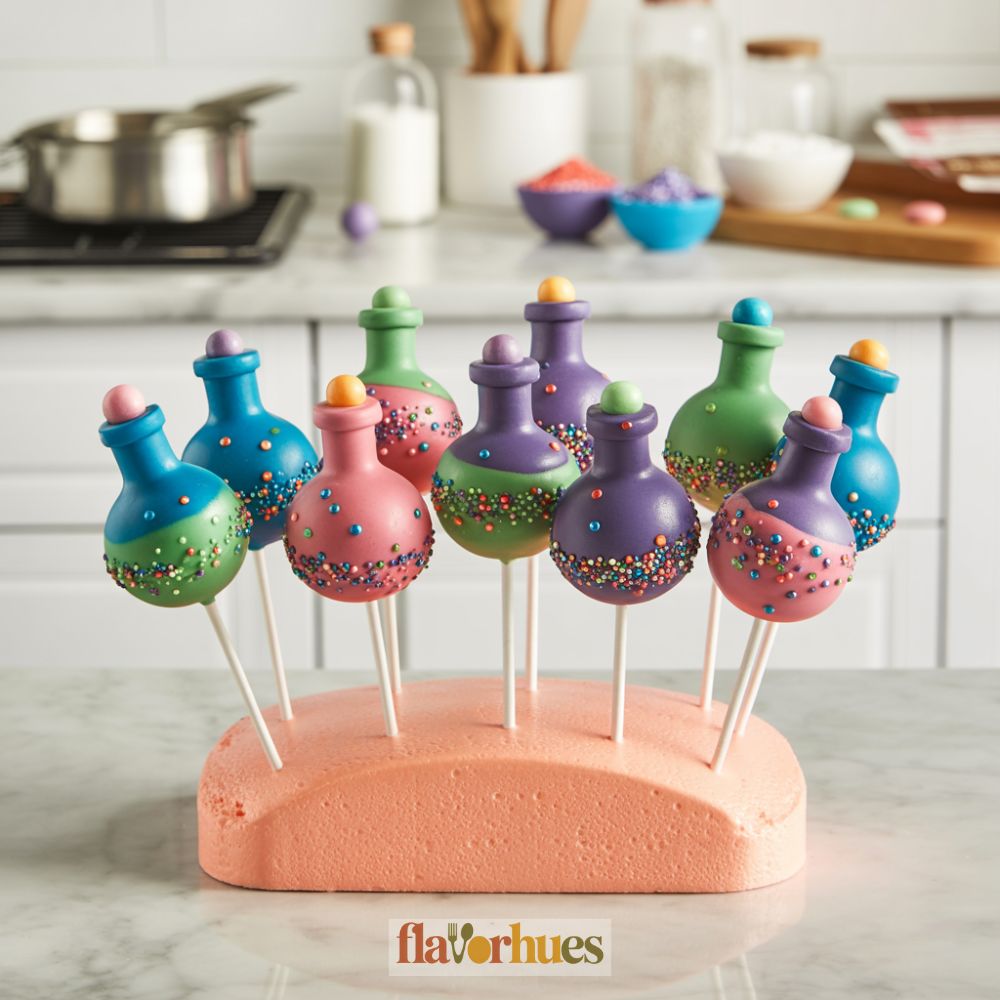
I love making these potion bottle cake pops for Halloween. They look just like the bottles you might find in a wizard’s lab.
The cake inside is soft, and the outside is coated with colorful candy melts. To make the potion bottle shape, I roll the cake mixture into a ball and pinch one end to create a “neck.”
After I dip the pops in candy melts, I sprinkle on bright, sparkling sprinkles while the coating is still wet. For extra detail, I sometimes add a small candy bead as a “cork” on the top.
I use purple, green, and blue sprinkles because they remind me of magic potions. Each one ends up a little unique, which makes them fun for parties.
18) Cheshire Cat Grin Cake Pops
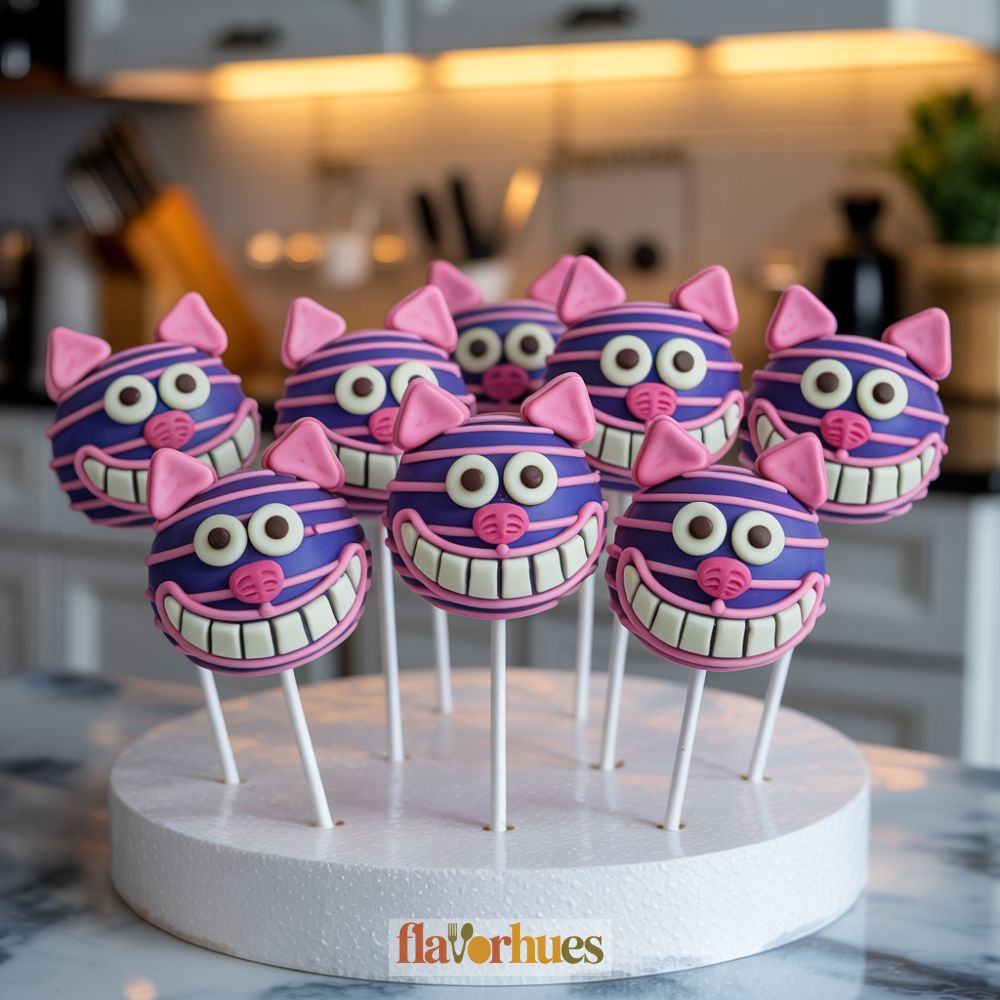
I love everything about the Cheshire Cat, especially its big, wide grin. That’s why I wanted to make these cake pops with big smiles and bright colors just like the cat from Alice in Wonderland.
For these, I start by shaping the cake mixture into slightly oval balls. I dip them into purple candy melts and let them set.
Then, I use pink and white icing to add stripes and fluffy cheeks. To create the famous Cheshire Cat grin, I pipe a big white smile and add little teeth with a toothpick and a bit of icing.
For the eyes, I use tiny candy eyeballs or a dot of icing. These cake pops look fun and a little bit mysterious, perfect for a Halloween party.
I always get a lot of smiles when I bring them out. Kids and adults both seem to enjoy them.
19) Zombie Hand Cake Pops
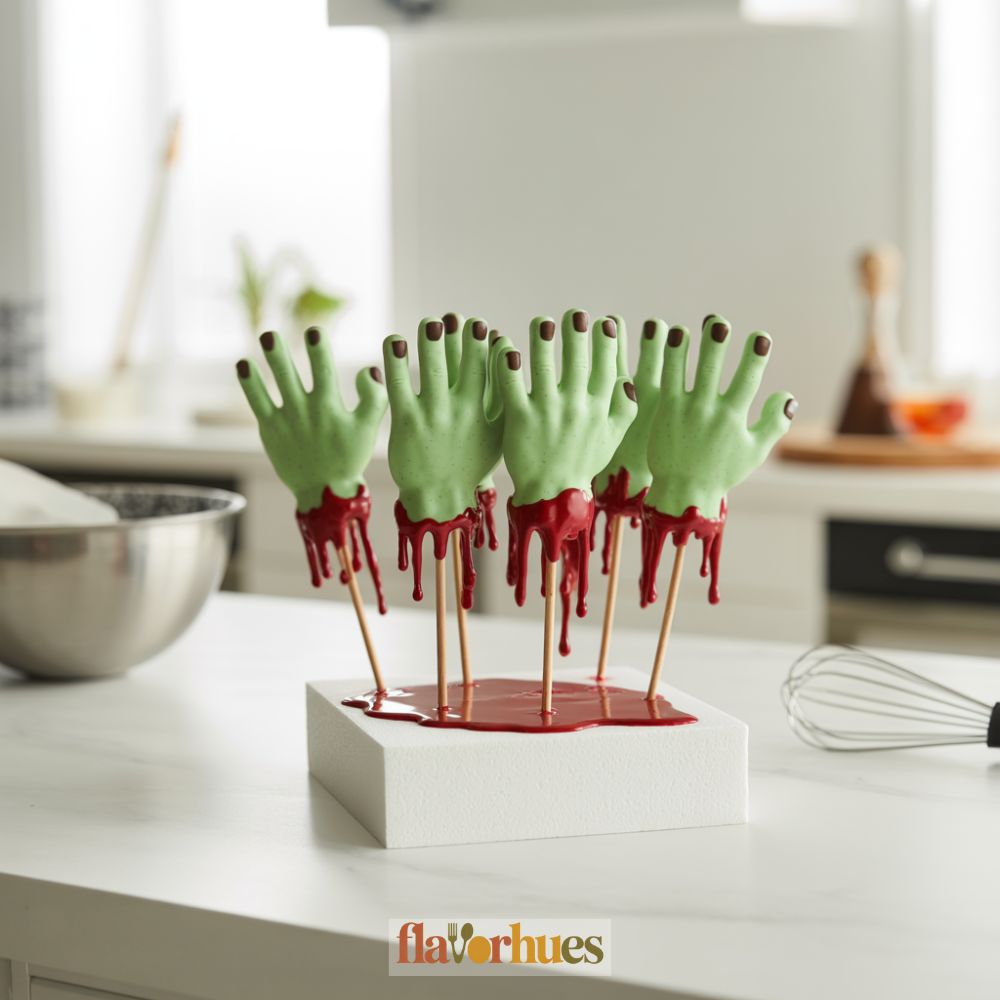
I wanted something spooky but fun for my Halloween treats. The zombie hand cake pops are just right for that.
I shaped the cake balls into little hands and used green candy melts for a creepy, undead look. For the details, I used a toothpick to make small lines on the fingers.
This helped to make the fingers look more real and a little more scary. I also added a few red candy sprinkles to look like blood around the fingertips.
When I stuck the pops on lollipop sticks, they looked like zombie hands popping out of the ground. I added a sprinkle of crushed cookies at the base so it looks like dirt.
These cake pops are eye-catching and get a lot of smiles at my Halloween parties.
20) Haunted House Cake Pops
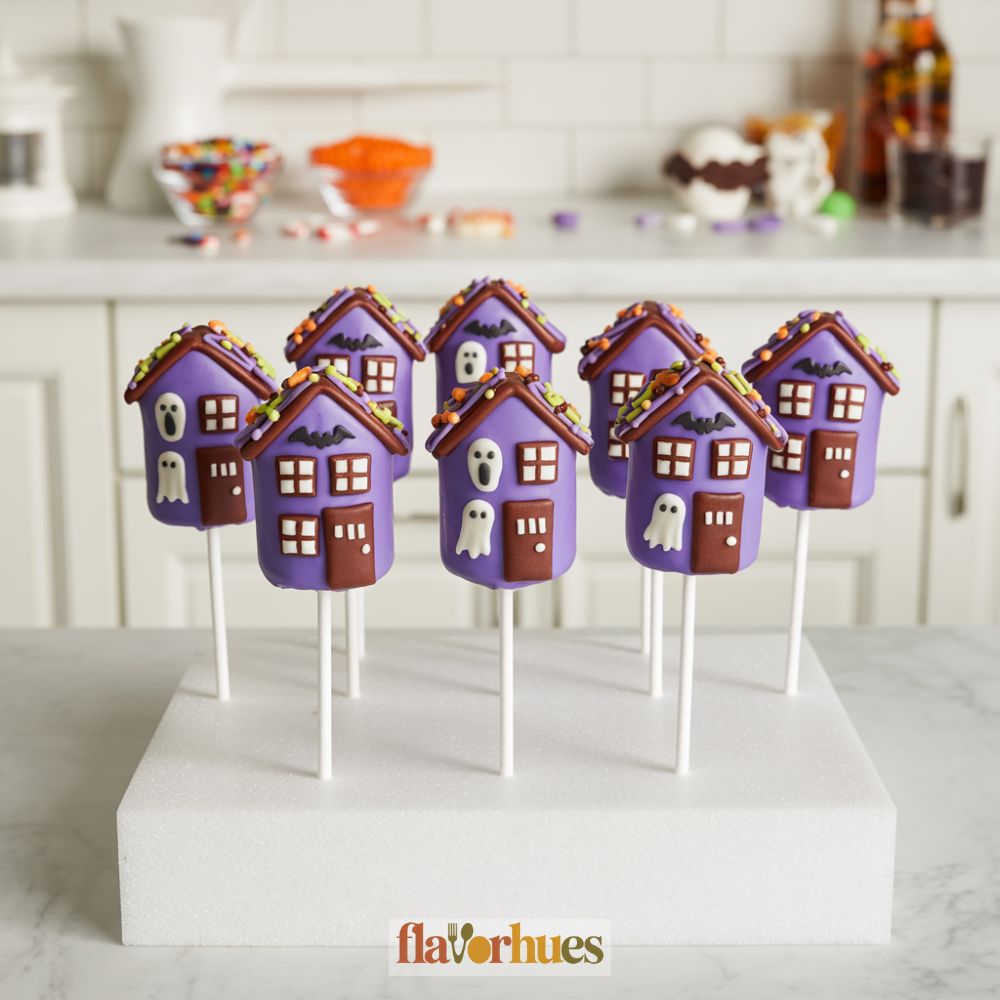
I love making haunted house cake pops because they look spooky but are still cute and fun. I start by molding my cake mix into a house shape.
It helps to press the cake firmly so it stays together. Once I dip the house shapes in melted chocolate, I use candy melts or edible markers to add windows and doors.
I sometimes use pretzel sticks for the roof or draw roof lines with icing. I like to use dark chocolate for a classic haunted house look.
Decorating each pop is my favorite part. I use yellow or orange dots to look like glowing windows and then add candy ghosts or bats around the house.
Sometimes, I add crushed cookie crumbs at the bottom for a “dirt” effect. Each cake pop becomes a tiny, edible haunted house scene.
21) Cauldron Bubbling Cake Pops
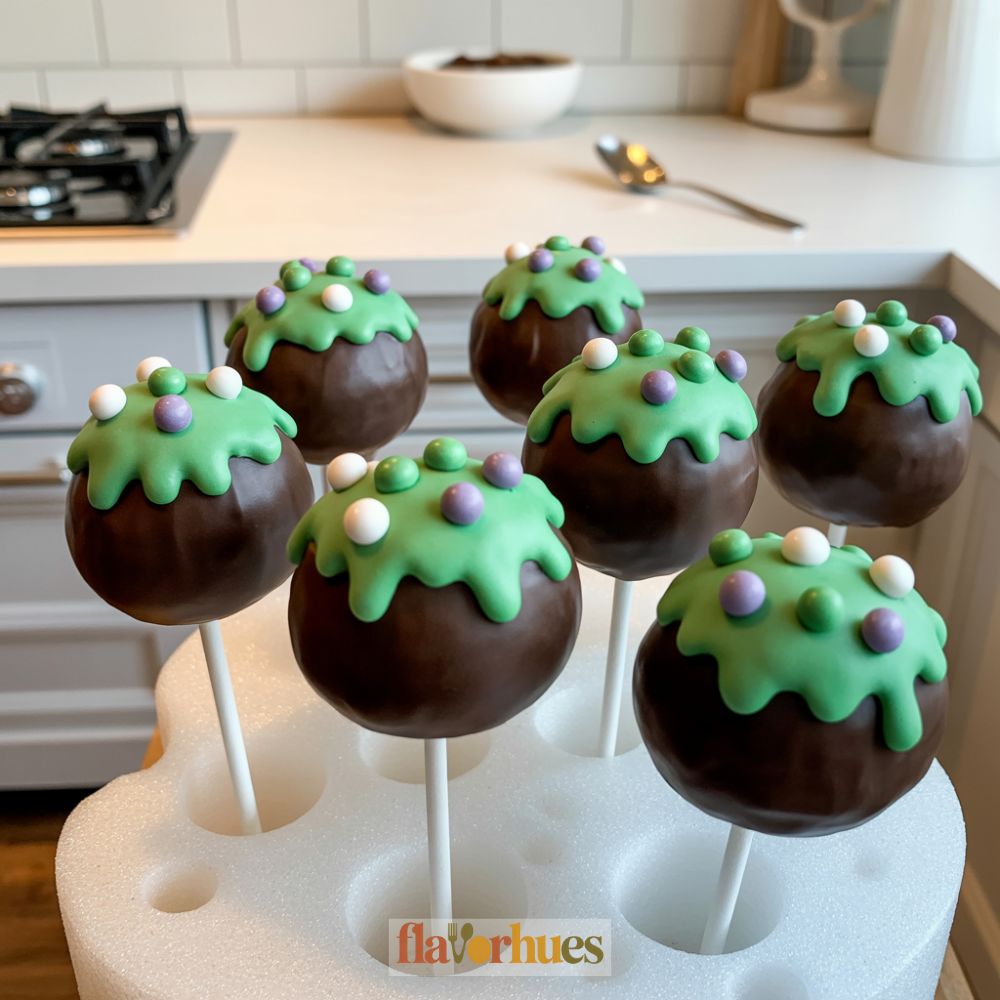
I love making cauldron bubbling cake pops for Halloween. They look like these tiny witch cauldrons, bubbling over with magic potion—how could anyone resist?
I start by shaping the cake pop mixture into round balls. Then I dip them in black candy melts, which always feels a bit messy but fun.
While the coating’s still wet, I sprinkle on green sugar pearls so they look like they’re bubbling up. Sometimes I’ll toss on a few orange or purple candies too, just for a pop of color.
For the handles, I use little pretzel sticks and gently stick them in the sides. It’s a simple trick, but it works.
I like putting them on a tray with a smear of green icing to look like spilled potion. It’s a little touch, but honestly, it makes the whole thing come together.